
Installation Guide


Doc. ID: 126 Rev: 3 Effective:2/24/2014 Page | 4
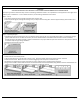
Note: Floor areas interrupted by wall sections extending out of the wall; floor areas which are not rectangular may experience buckling or
gapping if there is excessive floor expansion or shrinkage.
Adhesive
Use premium flooring adhesive which is non-water based, formulated for hardwood flooring installation.
Preferred type: moisture cure urethane floor glue.
Tools and Materials
Basics:
Tape measure • Moisture meter (wood, concrete or both) • Chalk line & chalk • Hammer • Electric power saw • Carbide tipped saw blade for
fine cut • NIOSH-designated dust mask • Hand saw or jamb saw • Eye protection • Straight edge or Spacers • Pry Bar • Mallet • Broom •
Color matched wood putty • Tapping block • Pull bar
Additional Supplies for Glue-Down Method:
Flooring adhesive • Trowels • Adhesive remover for selected adhesive • Clean rags • Weight roller • 3M Blue tape
Bond Failure
Bond failure is NOT flooring product defect. Most installation failures, including bond failure, result from jobsite moisture. Do not unpack or
deliver flooring to the jobsite until moisture problems are corrected. Read adhesive manufacturer’s instruction carefully. Certain wood
flooring adhesives may have special requirements and limitations of use. Some existing floor may not be acceptable. Not following the
adhesive manufacturer’s recommendations can lead to installation failure or product damage and will void your warranty.
Glue Spots on Face of Finished Floor
Adhesive can damage the floor’s finish, especially when it has dried. It is extremely important to take precautionary steps NOT to leave finger
prints or footprints marks on the face of the board. If glue comes in contact with the face of the board, remove immediately with the
adhesive remover recommended by the adhesive manufacturer. Use clean towels, changing frequently to prevent haze and adhesive residue.
If the spot removal damages the appearance of the boards, replace the board.
Helpful Pointers
General Tips
• Make sure your work area is well lit. Good visibility ensures that color is consistent and that visually defective planks are detected and
removed.
• The minimum length of the first and last plank is 12”. If the last plank will be less than 12”, adjust the length of the first plank. The
remainder of the last plank can be used as a starter board on the following rows.
• Using a shorter piece at undercut door jams will help when fitting flooring in place.
Glue-Down Installation Tips
• ALWAYS REFER TO THE SPECIFIC INSTRUCTIONS ON THE FLOORING ADHESIVE LABEL. The information given here is for typical installation.
Adjust it according to adhesive manufacturer’s instruction.
• Dry-lay means the glue has to set before placing floor planks in it. Wet-lay means the glue does not need to set before placing floor on it.
• Use trowel as specified by adhesive manufacturer.
• Continuously check the transfer of adhesive THROUGHOUT the installation process. If the adhesive no longer transfers to the back of the
flooring material, it must be removed and new adhesive applied.
• Work your way out of the room.
• After the installation is completed, keep the floor free from daily foot traffic for a minimum of 24 hours to allow adhesive to properly cure.
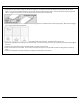
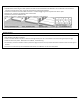
Cutting the Last Row to Width
• Most often the entire length of the last row will need to be cut so that it is narrow enough to fit the remaining space.
• Measure the distance between the floor face edge (exclude the tongue) to the wall. Subtract 1/2“ from this measurement for expansion
gap. Draw a line. Cut through the line. Discard the excess piece. Proceed with installation.
Safety and Health Precautions
Power tools can be dangerous. Operate in strict accordance to manufacturer’s operating instructions and safety precautions. Unsafe and
improper use can cause serious injuries.
Avoid inhalation and exposures to wood dust by mechanical means and by wearing personal protective equipment.
Wear appropriate personal protective equipment (PPE) which include NIOSH or OSHA approve dust masks, safety goggle and work gloves.