
Instructions / Assembly


Customer Service Hotline 1-877-693-PURE
Page 7
Home Master® Reverse Osmosis System—Owners Manual
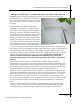
7. Connect drain line tubing — Locate the black plastic nut found in drain saddle parts bag.
Press it onto the RED 1/4” tubing attached to the filter cluster. The red tubing should protrude
from the black plastic nut slightly. Wrap excess tubing around the drainpipe so that some
loops are above the drain saddle. Hand tighten black plastic nut onto the drain saddle male
fitting until it is snug. Do not over tighten and DO NOT add a tubing insert.
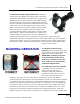
8. Pressurize the Home Master® RO - For Home Master® RO UV equipped systems first
connect power adapter to UV filter so the UV filter cap glows. If unit fails to illuminate, then
check power outlet with a known good device like a lamp. Many undersink outlets are
switched.
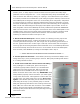
Make sure unit is dry. Double check to make sure all valves are in the closed position, except
for the main angle-stop valve, which should be open. Water should flow normally from your
kitchen faucet. SLOWLY open the EZ adapter ball valve. You should hear water rushing
through the system. Open the RO faucet to by flipping the lever up, where it should stay open.
A trickle of water should be present after 2-20 minutes. Some blackening of the water may
present due to loose carbon being flushed out. Close the lever on the RO faucet after the
trickle runs clear, and allow the system to pressurize. When the system has pressurized and
shuts off automatically; (IMPORTANT STEP) dry unit thoroughly, gently tug on each
connection and check for leaks. Then open the reserve tank valve slowly. Allow reserve tank to
fill for 2.5 hours or until full.
9. Fill and Drain Procedure—First close the EZ adapter ball valve so that the system is no
longer producing new water, then open the RO faucet. Let the water run out until it comes to a
COMPLETE STOP. Close RO faucet. Open the EZ adapter ball valve and let the system refill,
then repeat this step. System must be flushed at least twice prior to use. Some harmless fine
air bubbles may be present and will dissipate with time and use. [OPTIONAL-Following
successful fill and drain procedure you may plug in refrigerator electric plug; open refrigerator
connection kit ball valve so that the blue handle is parallel with the white body. Make sure
refrigerator icemaker and water center are turned ON. Check for leaks. Check for pressure at
the refrigerator’s water center. Dispose of the first two batches of ice after installation and
flush the water center until the water runs clear and is at room temperature. Use caution
when rolling refrigerator back into place. DO NOT crimp or crush water line, as a leak will likely
develop.]
TUBING COLOR CODING
ORANGE—LINE IN BLACK—TO STORAGE TANK
RED—TO DRAIN BLUE—TO RO FAUCET