INSTALLATION OF ROLLUP SHADE INSTALACIÓ N DE PERSIANA ENROLLABLE HARDWARE CONTENTS ADITAMENTOS Cord Cleat Soporte para el cordón Mounting Hook Gancho de montaje Small Screw Tornillo pequeño Mounting Screw Tornillo de montaje Plastic Screw Plug Tapόn plastic de tornillos Printed in China Impreso eri China 1
ASSEMBLY INSTRUCTIONS INSTRUCCIONES DE ENSAMBLAJE 1. Mark center of shade. Mark center of window. Position shade by aligning center marks. Mark position of eyelets on shade with a pencil (not included). For outside mounts, make sure both marks are level. For inside mounts, make sure both marks are the same distance back from the front edge of window frame. Marque el centro de la persiana. Marque el centro de la ventana. Coloque la persiana alineando las marcas centrales.
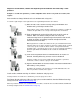
4. Position cord cleat (AA) a few inches to the right of the shade, high enough to be out of reach of children. Secure cord cleat (AA) using small screws (CC). Wrap excess cord in figure eights around cord cleat (AA). Coloque el soporte para el cordon (AA) a unos centimetros a la derecha de la persiana, lo suficientemente alto para que quede fuera del alcance de los niños. Asegure el soporte para el cordon (AA) con los tornillos pequeños (CC).
ELIMATE LOOPED PULL CORDS (pre-1995 mini blinds & pleated shades) (1.) Cut the looped pull cord just above the tassel, and remove equalizer buckle (if any). (2.) Insert cord through tassel and tie cord ends to secure the tassel. ELIMINE LAS CUERDAS DE TIRO CON BUCLE (mini persianas y persianas plegables anteriores a 1995) (1.) Corte la cuerda de tiro con bucle por encima de la borla y quite la hebilla de compensición de peso (si tiene). (2.
ROMAN SHADE RETROFIT KIT INSTRUCTION (pre-2011 Roman Shades) INSTRUCCIONES DEL KIT DE REACONDICIONAMIENTO PARA LA PERSIANA ROMANA (persianas romanas anteriores a 2011) Warning: Accessible cords on roman shades may pose a strangulation hazard to young children. Follow the instructions below to eliminate the cords from your corded roman shade. Parts and complete instructions for this Retro Fit Kit are available from the Window Coverings Safety Council at: www.windowcoverings.
POSITION SAFETY CORD STOPS COLOCACIÓ N DE LOS TOPES DE SEGURIDAD WARNING: Reduce the rist of inner cord strangulation to infants and toddlers. Make sure safety cord-stops are in position before using blinds. ADVERTENCIA: Reduzca el riesgo de estrangulamiento con cuerda intema de bebés y niños pequeños. Asegúrese de que los topes de seguridad estén en su lugar antes de utilizer las persianas. (1) Install blind as directed, making sure headrail is tightly fastened.
Replace or retrofit blinds, shades and draperies purchased before 2011 with today’s safer products. Remplace o acondicione persianas y cortinas adquiridas antes de 2011 con productos actuales, más seguros. And remember to always follow these basics window-cord safety rules: Y recuerde seguir siempre estas reglas básicas de seguridad paracuerdas de ventanas: (1) Move all cribs, beds, furniture and toys away from windows and window cords, preferably to another wall.