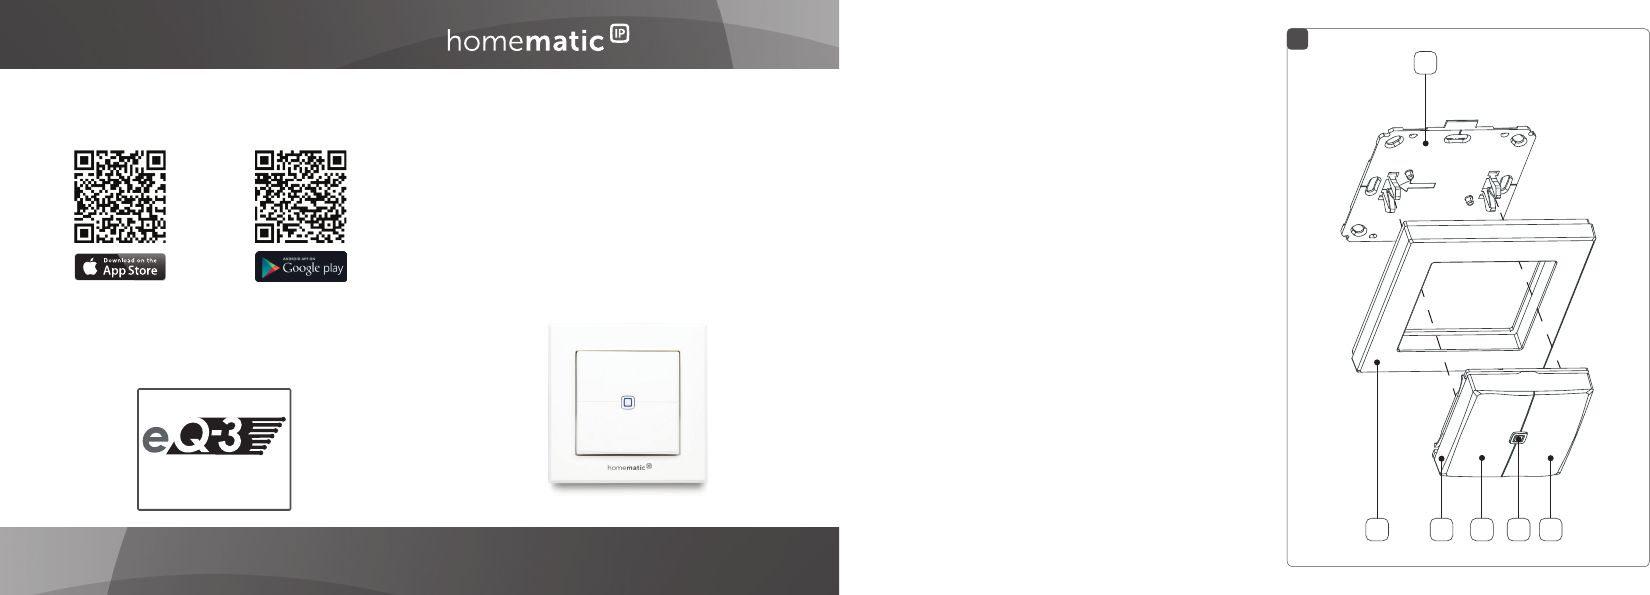
Wechselrahmen 1 Montageplatte 2 Doppelseitige Klebestreifen Wandtaster - 2-fach 2 Schrauben 3,0 x 30 mm 2 Dübel 5 mm 2 1,5 V LR03/Micro/AAA Batterien 1 Bedienungsanleitung Wall-mount Remote Control 2-button S. 1 p. 21 1. Ausgabe Deutsch 03/2015 Dokumentation © 2015 eQ-3 AG, Deutschland Alle Rechte vorbehalten.
6 4 G K H 5 3 J I J I 7
Inhaltsverzeichnis 1 2 3 4 5 Hinweise zur Anleitung....................................................2 Gefahrenhinweise.............................................................2 Funktion und Geräteübersicht.......................................4 Allgemeine Systeminformationen................................. 5 Inbetriebnahme................................................................. 5 5.1 5.2 5.3 6 7 Batterien wechseln.........................................................
Hinweise zur Anleitung 1 Hinweise zur Anleitung Lesen Sie diese Anleitung sorgfältig, bevor Sie Ihre Homematic IP Geräte in Betrieb nehmen. Bewahren Sie die Anleitung zum späteren Nachschlagen auf! Wenn Sie das Gerät anderen Personen zur Nutzung überlassen, übergeben Sie auch diese Anleitung. Benutzte Symbole: Achtung! Hier wird auf eine Gefahr hingewiesen. Hinweis. Dieser Abschnitt enthält zusätzliche wichtige Informationen! 2 Gefahrenhinweise Öffnen Sie das Gerät nicht.
Gefahrenhinweise fluss von Feuchtigkeit, Vibrationen, ständiger Sonnen- oder anderer Wärmeeinstrahlung, Kälte und keinen mechanischen Belastungen aus. Das Gerät ist kein Spielzeug! Erlauben Sie Kindern nicht damit zu spielen. Lassen Sie das Verpackungsmaterial nicht achtlos liegen. Plastikfolien/ -tüten, Styroporteile etc. können für Kinder zu einem gefährlichen Spielzeug werden.
Funktion und Geräteübersicht 3 Funktion und Geräteübersicht In der Raumklima-Lösung kann der Homematic IP Wandtaster - 2-fach komfortabel an den Homematic IP Access Point angelernt werden, um das gesamte System per Tastendruck in den Ecobetrieb (z. B. bei Abwesenheit) zu versetzen. Über die Homematic IP App kann konfiguriert werden, wie lange der Ecobetrieb nach Tastendruck aktiv bleibt (temporär oder dauerhaft).
Allgemeine Systeminformationen 4 Allgemeine Systeminformationen Dieses Gerät ist Teil der Raumklima-Lösung von Homematic IP und kommuniziert über das HmIP-Funkprotokoll. Alle Geräte der Raumklima-Lösung können komfortabel und individuell per Smartphone über die Homematic IP App konfiguriert werden. Welcher Funktionsumfang sich innerhalb des Homematic IP Systems im Zusammenspiel mit weiteren Komponenten ergibt, entnehmen Sie bitte dem Homematic IP Anwenderhandbuch.
Inbetriebnahme Zum Anlernen des Wandtasters gehen Sie wie folgt vor: • Öffnen Sie die Homematic IP App auf Ihrem Smartphone. • Wählen Sie den Menüpunkt „Gerät anlernen“ aus. • Fassen Sie den Taster (B) seitlich an und ziehen Sie ihn aus dem Rahmen heraus (s. Abbildung 5). • Drehen Sie den Taster auf die Rückseite. • Legen Sie zwei 1,5 V LR03/Micro/AAA Batterien polungsrichtig gemäß Markierung in die Batteriefächer ein (s. Abbildung 6). Der Anlernmodus ist für 3 Minuten aktiv.
Inbetriebnahme • • • 5.2 Leuchtet die LED rot, versuchen Sie es erneut. Wählen Sie die gewünschte Lösung für Ihr Gerät aus. Vergeben Sie in der App einen Namen für das Gerät (eine Zuordnung des Raums ist für den Wandtaster nicht notwendig). Montage Bitte lesen Sie diesen Abschnitt erst vollständig, bevor Sie mit der Montage beginnen. Sie können den Wandtaster entweder im mitgelieferten Wechselrahmen (A) montieren oder ihn bequem in eine bestehende Schalterserie integrieren (s. „5.2.
Inbetriebnahme • Wählen Sie einen beliebigen Montageort aus. Achten Sie darauf, dass der Montageuntergrund glatt, eben, unbeschädigt, sauber, fett- sowie lösungsmittelfrei und nicht zu kühl ist, damit der Klebestreifen langfristig haften kann. • • • 5.2.2 Befestigen Sie die Klebestreifen (G) auf der Rückseite der Montageplatte (F) in den dafür vorgesehenen Markierungen. Achten Sie darauf, dass die Schrift auf der Rückseite für Sie lesbar ist (H) (s. Abbildung 2).
Inbetriebnahme • dass der Pfeil auf der Vorderseite der Montageplatte nach oben zeigt. Zeichnen Sie zwei der Bohrlöcher (I) anhand der Montageplatte (diagonal gegenüberliegend) mit einem Stift an der Wand an (s. Abbildung 3). Die Bohrlöcher (J) können für die Montage auf einer Unterputzdose verwendet werden. • Bohren Sie die vorgezeichneten Löcher. Bei Steinwänden verwenden Sie einen 5 mm Bohrer für die Dübel.
Inbetriebnahme 5.2.3 Montage in Mehrfachkombinationen Sie können den Wandtaster sowohl mit dem mitgelieferten Rahmen (A), als auch mit Rahmen anderer Hersteller verwenden oder den Taster bzw. die Elektronikeinheit (B) in einen Mehrfachrahmen integrieren. Sie können die Montageplatte (F) flexibel mit Klebestreifen oder Schrauben an der Wand befestigen.
Inbetriebnahme 5.3 Ecobetrieb Der Ecobetrieb ermöglicht es Ihnen, die Temperatur im Haus • kurzzeitig, z. B. für den Wocheneinkauf, • geplant, z. B. für die Fahrt in den Urlaub, oder • dauerhaft, für einen unbestimmten Zeitraum, abzusenken, um Energie zu sparen. Um die Einstellungen für den Ecobetrieb vorzunehmen, gehen Sie wie folgt vor: • Öffnen Sie die Homematic IP App auf Ihrem Smartphone.
Batterien wechseln 6 Batterien wechseln Wird eine leere Batterie in der App bzw. am Gerät angezeigt (s. „7.4 Fehlercodes und Blinkfolgen“ auf Seite 15), tauschen Sie die verbrauchten Batterien gegen zwei neue Batterien des Typs LR03/Micro/AAA aus. Beachten Sie dabei die richtige Polung der Batterien. Um die Batterien des Wandtasters zu wechseln, gehen Sie wie folgt vor: • In montiertem Zustand lässt sich der Taster einfach aus dem Rahmen (A) und von der Montageplatte (F) ziehen.
Fehlerbehebung Nach dem Einlegen der Batterie führt der Wandtaster zunächst einen Selbsttest für ca. 2 Sekunden durch. Danach erfolgt die Initialisierung. Den Abschluss bildet die TestAnzeige: oranges und grünes Leuchten. Batterien dürfen niemals aufgeladen werden. Batterien nicht ins Feuer werfen! Batterien nicht übermäßiger Wärme aussetzen. Batterien nicht kurzschließen.
Fehlerbehebung 7.2 Befehl nicht bestätigt Bestätigt mindestens ein Empfänger einen Befehl nicht, leuchtet zum Abschluss der fehlerhaften Übertragung die LED rot auf. Grund für die fehlerhafte Übertragung kann eine Funkstörung sein (s. „10 Allgemeine Hinweise zum Funkbetrieb“ auf Seite 18). Die fehlerhafte Übertragung kann folgende Ursachen haben: • Empfänger nicht erreichbar, • Empfänger kann Befehl nicht ausführen (Lastausfall, mechanische Blockade etc.) oder • Empfänger defekt. 7.
Fehlerbehebung Eine Überschreitung des Duty Cycle Limits wird durch dreimal langes rotes Blinken der LED angezeigt und kann sich durch temporär fehlende Funktion des Gerätes äußern. Nach kurzer Zeit (max. 1 Stunde) ist die Funktion des Gerätes wiederhergestellt. 7.4 Fehlercodes und Blinkfolgen Blinkcode Bedeutung Lösung Kurzes oranges Blinken Funkübertra- Warten Sie, bis gung/Sendie Übertragung deversuch/ beendet ist.
Fehlerbehebung Kurzes oranges Blinken (alle 10 s) Anlernmodus aktiv Geben Sie die letzten vier Ziffern der GeräteSeriennummer zur Bestätigung ein (s. „5.1 Anlernen“ auf Seite 5). 1x langes rotes Leuchten Vorgang fehlgeschlagen oder Duty Cycle-Limit erreicht Versuchen Sie es erneut („7.2 Befehl nicht bestätigt“ auf Seite 14 oder „7.3 Duty Cycle“ auf Seite 14). 6x langes rotes Blinken Gerät defekt Achten Sie auf die Anzeige in Ihrer App oder wenden Sie sich an Ihren Fachhändler.
Wiederherstellung der Werkseinstellungen 8 Wiederherstellung der Werkseinstellungen Die Werksteinstellungen des Gerätes können wiederhergestellt werden. Dabei gehen alle Einstellungen verloren. Um die Werkseinstellungen des Wandtasters wiederherzustellen, gehen Sie wie folgt vor: • Fassen Sie den Taster (B) seitlich an und ziehen Sie ihn aus dem Rahmen heraus (s. Abbildung 5). • Entnehmen Sie die Batterien. • Legen Sie die Batterien entsprechend der Polaritätsmarkierungen wieder ein (s.
Wartung und Reinigung 9 Wartung und Reinigung Das Gerät ist für Sie bis auf einen eventuell erforderlichen Batteriewechsel wartungsfrei. Überlassen Sie eine Wartung oder Reparatur einer Fachkraft. Reinigen Sie das Gerät mit einem weichen, sauberen, trockenen und fusselfreien Tuch. Für die Entfernung von stärkeren Verschmutzungen kann das Tuch leicht mit lauwarmem Wasser angefeuchtet werden.
Technische Daten Hiermit erklärt die eQ-3 AG, dass sich dieses Gerät in Übereinstimmung mit den grundlegenden Anforderungen und den anderen relevanten Vorschriften der Richtlinie 1999/5/EG befindet. Die vollständige Konformitätserklärung finden Sie unter www.eQ-3.de. 11 Technische Daten Geräte-Kurzbezeichnung: Versorgungsspannung: Stromaufnahme: Batterielebensdauer: Schutzart: Umgebungstemperatur: Abmessungen (B x H x T): Ohne Rahmen: Mit Rahmen: Gewicht: Funkfrequenz: Empfängerkategorie: Typ.
Technische Daten Entsorgungshinweis Gerät nicht im Hausmüll entsorgen! Elektronische Geräte sind entsprechend der Richtlinie über Elektro- und Elektronik-Altgeräte über die örtlichen Sammelstellen für Elektronik-Altgeräte zu entsorgen. Konformitätshinweis Das CE-Zeichen ist ein Freiverkehrszeichen, das sich ausschließlich an die Behörden wendet und keine Zusicherung von Eigenschaften beinhaltet. Bei technischen Fragen zum Gerät wenden Sie sich bitte an Ihren Fachhändler.
Package contents Quantity Description Homematic IP 1 Wall-mount Remote Control - 2-button 1 Clip-on frame 1 Mounting plate 2 Double-sided adhesive strips 2 Screws 3.0 x 30 mm 2 Plugs 5 mm 2 1.5 V LR03/micro/AAA batteries 1 Operating manual 1st English edition 03/2015 Documentation © 2015 eQ-3 AG, Germany All rights reserved. Translation from the original version in German.
Table of contents 1 2 3 4 5 Information about this manual....................................23 Hazard information.........................................................23 Function and device overview.....................................25 General system information.........................................26 Start-up.............................................................................26 5.1 5.2 5.3 6 7 Teaching-in...........................................................................
Information about this manual 1 Information about this manual Please read this manual carefully before beginning operation with your Homematic IP components. Keep the manual so you can refer to it at a later date if you need to. If you hand over the device to other persons for use, please hand over this manual as well. Symbols used: Attention! This indicates a hazard. Note. This section contains important additional information! 2 Hazard information Do not open the device.
Hazard information The device may only be operated in dry and dustfree environment and must be protected from the effects of moisture, vibrations, solar or other methods of heat radiation, cold and mechanical loads. The device is not a toy; do not allow children to play with it. Do not leave packaging material lying around. Plastic films/bags, pieces of polystyrene, etc. can be dangerous in the hands of a child.
Function and device overview 3 Function and device overview In the climate control solution, the Homematic IP Wallmount Remote Control can comfortably be taught-in to the Homematic IP Access Point. At the push of a button, the eco mode can be activated for the entire system (e.g. while being away from home). The duration of the eco mode can be individually configured via the Homematic IP app (temporarily or permanent).
General system information 4 General system information This device is part of the climate control solution of Homematic IP and works with the HmIP radio protocol. All devices of the climate control solution can be configured comfortably and individually with a smartphone via the Homematic IP app. The available functions provided by the Homematic IP system in combination with other components are described in the Homematic IP User Guide. All current technical documents and updates are provided at www.
Start-up To teach-in the wall-mount remote control, please proceed as follows: • Open the Homematic IP app on your smartphone. • Select the menu item “Teach-in device”. • To remove the remote control (B) from the frame, take hold of the sides of the remote control and pull it out (see figure 5). • Turn over the remote control. • Insert two new 1.5 V LR03/micro/AAA batteries into the battery compartment, making sure that you insert them the right way round (see figure 6).
Start-up • • 5.2 Select the desired solution for your device. In the app, give the device a name (there is no allocation to a room required for the wall-mount remote control). Mounting Please read this entire section before starting to mount the device. You can use the supplied clip-on frame (A) to mount the wall-mount remote control or easily integrate it into an existing brand switch system (see „5.2.3 Installation in multiple combinations“ on page 30).
Start-up • • • 5.2.2 Fix the adhesive strips (G) on the back side of the mounting plate (F) in the provided area. You should be able to read the letters on the back side (H) (see figure 2). Remove the protective film from the adhesive strips. Press the assembled push button with the back side to the wall in the position where it should subsequently be attached. Screw mounting For mounting the wall-mount remote control using screws, please proceed as follows: • Choose a site for installation.
Start-up • Now drill the bore holes. If you are working with a stone wall, drill the marked 5 mm holes and insert the plugs supplied. If you are working with a wooden wall, you can pre-drill 1.5 mm holes to make screws easier to insert. • • • 5.2.3 Use the supplied screws and plugs (K) to fasten the mounting plate to the wall (see figure 4). Attach the clip-on frame (A) to the mounting plate. Place the remote control (B) back into the frame (see figure 1).
Start-up The wall-mount remote control is designed to fit into frames supplied by the following manufacturers: Manufacturer Frame Berker S.1, B.1, B.3, B.7 glass ELSO Joy GIRA System 55, Standard 55, E2, E22, Event, Esprit merten 1-M, Atelier-M, M-Smart, M-Arc, MStar, M-Plan JUNG A 500, AS 500, A plus, A creation 5.3 Eco mode In the eco mode, the temperature in the house can be reduced • temporarily, e.g. for the weekly shopping, • scheduled, e.g.
Replacing batteries • • • mode / Wall-mount remote control”. You can define the rooms for activating the eco mode and lowering the temperature by tapping on “Rooms in eco mode”. The temperature for the eco mode can be defined under “Eco temperature”. To activate the eco mode via the wall-mount remote control you can define the duration under “Eco duration via wall-mount remote control”.
Replacing batteries • • • • (B) from the frame, take hold of the sides of the remote control and pull it out (see figure 5). You do not need to open the device. Turn the remote control over to remove the batteries. Insert two new 1.5 V LR03/micro/AAA batteries into the battery compartment, making sure that you insert them the right way round (see figure 6). Put the remote control back into the frame.
Troubleshooting Used batteries should not be disposed of with regular domestic waste! Instead, take them to your local battery disposal point. 7 Troubleshooting 7.1 Weak battery Provided that the voltage value permits it, the wall-mount remote control will remain ready for operation also if the battery voltage is low. Depending on the particular load, it may be possible to send transmissions again repeatedly, once the batteries have been allowed a brief recovery period.
Troubleshooting • 7.3 failure, mechanical blockade, etc.). Receiver is defective. Duty cycle The duty cycle is a legally regulated limit of the transmission time of devices in the 868 MHz range. The aim of this regulation is to safeguard the operation of all devices working in the 868 MHz range. In the 868 MHz frequency range we use, the maximum transmission time of any device is 1% of an hour (i.e. 36 seconds in an hour).
Troubleshooting 7.4 Error codes and flashing sequences Flashing code Meaning Short orange flashing Radio transmis- Please wait, until sion/attempting transmission has to transmit been confirmed. Solution 1x long green lighting Transmission confirmed You can continue operation. 1x long red lighting Transmission failed Please try again (s. „7.2 Command not confirmed“ on page 34).
Restore factory settings 6x long red flashing Device defective Please see your app for error message or contact your retailer. 1x orange and 1 x green lighting (after inserting batteries) Test display Once the test display has stopped, you can continue. 8 Restore factory settings The factory settings of the device can be restored. If you do this, you will lose all your settings.
Maintenance and cleaning • Release the system button to finish the procedure. The device will perform a restart. 9 Maintenance and cleaning The device does not require you to carry out any maintenance other than replacing the battery when necessary. Enlist the help of an expert to carry out any maintenance or repairs. Clean the device using a soft, lint-free cloth that is clean and dry. You may dampen the cloth a little with lukewarm water in order to remove more stubborn marks.
Technical specifications characteristics of the receiver, environmental factors such as humidity in the vicinity have an important role to play, as do on-site structural/ screening conditions. eQ-3 AG hereby declares that this device complies with the essential requirements and other relevant regulations of Directive 1999/5/EC. You can find the full declaration of conformity at www.eQ-3.de.
Technical specifications Instructions for disposal Do not dispose of the device with regular domestic waste! Electronic equipment must be disposed of at local collection points for waste electronic equipment in compliance with the Waste Electrical and Electronic Equipment Directive. Information about conformity The CE sign is a free trading sign addressed exclusively to the authorities and does not include any warranty of any properties. For technical support, please contact your retailer.