Models / Modèles / Modelos 8x6 8x8 8x10 73005123 73005124 73005101 73005125 73005126 73005102 73005127 73005128 73005103 Owner’s Manual Manuel du propriétaire Manual del Propietario Version / Edición 1.2 PLEASE READ OWNER’S MANUAL COMPLETELY BEFORE ASSEMBLING YOUR SHED. ALL STATED SIZES ARE NOMINAL DIMENSIONS. PRIÈRE DE LIRE LE MANUEL DU PROPRIÉTAIRE EN ENTIER AVANT D’ASSEMBLER LA REMISE. TOUTES LES DIMENSIONS INDIQUÉES SONT NOMINALES.
Thank you for choosing the Barrette Outdoor Living Storage Building. Please read this Owner's Manual completely before assembling your building. Retain manual and your Thank you for choosing the Barrette Outdoor Living Storage dated sales slip for future reference and warranty claims. Building. Please read this Owner's Manual completely before assembling your building.
Veuillez lire ce manuel d'utilisation au complet avant de monter votre remise. manuelOutdoor et votreLiving. reçu Merci d'avoir choisi laConservez remise deleBarrette daté pour consultation future et pour toute réclamation Veuillez lire ce manuel d'utilisation au complet avant dedans le cadrevotre de laremise. garantie.
todas laspor instrucciones del manual del propietario. Con-OutGracias elegir el cobertizo tipo cochera de Barrette serveLiving. este manual y elempezar comprobante de el venta fechado, door Antes de a armar cobertizo, leapara futuras consultas y reclamos de garantía. todas las instrucciones del manual del propietario. Con- serve este y el comprobante de venta Gracias pormanual elegirde el cobertizo tipo cochera defechado, Barrette para OutPrecauciones seguridad futuras consultas yde reclamos deagarantía.
4 PLEASE TAKE A COMPLETE INVENTORY OF ALL PARTS USING THE PARTS LIST AND PART IDENTIFICATION GUIDE PROVIDED ON PAGES 1, 4, 7 AND 9. D O NOT ATTEMPT TO ASSEMBLE BUILDING IF PARTS ARE MISSING OR DAMAGED. DO NOT RETURN PRODUCT TO STORE. IF YOU NEED REPLACEMENT PARTS PLEASE CAL L 1-877-362-3409. SURNIS AUX PAGES 2, 4, 8 ET 9.
4 5 PLEASE TAKE A COMPLETE INVENTORY OF ALL PARTS USING THE PARTS LIST AND PART IDENTIFICATION GUIDE PROVIDED ON PAGES 1, 4, 7 AND 9. D O NOT ATTEMPT TO ASSEMBLE BUILDING IF PARTS ARE MISSING OR DAMAGED. DO NOT RETURN PRODUCT TO STORE. IF YOU NEED REPLACEMENT PARTS PLEASE CAL L 1-877-362-3409. PLEASE TAKE A COMPLETE INVENTORY OF ALL PARTS USING THE PARTS LIST AND PART IDENTIFICATION GUIDE PROVIDED ON PAGES 1, 5, 7 AND 9.
PLEASE TAKE A COMPLETE INVENTORY OF ALL PARTS USING THE PARTS LIST AND PART IDENTIFICATION GUIDE PROVIDED ON PAGES 1, 4, 7 AND 9. D O NOT ATTEMPT TO ASSEMBLE BUILDING IF PARTS ARE MISSING OR DAMAGED. DO NOT RETURN PRODUCT TO STORE. IF YOU NEED REPLACEMENT PARTS PLEASE CAL L 1-877-362-3409. 6 SURNIS AUX PAGES 2, 4, 8 ET 9.
7 Base Track (AL1-AL4) Part Identification Base Track (AL1-AL4) Floor (FT1) Left Gable (GHL) Left Gable Front Wall Panel (GHL) (WP3) Back/Side Wall Panel (WP1/WP2) Right Gable (GHR) Window Frame (WF1) Window Gable Glass (WGG) Roof Panel Left (RPA) Roof Panel Left (RPA) Roof Panel Center (RPB) Ridge Beam Cap (RB1) Door Aluminum Insert (DPI) Roof Panel Right (RPC) Shed Tie Strap (RTS1) Back/Side Wall Panel (WP1/WP2) Right Gable Corner Post (GHR) (CN1) Door Lintel (LT1) Roof Panel Center (RP
8 8 Rail de base Canal de base (AL1-AL4) Identification des pièces / Identificación de las piezas des pièces / Identificación de las piezas Panneau mural arrière/latéral Panel de pared posterior/lateral (WP1/WP2) Pignon droit Pignon gauche Cadre de fenêtre Hastial derecho Hastial izquierdo Marco de ventana Rail de base Panneau de plancher Panneau mural arrière/latéral Panneau mural avant Poteau cornier Montant de porte Panneau de plancher Panneau mural arrière/latéral Panneau mural avant Poteau cornier
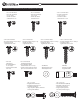
9 Part Identification / Identification des pièces / Identificación de las piezas • #10 x 1/2" Pan Head • Vis à tête cylindrique no 10 x 1/2 po • Tornillo de cabeza achatada #10 x 1/2" • #10 x 1" Pan Head • Vis à tête cylindrique no 10 x 1 po • Tornillo de cabeza achatada #10 x 1" • 1/4" x 3/4" Truss Head • Vis à tête bombée 1/4 po x 3/4 po • Tornillo de cabeza segmentada 1/4" x 3/4" • #10 x 3/4" Self Tapping • Vis autotaraudeuse no 10 x 3/4 po • Tornillo autorroscable #10 x 3/4" • 1/4" x 1" Truss Head •
10 IMPORTANT NOTE ON CONDENSATION! REMARQUE IMPORTANTE SUR LA CONDENSATION ¡NOTA IMPORTANTE SOBRE LA CONDENSACIÓN! All buildings are subject to condensation. Some of the causes of condensation are poor ground conditions, improper foundation and construction and area climate. Condensation in most buildings is hidden. While wood will rot and metal will rust, condensation on PVC is similar to condensation on a window. For tips on preventing condensation please see the back page of the manual.
11 8x10 Wood Platform Option Option avec plate-forme en bois pour 8x10 Opción para la plataforma de madera por 8x10 To provide the best support for your building and to ensure that the corners are square, the platform must be sloped slightly away from the door opening and free of bumps and ridges.
12 IMPORTANT NOTE ON CONDENSATION! REMARQUE IMPORTANTE SUR LA CONDENSATION ¡NOTA IMPORTANTE SOBRE LA CONDENSACIÓN! All buildings are subject to condensation. Some of the causes of condensation are poor ground conditions, improper foundation and construction and area climate. Condensation in most buildings is hidden. While wood will rot and metal will rust, condensation on PVC is similar to condensation on a window. For tips on preventing condensation please see the back page of the manual.
13 8x8 Wood Platform Option Option avec plate-forme en bois pour 8x8 Opción para la plataforma de madera por 8x8 To provide the best support for your building and to ensure that the corners are square, the platform must be sloped slightly away from the door opening and free of bumps and ridges.
14 IMPORTANT NOTE ON CONDENSATION! REMARQUE IMPORTANTE SUR LA CONDENSATION ¡NOTA IMPORTANTE SOBRE LA CONDENSACIÓN! All buildings are subject to condensation. Some of the causes of condensation are poor ground conditions, improper foundation and construction and area climate. Condensation in most buildings is hidden. While wood will rot and metal will rust, condensation on PVC is similar to condensation on a window. For tips on preventing condensation please see the back page of the manual.
15 8x6 Wood Platform Option Option avec plate-forme en bois pour 8x6 Opción para la plataforma de madera por 8x6 To provide the best support for your building and to ensure that the corners are square, the platform must be sloped slightly away from the door opening and free of bumps and ridges.
16 TRACK PIECES MEET. AL4 65 /16 ”( 29 5.5 cm ) AL4 AL4 AL2 AL2 65 7/16” (166.2cm) 95 31/32” (243.7cm) AL3 CONTINU DE CALFEUTRAGE DE SILICONE SOUS LES RAILS DE AL3 AL3 m ) AL3 ) 8c cm 3. 7.4 33 37 17 /16 ”( ”( 13 32 19 / BASE, SOBRE EL PERÍMETRO INTERIOR DE LOS CANALES DE BASE Y DONDE SE AL3 AL1 8 CORDÓN CONTINUO DE SILICONA DE CALAFATEO DEBAJO DE LOS CANALES DE 8x8 AL3 8x10 AL1 14 Identifique la configuración del canal de base usando los diagramas a continuación.
17 2 For models with floor panels, layout the Floor Panels (FT1) as shown and secure with #10 x 1" pan head screws (AS3). The floor panels are designed to overlap but should be spaced appoximately 1/16" to 1/8" apart from each other and the base track for expansion and contraction. Please go to your local hardware store for appropriate screws for a concrete slab. Image shown is for 8x10.
18 4 Continue adding Back and Side Wall Panels (WP1/WP2) and Corner Post (CN1). Snap panels together and push down into the base track. Image shown is for 8x10. Ensure all parts are fully seated. Continuez l’installation des panneaux muraux arrière (WP1), des panneaux muraux latéraux (WP2) et des poteaux corniers (CN1). Emboîtez les panneaux ensemble et insérez-les dans les rails de base. L’illustration montre une remise de 8 pi x 10 pi. Assurez-vous que toutes les pièces sont bien emboîtées.
19 6 Complete the front walls by adding the Corner Posts (CN1), Front Wall Panels (WP3) and Door Jambs (VDJV). Insert the Door Jamb Aluminum Supports (VDJI) into the door jamb cavity as shown. Ensure all parts are fully seated. Pour construire le mur avant, installez les poteaux corniers (CN1), les panneaux muraux avant (WP3) et les montants de porte (VDJV). Insérez les supports de montant de porte en aluminium (VDJI) dans la cavité du montant comme illustré.
20 8 Assemble the Left Gable (GHL) and Right Gable (GHR) as shown. Assemblez le pignon gauche (GHL) et le pignon droit (GHR). Ensamble el Hastial izquierdo (GHL) y el Hastial derecho (GHR) como se muestra. GHL GHR Add the Window Gable Glass (WGG) and Window Frame (WF1) to the front of the gable. Installez la vitre de fenêtre de pignon (WGG) et le cadre de fenêtre (WF1) sur le devant du pignon. Agregue el Cristal de ventana del hastial (WGG) y el Marco de ventana (WF1) a la parte anterior del hastial.
21 9 Install the assembled gables onto the front and rear walls and into the cavities of the corner posts. Push down firmly to seat. Tighten the screws in the lintels. Posez les pignons assemblés sur les murs avant et arrière et dans les cavités des poteaux corniers. Appuyez fermement pour vous assurer qu’ils sont bien emboîtés. Serrez les vis dans les linteaux. Instale los hastiales ensamblados en las paredes anterior y posterior y en las cavidades de los postes esquineros.
22 11 Install the assembled ridge beam into the cavity at the top of the front and rear gables. Image shown is for 8x10. IMPORTANT: Temporarily secure the Ridge Beam to the gables (otherwise the beam may fall out). Secure the beam by running a zip-tie through the first hole on the beam and then through the vent in the gable. Secure the other end of the beam the same way ensuring the second zip-tie is on the same side of the shed as the first.
23 13 RPA RPB RPB RPB RPB RPB Using the layouts on pages 4, 5 and 6 as a guide, add Roof Panel s (RPA-RPC), starting on the side without the zip-ties installed at step 11. Remove teh zip ties before installing the other side of the roof. Ensure that each panel added engages the ridge beam and the previous panel until the roof is complete. Next, center the roof panels so that they overlap the front and back gables. Image shown is for the 8x10.
24 15 Cut outthe andDoor set template “A”pieces on Door Jambs (VDJV) as Install Trim (DT1) over the top and bottom of the door shown. Mark the screw hole locations and pre-drill panels folllowed by the Door Caps (DC1, DC2) as shown. starter holes for hinge screws using a 9/64” drill bit. Position the Astragal (AST) against the door edge of the left door if righthanded and door left-handed. ThelaAstragal touch the door Découper et right placez les iftemplate “A” sur Montantshould de porte comme indique.
las Cubiertas de puerta con tornillos #10 x 1/2" (AS2), excepto por la Cubierta de puerta en la parte superior de la puerta con el astrágalo. No apriete demasiado los tornillos. DT1 DT1 DC1 25 DC2 DC1 DC2 BACK VIEW VUE ARRIÈRE / VISTA ATRÁS Set Template “B” on front face of the door and fold it over the door’s edge along the line provided. Be sure to line up template flush with the locator mark on the edge of the door as shown.
25 26 19 17 To attach the doors, center the door on the door jamb 3/8" from the edge 1 ⁄2" tohole 9" from TAttach all hinges (HA3) to doors using #9 x ½” Undercut Self Tapping, of the jamb stop, mark the hinge screw locations on the jamb and Flat Head Screws (DHS2). Do not overtighten screws. the door cap edge. Mark the screw hole locations and pre-drill starter holes for the hinge screwsstarter using holes a 9/64"fordrill Finally, attach thea 9/64" drill bit. Finall y, pre-drill thebit.
26 2627 19 19 To attach the doors, center the door on the door jamb 3/8" from the edge Attach top hinge to the doorhinge jamb (VDJV) using #9 x 1/2” of the jamb stop, mark screw hole locations on Undercut the jamb and To attach the doors, the door onhas the door jamb 3/8" from theSelf edge IMPORTAN T: For the next two steps, be sure to check door alignment several times during screw installation to center ensure building not moved out of alignment. Tapping, Flat Head screws (DHS2).
27 28 22 Fasten to theberidge IMPORTANT: Forthe theroof nextpanels two steps, surebeam to check door alignment several times during screw installation to ensure building has not moved out of alignment. using 1/4" 1-3/4" (TS4) truss head screws If it has, realign andxresume installation of screws.
29 28 24 22 Add Shed Tie Straps (RTS1) to the Fixez des tirants de remise (RTS1) à l’appui transversal Fasten the roof panels to the ridgeofbeamde toiture au centre de la toiture au moyen de vis à tête Roof Cross Support at the middle using 1/4"using x 1-3/4" truss head screws the roof, 1/4"(TS4) x 1-1/4" truss bombée 1/4 po x 1-1/4 po (TS3) comme illustré. L’illuswhere the roof panels overlap head screws (TS3) as shown. each other, tration montre une remise de 8 pi x 10 pi.
30 29 25 24 From the inside of the building, close the doors and place a Lock Bracket (LB1) on the door so that it lines up with the lock racket b on the opposite door and Add Shed Tie Straps (RTS1) to the Coloque Vigas de sujeción (RTS1) en el Soporte de techo tirants dedrill remise (RTS1)the à l’appui drill through to the outer edge of theFixez doordes using a 1/4” bit.
31 30 31 26 25 For 8x6 sheds, thebuilding, Ridge Beam across top of the roof. From the insideslide of the closeCap the(RB1) doorson and placethe a Lock Bracket (LB1) on the door so that it lines up with the lock racket b on the opposite door and For 8x6 sheds, slide the Ridge Beam Cap (RB1) on across the top of the roof. For 8x10 and 8x8 sheds, place two Ridge Beam Caps (RB1) together then PVC cement to the underside drill through the outerplace edgetwo of the door using a 1/4” drilltogether bit.
32 32 31 27 26 Attach Ridge Beam Caps (RBEC) theacross provided cement. For 8x6the sheds, slide the End Ridge Beam Cap using (RB1) on the PVC top of the roof. Attach the Ridge Beam End Caps (RBEC) using the provided PVC cement. For 8x10 and 8x8 sheds, place two Ridge Beam Caps (RB1) together then add PVC cement to the underside of the Ridge Beam Joint and in le place overpour the joint where the ridge beam caps meet.
32 25 33 33 28 27 From inside building, close doors and position 1 From thethe inside of of thethe building, close thethe doors and position thethe ⁄2" to 89" from To attach hinges, flip theCaps doors front face down as shown. Setcement. the hinge at the edge of the door radius approximately Attach thethe Ridge Beam End (RBEC) using the provided PVC Slide Lock (LK) at the top of the door with the Astragal. Start with Slide (LK) at the top ofthe the door with the Astragal. with theLock door cap edge.
34 Garantie limitée à dix ans non transférable 7830 Freeway Circle Middleburg Heights, Ohio 44130 www.barretteoutdoorliving.com Garantía limitada intransferible de 10 años 7830 Freeway Circle Middleburg Heights, Ohio 44130 www.barretteoutdoorliving.
Instructions For Cleaning Instructions de nettoyage Instrucciones de limpieza Congratulations on your purchase of a fine quality Storage Building from Barrette Outdoor Living. With proper maintenance your vinyl storage building will exceed your expectations for years to come. Cleaning: It is recommended that you clean your storage building at least twice a year to prevent a build up of dirt.