Installation Manual HW205930 1|Page Rev 10.
Table of Contents Diagrams Notice to Installers Tools Needed for Installation Packing List Hinge Assembly Installation & Assembly …………………………………………………. …………………………………………………. …………………………………………………. …………………………………………………. …………………………………………………. …………………………………………………. 3 4 4 5 5 6 2|Page Rev 10.
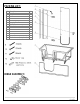
DIAGRAMS: 3|Page Rev 10.
NOTICE TO INSTALLERS THE FLEXIBLE DRAIN HOSE THAT IS INCLUDED WITH THIS UNIT IS FOR INSTALLATION INTO AN OPEN FLOOR DRAIN ONLY. SUBSTITUTING THE EXISTING DRAIN SHOE FOR A DIFFERENT ONE WILL NOT VOID THE WARRANTY AS LONG AS THERE NO DAMAGE OR EVIDENCE OF MISUSE TO THE BASE Note: Tub needs to be leveled in its final resting position, mark the placement, and then level. It is advised to have tub onsite before preparing drain location. Make sure the floor can withhold the weight of the product.
PACKING LIST: NO 1. 2. 3. 4. 5. 6. 7. 8. 9. 10. 11. 12. 13. 14. Description Wall Bracket Hinge Aluminum Wall Mount Fixed Glass Door Lock Hanging Glass Door Bathtub Tub skirt (pre-mounted) ST4*35 ST4*20 SE4*10 Door Cap 6mm Plastic swell Plastic door seal (not pictured) Qty 1 2 1 1 1 1 1 1 4 1 2 2 4 1 HINGE ASSEMBLY: 5|Page Rev 10.
1. Walls and floor must be clear of any debris. Note: Tub comes with 90 degree drain; make sure your drain location will work with the drain. 3. Place the tub in its final resting place; adjust all the legs to be touching the floor. Level the tub in place. 2. Remove the skirt off the tub for easy access. 4. With the level, check the outside of the tub to be leveled. Adjust the feet for leveling. 6|Page Rev 10.
5. Fix the bathtub, tighten the screw nut. 7. Remove the fixed glass panel and drill the marked holes. 6. Install the fixed glass onto the tub and into the aluminum wall mount. Use level to mark all hole locations. 8. Lay flat the fixed glass and the door. Use the hinge assembly to attach the both glass panels together. 7|Page Rev 10.
9. Install the door assembly unto the tub and inside the wall mount. 11. Install the locking mechanism. 10. Install the wall bracket on the fixed glass panel. The bracket should be installed in the middle of the wall. (Note: Mark the position of the shower head so the bracket does not interfere.) 12. Install the plastic door seal (gasket) 8|Page Rev 10.
13. Water test: After installation, the tub has to be checked for leaks. Close and lock the glass door. Fill the tub to the overflow control. If the tub has water leak at the door, adjust the location of the wall bracket (1) to right or left. By doing so, the lowest part of the glass door will get closer to the tub. Lightly push the on the bottom of the glass door (2) to see if there is a gap between the tub at the door gasket. If there is still a gap, adjust the bracket location again.
| P a g e Rev 10.