
Installation Guide


Eective/Rev Date: July 31, 2011 1www.homewerksww.com
Instructions
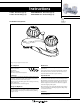
Two Handle Lavatory Faucet
Tools Required
Adjustable Wrench
Groove Joint Pliers
Pipe Wrench
Phillips Screwdriver
Pipe Tape or pipe thread compound
Safety Tips
If you solder the joints during installation of the faucet, the seats,
cartridges, and washers must be removed before using a ame
or the warranty will be voided on these parts.
Protect your eyes with safety glasses when cutting or soldering
water supply lines.
Cover the sink drain to avoid losing parts.
Things You May Need
Installations may vary depending on how the previous faucet was
installed. Supplies necessary for the installation of your faucet are
not all included; however, they are available wherever plumbing
supplies are sold.
Maintenance
Your new lavatory faucet is designed for years of trouble-free
performance.
Keep it looking new by cleaning it periodically with a soft cloth.
Avoid abrasive cleaners, steel wool, and harsh chemicals as
these will dull the nish and void your warranty.
Important Points
Prior to beginning installation, turn o the hot and cold water
lines, then turn on the old faucet to release built-up pressure.
When installing your new faucet, turn the connector nuts nger
tight, then use one wrench to hold the tting and a second
wrench to tighten the nut. Connections that are too tight will
reduce the integrity of the system.
Wrap all threaded connections with PTFE pipe tape available
at your local hardware or plumbing supply store. Always wrap
in a clock-wise direction.
Contact Us
For Customer Service please call 877-319-3757, or go to
homewerksww.com.
Certications
116766 – Chrome less pop-up
116765 – Chrome with pop-up
10-B42-WNCH1-B-Z – Chrome less pop-up
10-B42-WYCH1-B-Z – Chrome with pop-up
CALIFORNIA LEAD
PLUMBING LAW
*Image may vary slightly from actual product