
User's Manual
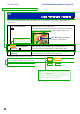

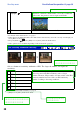
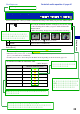

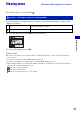


Table Of Contents
- Using the Setup screen
- Viewing images on a TV
- Using your computer
- Enjoying your Windows computer
- Installing the software (supplied)
- On the “Picture Motion Browser” (supplied)
- Copying images to your computer using the “Picture Motion Browser”
- Copying images to a computer without “Picture Motion Browser”
- Viewing image files stored on a computer with the camera copying to the “Memory Stick Duo”
- Using your Macintosh computer
- Viewing “Cyber-shot Step-up Guide”
- Printing still images
- Troubleshooting
- Others
- Index

45
Using the menu
Viewing menu For details on the operation 1 page 30
You can change the image size of a recorded image (Resize), and save it as a new file. The
original image is retained even after resizing.
1 Display the image you want to resize.
2 Press MENU to display the menu.
3 Select [Resize] with b/B on the control button, then press z.
4 Select the desired size with v/V, then press z.
The resized image is recorded in the recording folder as the newest file.
• For details on Image Size, see page 10.
• You cannot change the size of movies.
• When you change from a small size to a large size, the image quality deteriorates.
• You cannot resize to an image size of 3:2 or 16:9.
• When you resize a 3:2 or 16:9 image, the upper and lower black portions will be displayed on the image.
(Resize): Changing the image size of a recorded image
7M
For details on guidelines for selecting the image size, see
page 24.
5M
3M
VGA
Cancel
Cancels resizing.
Small sizeLarge size
2Mの記載削除
致しました。
[Resize]ID341で変数設定
しております。
H3に合わせてアイコンを削除し、カギ括弧をブ
ラケットにしましたが、宜しかったでしょうか?
ご確認のうえ、ご指示お願い致します。