FBII Security System OMNI®-408 OMNI®-408EU User Guide N9942-2V2 4/04 Rev.
–2–
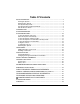
Table Of Contents QUICK REFERENCE............................................................................................. 4 Arming the System............................................................................................ 4 Disarming the System ....................................................................................... 4 Arm System/Stay Inside.................................................................................... 4 Arm System/Stay Inside/Instant Mode................
Quick Reference Arming the System Check to make sure the system is ready — Green READY LED is lit. Enter your 4-digit User Code (or press the ARM button on your keyfob). The ARMED LED goes on. Exit through a door designated by your installer as an exit/entry door. Disarming the System Enter through door designated by your installer as an exit/entry door. Enter your 4-digit User Code (or press the DISARM button on your keyfob). The ARMED LED goes out.
Quick Reference (cont’d) The following table lists the “Quick Commands” available with this control. Keystroke Quick Command Keypads Description # 1 Quick Arm All keypads If system is ready, allows you to arm the system without requiring your User Code. Your User Code is always needed to disarm the system. # 2 Force Arm All keypads Allows you to arm the system even if some zones are faulted. These zones are automatically bypassed and are unprotected.
Introduction Congratulations on your decision to protect your home or business with the OMNI®-408 security system. You have chosen a reliable, state-of-the-art security system that is remarkably easy to operate. Representatives from your local security company, who can explain the specifics of your system, have professionally installed your system. The keypad is the input and display device for your security system.
System Reference ZONE 1 2 3 4 5 6 7 8 DESCRIPTION ENTRY TIME 1 DOOR ENTRY TIME 2 DOOR EXIT TIME* * Exit time is the same for all designated entry/exit doors. The following SEND HELP ALERTS can be programmed into your system. Both keys must be pressed at the same time to activate the alert. The keys you press depend on which type of keypad you have. Your installer will show you how to activate these emergency keys.
System Reference (cont’d) OMNI-KP,OMNI-KP-US AND XK108 KEYPADS STAY TAMPER NO AC PHONE TEST NOT READY BYPASS CHIME BAT INSTANT ALARM FIRE TRBL PAGE SUPRVSN CANCELED OMNI-KP Fixed-Word Keypad STAY TAMPER NO AC PHONE TEST NOT READY BYPASS CHIME BAT INSTANT ALARM FIRE TRBL PAGE SUPRVSN CANCELED OMNI-KP-US Fixed-Word Keypad XK108 LED Keypad OMNI-LCD, OMNI-LCD-US, AND XK7LC KEYPADS 1 2 3 STAY 4 5 6 BYPASS 7 8 9 INSTANT * 0 # CODE XK-7LC_kypd OMNI-LCD Alpha Keypad –8– OMNI-LCD-US
System Reference (cont’d) USER ID ASSIGNED TO 1 (MASTER USER 1) 2 3 4 5 6 Duress** * The Master User can add, change, or erase other User Codes. ** If enabled, this User Code will transmit a duress signal to the central station. MONITORING STATION INFORMATION Account No. Telephone No.
System Operation You can arm or disarm the burglar portion of your security system. Before you can arm the system, it must be “ready.” If you have a protected door open, or if someone is moving in view of a motion detector, the system will not display “READY.” The system is ready if the READY LED is lit and the display shows: LCD Keypad: SYSTEM READY Fixed-Word Keypad: READY LED lit NOTE: If programmed by your installer, you may arm the system if a delay or interior zone is faulted.
System Operation (cont’d) When the System is Not Ready If the system is not ready to be armed, the READY LED is off and the display indicates which zone or zones are not ready. Determine which zone or zones are not ready, resolve the problem, and arm the system normally. If the problem cannot be resolved, you may bypass the zone that is not ready. Bypassing should only be done if the problem on the zone cannot be resolved, OR if you intentionally wish to leave the zone disarmed.
System Operation (cont’d) To Arm the System In Instant Mode and Stay Inside In INSTANT STAY mode, the perimeter portion of your burglar alarm system is armed, but the time delays are eliminated from your normal entry/exit door(s). All interior protection is disarmed, so you are free to move around inside. Check to make sure the system is READY. When it is ready, press: INSTANT STAY followed by followed by your User Code.
System Operation (cont’d) To Arm the System In Instant Mode In INSTANT mode, all alarm sensors, including doors that normally have a delay to allow you to disarm the system, will immediately report an alarm if activated. Check to make sure the system is ready. When it is ready, press: INSTANT followed by your User Code.
System Operation (cont’d) NOTE: Bypassed zones are NOT protected when the system is armed. After the bypass command has been accepted, the keypad sounds one long beep, and the following is displayed: LCD Keypad: BYPASSED: ZN1 FRONT DOOR Fixed-Word Keypad: BYPASS zone number displayed To Unbypass a Zone Pressing the BYPASS button returns a bypassed zone to normal operation. To unbypass a zone(s), repeat the bypass function as follows: BYPASS followed by your User Code† and Zone No.
System Operation (cont’d) If no alarms have taken place, the ARMED LED goes off, and the display shows: LCD Keypad: SYSTEM READY Fixed-Word Keypad: READY LED lit If alarms occurred while the system was armed, or if a trouble condition exists, the display shows: LCD Keypad: ALM MEM ZN1 FRONT DOOR Fixed-Word Keypad: ARMED LED off READY LED blinks The keypad scrolls through the zone or zones that were in alarm. Burglary alarms sound a steady tone at the keypad(s), and fire alarms generate a pulsing sound.
User Codes Adding/Changing a User Code Users can be added or changed directly at the keypad. Your system can have up to 6 different User Codes. To add or change a User Code, press the following: Master User Code User ID (1-6) New User Code CODE NOTES: • User number 1 is a master user and can create or modify other users. • User number 6 can be a duress code that will transmit a special duress code to the central station.
Paging Feature Your installer may have programmed your system to send messages with certain system conditions to your pager. An explanation of those messages is provided below. Follow-Me Displays The display shown on your pager is "ACCTEXXX" where: "ACCT" is the 4-digit central station no. 2 account number. "E" is the event code. There are 4 event types: alarms, troubles, openings, and closings.
Paging Feature (cont’d) 1. Access pager number programming by pressing in sequence the [#], [5], and [8] keys. An acknowledgement tone sounds to indicate pager number programming has been accessed. The [#], [5], [8] command is accessible only while the system is disarmed and the dialer, dialer delay, and bell are not active. LCD keypads will display the existing pager phone number. 2. Enter your new pager phone number. Your new pager phone number may consist of up to 16 characters (1-9, 0).
Miscellaneous Commands Arm System (Maid Code) If you choose to have a code that cannot disarm the system, but can arm the system, have your installer program this feature. If programmed, User Code No. 5 has system arming capability only, and you can issue this code to a temporary user so they can secure the premises when they leave. Send Help Conditions Your system can be programmed for three separate Send Help Alerts that send an emergency signal to your central station.
Miscellaneous Commands (cont’d) Quick Forced Arm Yes No If programmed by your installer, Quick Forced Arm allows you to arm the burglar portion of your alarm system in the Away mode, bypassing all zones that are not ready. To enable Quick Force Arm: Press [#], [2]. A valid User Code is still required to disarm the system. UL The Quick Forced Arm feature is disabled on UL installations. Quick Exit Yes No If enabled, this feature allows the user to exit without having to disarm, then arm the system.
Miscellaneous Commands (cont’d) The display will show: LCD Keypad: BYPASSED: ZN1 Fixed-Word Keypad: 01 BYPASS Set Time and Date To set the time and date, press [#], [3]. Enter 2 digits each for hours, minutes, month, day, and year. hours (00-23) minutes (01-59) month (01-12) day (01-31) year (00-99) In order to acknowledge your entry, a beep sounds after you set each component of the time and date.
Testing the System System Test We recommend that you test your system once a week using the following procedure: If your system is monitored, contact your central station before you perform this test. 1. Arm your security system. 2. Wait until your exit time is over and then activate the system by opening a protected zone (for example, a window or door). 3. Confirm that the alarm sounding device (bell or siren) sounds.
Recommendations on Smoke Detectors With regard to the number and placement of smoke/heat detectors, we subscribe to the recommendations contained in the National Fire Protection Association’s (NFPA) Standard #72 noted below.
Emergency Evacuation Establish and regularly practice a plan of escape in the event of fire. The following steps are recommended by the National Fire Protection Association: M ET O RO OS PORCH 1. Position your detector or your interior and/or exterior sounders so that they can be heard by all occupants. D BE CL M O RO D BE M O RO TH BA D BE 2nd FLOOR M OO DR EN CH BE T KI 3. Sketch a floor plan of the building. Show windows, doors, stairs, and rooftops that can be used to escape.
RADIO FREQUENCY EMISSIONS STATEMENTS FEDERAL COMMUNICATIONS COMMISSION (FCC) Part 15 This device complies with part 15 of the FCC rules. Operation is subject to the following two conditions: (1) This device may not cause harmful interference, and (2) this device must accept any interference received, including interference that may cause undesired operation. INDUSTRY CANADA This Class B digital apparatus complies with Canadian ICES-003.
INDUSTRIE CANADA AVIS: L’étiquette d’Industrie Canada identifie le matériel homologué. Cette étiquette certifie que le matériel est conforme aux normes de protection, d’exploitation et de sécurité des réseaux de télécommunications, comme le prescrivent les documents concernant les exigences techniques relatives au matériel terminal. Le Ministère n’assure toutefois pas que le matériel fonctionnera à la satisfaction de l’utilisateur.
System Limitations While this system is an advanced-design security system, it does not offer guaranteed protection against burglary, fire, or other emergency. Any alarm system, whether commercial or residential, is subject to compromise or failure to warn for a variety of reasons. For example: • Intruders may gain access through unprotected openings or have the technical sophistication to bypass an alarm sensor or disconnect an alarm warning device. • Intrusion detectors (e.g.
System Limitations (cont’d) • Alarm warning devices such as sirens, bells, or horns may not alert people or wake up sleepers who are located on the other side of closed or partly open doors. If warning devices sound on a different level of the residence from the bedrooms, then they are less likely to waken or alert people inside the bedrooms. Even persons who are awake may not hear the warning if the alarm is muffled by noise from a stereo, radio, air conditioner, other appliances, or by passing traffic.
Glossary AC/LB LED: Yellow LED that, when lit, indicates the system is running on electricity; when not lit, indicates the system is running on the backup battery. ALARM: Sound from keypad or other horn/siren indicates a burglar alarm, fire alarm, or other condition you should be alerted to. ARM LED: Red LED in the upper portion of the keypad. When lit, some part of the burglar alarm system is armed; when not lit, the burglary portion of the system is disarmed.
Glossary (cont’d) CHIME FEATURE: An optional feature that causes the keypad to chime for 1 second when selected doors are opened when the burglary protection is off or disarmed. Once programmed by your installer, you can turn Chime on and off by pressing [#], [6]. DURESS: Duress is a system feature that you may have programmed into your system. If someone should force you to disarm your system, you would use the special Duress User Code.
Glossary (cont’d) SENSOR: The actual alarm sensor, detector, or device installed to detect an intrusion, fire, or environmental problem. Examples include: door contacts, window contacts, motion sensors, glassbreak sensors, smoke detectors, rateof-rise heat detectors, temperature sensors, flood/water sensors, and carbon monoxide gas detectors. SILENT CONDITION: Most types of alarms and troubles alert you with the keypad sounder and the sirens, horns, or speakers located in your premises.
ONE YEAR LIMITED WARRANTY Honeywell International Inc., acting through its Security & Custom Electronics business ("Seller"), 165 Eileen Way, Syosset, New York 11791, warrants its security equipment (the "product") to be free from defects in materials and workmanship for one year from date of original purchase, under normal use and service.