400-146-001-A_69-2245EF (AQ1000TP2) ENG.
400-146-001-A_69-2245EF (AQ1000TP2) ENG.fm Page -1 Wednesday, June 18, 2008 2:32 PM IMPORTANT This thermostat is to be used with an AQ2000 Series hydronic control panel. Need Help? For assistance with this product please visit http://yourhome.honeywell.com or call Honeywell Customer Care toll-free at 1-800-468-1502. Read and save these instructions. ® U.S. Registered Trademark. Patents pending. © 6-08 Honeywell International Inc. All rights reserved.
400-146-001-A_69-2245EF (AQ1000TP2) ENG.fm Page 0 Wednesday, June 18, 2008 2:32 PM Table of contents User’s section About your new thermostat ........................................................................................................................ 1 Overview of display and controls................................................................................................................ 2 Powering up and setting the temperature ...........................................................
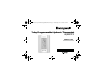
00-146-001-A_69-2245EF (AQ1000TP2) ENG.fm Page 1 Wednesday, June 18, 2008 2:32 PM About your new thermostat Honeywell’s AQ1000TP2 is a programmable thermostat designed to be used with an AQ2000 Series hydronic control panel to operate a hydronic system, a HVAC system or both.
400-146-001-A_69-2245EF (AQ1000TP2) ENG.
400-146-001-A_69-2245EF (AQ1000TP2) ENG.fm Page 3 Wednesday, June 18, 2008 2:32 PM Powering up and setting the temperature Powering up The thermostat is powered through the AQ2000 hydronic control panel. It turns on when the zoning module is energized. At power-up, the message ALL ZONES SCHEDULE will flash for the first 15 seconds if the thermostat has been configured for ALL-ZONES scheduling (see page 19).
400-146-001-A_69-2245EF (AQ1000TP2) ENG.fm Page 4 Wednesday, June 18, 2008 2:32 PM Setting the thermostat Hold/Run mode Select one of the following modes of operation: Run mode Place the thermostat in Run mode using the HOLD/RUN button. In this mode, the setpoint is automatically adjusted according to the schedule (see page 9). Hold Mode Place the thermostat in Hold mode using the HOLD/RUN button. In this mode, any modification to the temperature setpoint must be done manually.
400-146-001-A_69-2245EF (AQ1000TP2) ENG.fm Page 5 Wednesday, June 18, 2008 2:32 PM Setting the system Heat/Cool mode Press the SYSTEM button to place the system in one of the following modes of operation: Cool mode The air cooling system is on. System mode indicator Heat mode The hydronic heating system is on. SYSTEM button Auto mode The system is in automatic changeover mode. This means the thermostat switches between heating mode and cooling mode to maintain the desired temperature.
400-146-001-A_69-2245EF (AQ1000TP2) ENG.fm Page 6 Wednesday, June 18, 2008 2:32 PM Setting the fan On/Auto mode When the thermostat is used to operate a fan in an HVAC system, you can press the FAN button to place the fan in one of the two following modes of operation: On mode The fan runs all the time. Auto mode The fan runs only during a call for heat or cool.
400-146-001-A_69-2245EF (AQ1000TP2) ENG.fm Page 7 Wednesday, June 18, 2008 2:32 PM Setting the clock and date n Press the Menu button. o Press CLOCK. 7 p Press the or button to set the time (A). Press and hold the button to scroll faster. Press NEXT (B).
400-146-001-A_69-2245EF (AQ1000TP2) ENG.fm Page 8 Wednesday, June 18, 2008 2:32 PM q Press the or button to set the year (A). Press NEXT (B). r Press the or button to set the month (A). Press NEXT (B). s Press the or button to set the day (A). Press the Menu button (B) to exit. NOTE: If you do not press any button for a period of 60 seconds, the thermostat will automatically end the clock and date programming after saving all modifications.
400-146-001-A_69-2245EF (AQ1000TP2) ENG.fm Page 9 Wednesday, June 18, 2008 2:32 PM Default schedule When the thermostat is set to Run mode, it automatically adjusts its temperature setpoint according to the programmed schedule. The schedule consists of 4 periods per day which represents a typical week day. You can program the thermostat to skip the periods that do not apply to your situation.
400-146-001-A_69-2245EF (AQ1000TP2) ENG.fm Page 10 Wednesday, June 18, 2008 2:32 PM New schedule You can program up to 4 periods (Wake, Leave, Return and Sleep) per day. To program a period, you need to set the start time, the heating setpoint and the cooling setpoint. You can have a different program every day. NOTE: The heating setpoint is always at least 2 °F (1 °C) lower than the cooling setpoint. For example, if the heating setpoint is at 77 °F (25 °C) and you lower the cooling setpoint to 78 °F (25.
400-146-001-A_69-2245EF (AQ1000TP2) ENG.fm Page 11 Wednesday, June 18, 2008 2:32 PM Modifying the schedule n Press the Menu button*. o Press SCHEDULE. p Select ALL DAYS** (A) or press the or button to select the day (B). Press NEXT (C). * If ALL ZONES SCHEDULE appears, any modifications made to the schedule on this thermostat will be applied to other thermostats (see page 19).
400-146-001-A_69-2245EF (AQ1000TP2) ENG.fm Page 12 Wednesday, June 18, 2008 2:32 PM q Press the or button to select the period (A). Press NEXT (B). NOTE: To erase the period’s settings*, press the Clear button (A) once. Press Clear again to display and select the period’s default settings. r Press the or button to set the start time (A). Press and hold the button to scroll faster. Press NEXT (B). * To skip a period, erase the settings for that period.
400-146-001-A_69-2245EF (AQ1000TP2) ENG.fm Page 13 Wednesday, June 18, 2008 2:32 PM s Press the or button to set the heating setpoint (A). Press NEXT (B). t Press the or button to set the cooling setpoint (A). Press NEXT (B). u If necessary, go back to step 3 to set another day or step 4 to set another period. To exit, press the Menu button. NOTE: If you do not press any button for a period of 60 seconds, the thermostat will automatically exit the schedule programming after saving all modifications.
400-146-001-A_69-2245EF (AQ1000TP2) ENG.fm Page 14 Wednesday, June 18, 2008 2:32 PM User’s configuration menu 1. 2. 3. 4. Press the Menu button for 3 seconds to access the configuration menu. The first parameter is displayed. To modify a parameter, press the or button. To display the next parameter, press NEXT. To exit the menu, press the Menu button. The parameters will appear in the order shown in the following table. Parameter descriptions can be found on page 15.
400-146-001-A_69-2245EF (AQ1000TP2) ENG.fm Page 15 Wednesday, June 18, 2008 2:32 PM Temperature Display Mode Use this parameter to choose the temperature display mode. If the automatic mode (AU) is selected, the thermostat displays the temperature in the format specified in the AQ2000 control panel. If °F or °C is selected, the thermostat displays the temperature in the selected format, regardless of the format specified in the AQ2000 control panel.
400-146-001-A_69-2245EF (AQ1000TP2) ENG.fm Page 16 Wednesday, June 18, 2008 2:32 PM Permanent Backlight Use this parameter to select whether or not the thermostat’s screen is permanently illuminated. If you do not choose permanent backlight, the screen will lit for 12 seconds when any button is pressed. Time Display Format Use this parameter to select between the 12-hour format and the 24-hour format.
400-146-001-A_69-2245EF (AQ1000TP2) ENG.fm Page 17 Wednesday, June 18, 2008 2:32 PM Alert messages The temperature measured by the thermostat is below the thermostat’s display range. The temperature measured by the thermostat is above the thermostat’s display range. The thermostat has lost communications with the AQ2000 control panel. The thermostat might be defective. The floor sensor may also be defective if the thermostat has been configured for F mode (see page 19). Cooling or heating has stopped.
400-146-001-A_69-2245EF (AQ1000TP2) ENG.fm Page 18 Wednesday, June 18, 2008 2:32 PM Installation 1. 2. 3. Remove the thermostat from its wallplate by unscrewing the screw underneath the thermostat and tilting the bottom of the thermostat up. Note that the screw remains captive on the wallplate. Insert the wires through the center hole of the wallplate and secure the wallplate to the wall or onto an electrical box. Connect the wires to the terminals on the thermostat’s wallplate (no polarity to observe).
400-146-001-A_69-2245EF (AQ1000TP2) ENG.fm Page 19 Wednesday, June 18, 2008 2:32 PM Configuration switches The configuration DIP switches are located on the back of the thermostat faceplate. Scheduling Mode (switch 1) Use DIP switch 1 to select between 1-ZONE and ALL-ZONES scheduling. • All thermostats configured for ALL-ZONES scheduling share the same schedule settings as the AQ2000 hydronic control panel.
400-146-001-A_69-2245EF (AQ1000TP2) ENG.fm Page 20 Wednesday, June 18, 2008 2:32 PM Installer’s configuration menu The parameters in the Installer’s configuration menu must be modified by qualified personnel only. Incorrect settings can result in property damage. 1. 2. 3. 4. Remove the thermostat from its wallplate. Place DIP switch 2 on the back of the thermostat in the up position (Installer mode). Return the thermostat to its wallplate. The first parameter is displayed.
400-146-001-A_69-2245EF (AQ1000TP2) ENG.fm Page 21 Wednesday, June 18, 2008 2:32 PM Minimum Air Setpoint This parameter is available only when the thermostat is configured in A or AF mode (see page 19). Default setting Range 41 °F (5 °C) 41 °F (5 °C) to 100 °F (38 °C) Maximum Air Setpoint This parameter is available only when the thermostat is configured in A or AF mode (see page 19).
400-146-001-A_69-2245EF (AQ1000TP2) ENG.fm Page 22 Wednesday, June 18, 2008 2:32 PM Vacancy Heating Setpoint This parameter is the heating setpoint when the thermostat is in Vacancy mode (see page 4). Default setting Range 41 °F (5 °C) between the minimum and maximum setpoints Vacancy Cooling Setpoint This parameter is the cooling setpoint when the thermostat is in Vacancy mode (see page 4).
400-146-001-A_69-2245EF (AQ1000TP2) ENG.fm Page 23 Wednesday, June 18, 2008 2:32 PM Technical Specifications Power supply: powered by the zoning module (24 to 34 VDC) Default setpoint range: 41 °F to 100 °F (5 °C to 38 °C) Default floor limit (AF mode): 41 °F to 100 °F (5 °C to 38 °C) Setpoint interval: ± 1.0 °F (0.5 °C) Indoor temperature display range: 32 °F to 158 °F (0 °C to 70 °C) Outdoor temperature display range: -58 °F to 212 °F (-50 °C to 100 °C) Display resolution: ± 1.0 °F (0.
400-146-001-A_69-2245EF (AQ1000TP2) ENG.fm Page 24 Wednesday, June 18, 2008 2:32 PM 2-year limited warranty Honeywell warrants this product, excluding battery, to be free from defects in the workmanship or materials, under normal use and service, for a period of two (2) years from the date of purchase by the installing contractor. If at any time during the warranty period the product is determined to be defective or malfunctions, Honeywell shall repair or replace it (at Honeywell’s option).
400-146-001-A_69-2245EF (AQ1000TP2) ENG.fm Page 25 Wednesday, June 18, 2008 2:32 PM Honeywell’s sole responsibility shall be to repair or replace the product within the terms stated above. HONEYWELL SHALL NOT BE LIABLE FOR ANY LOSS OR DAMAGE OF ANY KIND, INCLUDING ANY INCIDENTAL OR CONSEQUENTIAL DAMAGES RESULTING, DIRECTLY OR INDIRECTLY, FROM ANY BREACH OF ANY WARRANTY, EXPRESS OR IMPLIED, OR ANY OTHER FAILURE OF THIS PRODUCT.
400-146-001-A_69-2245EF (AQ1000TP2) FRE.
400-146-001-A_69-2245EF (AQ1000TP2) FRE.fm Page -1 Wednesday, June 18, 2008 2:34 PM IMPORTANT Ce thermostat est conçu pour l’utilisation avec un panneau de commande hydronique de la série AQ2000. Besoin d’aide? Pour obtenir de l’aide sur ce produit, veuillez consulter le http://yourhome.honeywell.com ou joindre le service à la clientèle en composant sans frais le 1 800 468-1502 Veuillez lire le guide et le conserver en lieu sûr. ® Marque de commerce enregistrée aux États-Unis. Brevets en instance.
400-146-001-A_69-2245EF (AQ1000TP2) FRE.fm Page 0 Wednesday, June 18, 2008 2:34 PM Table des matières Section de l’utilisateur À propos de votre nouveau thermostat ...................................................................................................... 1 Aperçu de l’affichage et des contrôles ....................................................................................................... 2 Mise sous tension et réglage de la température ..................................................
400-146-001-A_69-2245EF (AQ1000TP2) FRE.fm Page 1 Wednesday, June 18, 2008 2:34 PM À propos de votre nouveau thermostat Le thermostat programmable AQ1000TP2 de Honeywell est conçu pour être utilisé avec un panneau de commande hydronique de la série AQ2000 pour commander un système hydronique et/ou un système CVAC.
400-146-001-A_69-2245EF (AQ1000TP2) FRE.
400-146-001-A_69-2245EF (AQ1000TP2) FRE.fm Page 3 Wednesday, June 18, 2008 2:34 PM Mise sous tension et réglage de la température Mise sous tension Le thermostat reçoit l’alimentation à partir du panneau de commande hydronique AQ2000. Il est mis sous tension en même temps que le module de zonage. Lors de la mise sous tension, le message « ALL ZONES SCHEDULE » clignotera pendant les 15 premières secondes si le thermostat a été configuré pour la programmation globale (voir la page 19).
400-146-001-A_69-2245EF (AQ1000TP2) FRE.fm Page 4 Wednesday, June 18, 2008 2:34 PM Sélection du mode du thermostat Sélectionner l’un des modes suivants : Mode « RUN » (programmation) Mettre le thermostat en mode « RUN » à l’aide du bouton « HOLD/RUN ». En ce mode, le thermostat ajuste la température de consigne selon l’horaire (voir la page 9). Mode « HOLD » (dérogation permanente) Mettre le thermostat en mode « HOLD » à l’aide du bouton « HOLD/RUN ».
400-146-001-A_69-2245EF (AQ1000TP2) FRE.fm Page 5 Wednesday, June 18, 2008 2:34 PM Sélection du mode du système Appuyer sur le bouton « SYSTEM » pour mettre le système dans l’un des modes de fonctionnement suivants : Mode « COOL » (climatisation) Le système de climatisation est opérationnel. indicateur de mode du système Mode « HEAT » (chauffage) Le système hydronique est opérationnel. bouton « SYSTEM » Mode « AUTO » (automatique) Le système est en mode de changement automatique.
400-146-001-A_69-2245EF (AQ1000TP2) FRE.fm Page 6 Wednesday, June 18, 2008 2:34 PM Sélection du mode du ventilateur Quand le thermostat est utilisé pour commander un ventilateur du système CVAC, vous pouvez appuyer sur le bouton « FAN » pour mettre le ventilateur dans l’un des deux modes de fonctionnement suivants : Mode « ON » (continu) Le ventilateur fonctionne sans arrêt. Mode « AUTO » (automatique) Le ventilateur fonctionne seulement lors d’une demande de chauffage ou de climatisation.
400-146-001-A_69-2245EF (AQ1000TP2) FRE.fm Page 7 Wednesday, June 18, 2008 2:34 PM Réglage de l’horloge et de la date n Appuyer sur le bouton Menu. o Appuyer sur « CLOCK » (horloge). 7 p Appuyer sur le bouton ou pour régler l’heure (A). Maintenir le bouton enfoncé pour défiler l’heure plus rapidement. Appuyer sur NEXT (B).
400-146-001-A_69-2245EF (AQ1000TP2) FRE.fm Page 8 Wednesday, June 18, 2008 2:34 PM q Appuyer sur le bouton ou pour régler l’année (A). Appuyer sur NEXT (B). r Appuyer sur le bouton ou pour régler le mois (A). Appuyer sur NEXT (B). s Appuyer sur le bouton ou pour régler le jour (A). Appuyer sur le bouton Menu pour sortir de la programmation (B). NOTA : Si vous n'appuyez sur aucun bouton pendant 60 secondes, le thermostat automatiquement enregistrera toute modification et sortira de la programmation.
0-146-001-A_69-2245EF (AQ1000TP2) FRE.fm Page 9 Wednesday, June 18, 2008 2:34 PM Horaire par défaut Lorsqu’on met le thermostat en mode « RUN », il ajuste automatiquement la température de consigne selon l’horaire programmé. L’horaire se compose de 4 périodes par jour, ce qui représente un jour de semaine typique. Vous pouvez programmer le thermostat pour sauter les périodes qui ne s'appliquent pas à votre situation.
400-146-001-A_69-2245EF (AQ1000TP2) FRE.fm Page 10 Wednesday, June 18, 2008 2:34 PM Nouvel horaire Vous pouvez programmer jusqu'à 4 périodes (« WAKE » [réveil], « LEAVE » [départ], « RETURN » [retour] et « SLEEP » [coucher]) par jour. Pour programmer une période, vous devez régler l'heure du début de la période, la consigne de chauffage et la consigne de climatisation. Il est possible d’avoir un programme différent à chaque jour.
400-146-001-A_69-2245EF (AQ1000TP2) FRE.fm Page 11 Wednesday, June 18, 2008 2:34 PM Modification de l’horaire n Appuyer sur le bouton Menu*. o Appuyer sur SCHEDULE. p Sélectionner ALL DAYS** (A) ou appuyer sur le bouton ou pour sélectionner le jour (B). Appuyer sur NEXT (C). * Si « ALL ZONES SCHEDULE » (programmation globale) apparaît à l’écran, toute modification d’horaire faite sur le thermostat sera appliquée aux autres thermostats (voir la page 19).
400-146-001-A_69-2245EF (AQ1000TP2) FRE.fm Page 12 Wednesday, June 18, 2008 2:34 PM q Appuyer sur le bouton ou pour sélectionner la période (A). Appuyer sur NEXT (B). NOTA: Pour effacer les réglages de la période, appuyer une fois sur le bouton Clear (A). Appuyer de nouveau sur Clear pour afficher et sélectionner les réglages par défaut. r Appuyer sur le bouton ou pour régler l’heure du début (A). Maintenir le bouton enfoncé pour défiler l’heure plus rapidement. Appuyer sur NEXT (B).
400-146-001-A_69-2245EF (AQ1000TP2) FRE.fm Page 13 Wednesday, June 18, 2008 2:34 PM s Appuyer sur le bouton ou pour régler la consigne de chauffage (A). Appuyer sur NEXT (B). t Appuyer sur le bouton ou pour régler la consigne de climatisation (A). Appuyer sur NEXT (B). u Au besoin, retourner à l’étape 3 pour modifier les réglages d’un autre jour ou à l’étape 4 pour régler une autre période. Pour sortir de la programmation, appuyer sur le bouton Menu.
400-146-001-A_69-2245EF (AQ1000TP2) FRE.fm Page 14 Wednesday, June 18, 2008 2:34 PM Menu de configuration de l’utilisateur 1. 2. 3. 4. Appuyer sur le bouton Menu pendant 3 secondes pour accéder au menu de configuration. Le premier paramètre est affiché. Pour modifier un paramètre, appuyer sur le bouton ou . Pour afficher le paramètre suivant, appuyer sur NEXT. Pour sortir du menu, appuyer sur le bouton Menu. Les paramètres apparaîtront dans l’ordre tel qu’ils apparaissent dans le tableau suivant.
400-146-001-A_69-2245EF (AQ1000TP2) FRE.fm Page 15 Wednesday, June 18, 2008 2:34 PM Mode d’affichage de la température Ce paramètre permet de choisir le mode d'affichage de la température. Quand le mode automatique (Au) est sélectionné, le thermostat affiche la température dans le format tel que spécifié dans le panneau de commande AQ2000.
400-146-001-A_69-2245EF (AQ1000TP2) FRE.fm Page 16 Wednesday, June 18, 2008 2:34 PM Rétroéclairage permanent Ce paramètre permet de sélectionner ou non le rétroéclairage permanent. Si vous n’optez pas pour le rétroéclairage permanent, l’écran s’illuminera pendant 12 secondes à chaque fois que vous appuyez sur un bouton. Format d’affichage de l’heure Ce paramètre permet de sélectionner entre le format 12 heures et le format 24 heures.
400-146-001-A_69-2245EF (AQ1000TP2) FRE.fm Page 17 Wednesday, June 18, 2008 2:34 PM Messages d’alerte La température mesurée est au-dessous de la plage d’affichage du thermostat. La température mesurée est au-dessus de la plage d’affichage du thermostat. Le thermostat a perdu tout lien de communication avec le panneau de commande AQ2000. Le thermostat pourrait être défectueux. La sonde du plancher pourrait aussi être defectueuse si le thermostat est configuré en mode F (voir la page 19).
400-146-001-A_69-2245EF (AQ1000TP2) FRE.fm Page 18 Wednesday, June 18, 2008 2:34 PM Installation 1. 2. 3. Enlever le thermostat de sa plaque murale en desserrant la vis située sous le thermostat et en tirant sur la partie inférieure. Noter que la vis reste captive sur la plaque murale. Insérer les fils à travers de l’ouverture au centre de la plaque murale et fixer la plaque murale sur le mur ou sur une boîte électrique. Raccorder les fils aux bornes sur la plaque murale (aucune polarité à respecter).
400-146-001-A_69-2245EF (AQ1000TP2) FRE.fm Page 19 Wednesday, June 18, 2008 2:34 PM Sélecteurs de configuration Les sélecteurs de configuration sont situés à l’arrière de la façade du thermostat. Mode de programmation (sélecteur 1) Sélecteur 1 permet de choisir entre la programmation « 1-ZONE » (locale) et la programmation « ALL-ZONES » (globale). • Tous les thermostats configurés pour la programmation « ALL-ZONES » se servent du même horaire que le panneau de commande hydronique AQ2000.
400-146-001-A_69-2245EF (AQ1000TP2) FRE.fm Page 20 Wednesday, June 18, 2008 2:34 PM Menu de configuration de l’installateur Seuls des installateurs compétents sont autorisés à modifier les paramètres du menu de configuration. Des mauvais réglages peuvent causer des dommages à la propriété. 1. 2. 3. Enlever le thermostat de la plaque murale. Placer le sélecteur 2, à l’arrière du thermostat, vers le haut (mode Installateur). Retourner le thermostat sur la plaque murale. Le premier paramètre est affiché.
400-146-001-A_69-2245EF (AQ1000TP2) FRE.fm Page 21 Wednesday, June 18, 2008 2:34 PM Consigne minimale de l’air ambiant Ce paramètre est offert seulement si le thermostat est configuré en mode A ou AF (voir la page 19). Réglage par défaut Plage 5 °C (41 °F) 5 °C (41 °F) à 38 °C (100 °F) Consigne maximale de l’air ambiant Ce paramètre est offert seulement si le thermostat est configuré en mode A ou AF (voir la page 19).
400-146-001-A_69-2245EF (AQ1000TP2) FRE.fm Page 22 Wednesday, June 18, 2008 2:34 PM Consigne de chauffage en mode Vacance Ce paramètre est la consigne de chauffage lorsque le thermostat est en mode Vacance (voir la page 4), Réglage par défaut Plage 41 °F (5 °C) entre les consignes minimale et maximale Consigne de climatisation en mode Vacance Ce paramètre est la consigne de climatisation lorsque le thermostat est en mode Vacance (voir la page 4).
400-146-001-A_69-2245EF (AQ1000TP2) FRE.
400-146-001-A_69-2245EF (AQ1000TP2) FRE.fm Page 24 Wednesday, June 18, 2008 2:34 PM Garantie limitée de 2 ans Honeywell garantit ce produit, à l'exception des piles, contre tout vice de fabrication ou de matière dans la mesure où il en est fait une utilisation et un entretien convenables, et ce, pour deux (2) ans à partir de la date d'achat par le consommateur.
400-146-001-A_69-2245EF (AQ1000TP2) FRE.fm Page 25 Wednesday, June 18, 2008 2:34 PM DÉCOULANT DIRECTEMENT OU INDIRECTEMENT D'UNE VIOLATION QUELCONQUE D'UNE GARANTIE, EXPRESSE OU TACITE, APPLICABLE AU PRÉSENT PRODUIT NI DE TOUTE AUTRE DÉFECTUOSITÉ DU PRÉSENT PRODUIT. Certaines provinces ne permettent pas l'exclusion ou la restriction des dommages indirects et, par conséquent, la présente restriction peut ne pas s'appliquer.