ADEMCO 6271V TouchCenter Keypad User Guide K10498 8/05 Rev.
Table of Contents ABOUT THE TOUCHCENTER ............................................................................ 4 Introduction.................................................................................................... 4 The TouchCenter Interface............................................................................ 4 Navigating through the TouchCenter............................................................. 5 About Your Home Screen......................................................
Table of Contents (Cont'd) Introduction to User Code Setup ................................................................. 33 Authority Levels ........................................................................................... 33 How to Access User Setup.......................................................................... 34 How to Add a User ...................................................................................... 35 How to Delete a User .........................................
About the TouchCenter Introduction Congratulations on your ownership of an Honeywell Security System. You've made a wise decision in choosing it, for it represents the latest in security protection technology today. This security system offers you burglary protection and may provide fire and emergency protection. To realize the full potential of the system, it is important that you feel comfortable operating it.
About the TouchCenter (Cont'd) Navigating through the TouchCenter Navigation through the TouchCenter typically begins from the "Home" screen. This is the TouchCenter’s main default screen (starting screen) and is the first screen you will see when the TouchCenter is powered up and initialized. It is from this screen that you will select from the main menu. Once you have made your selection, you will navigate through various sub-menus by touching buttons or icons to perform the function you desire.
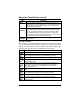
About the TouchCenter (cont'd) Navigation Icon Descriptions To aid in the navigation of the TouchCenter, a set of user-friendly icons has been provided. The appearance, function, and location of these icons is described below: ICON 6 LOCATION FUNCTION "Home" screen Allows you to record and retrieve voice messages. "Home" screen Allows you to turn certain devices on and off (if installed and programmed by your installer.) "Home" screen Accesses "Arming" screen.
About the TouchCenter (Cont'd) TouchCenter "Arming" Screen From the "Home" screen, press SECURITY to access the TouchCenter "Arming" screen. Use this picture and the table that follows to become familiar with the TouchCenter security functions. Note: The Voice Status ( ) button causes the TouchCenter to announce system status if depressed at least 10 seconds following its last depression. Note that Voice must be enabled for this button to function correctly during an alarm condition.
About the TouchCenter (cont'd) ITEM FUNCTION NIGHT MultiPartitions MORE CHOICES Press this button to arm when you are staying home and do not expect anyone to use the entrance door. Your installer may have configured NIGHT Mode differently; have him/her describe the actual settings of this mode. Check this circle when you want to arm more than one partition. When Multi-Partitions is checked, all partitions within the system can be armed at one time (if the user is so authorized).
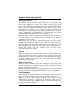
System Overview Introduction to Your System This system offers you burglary protection and may offer fire and emergency protection. Monitoring is accomplished with various contact and motion sensors for perimeter and interior burglary protection, plus the system may have strategically placed smoke, heat, or combustion detectors. Burglary Protection The burglary protection portion of your system must be turned on or "armed" before it will sense burglary alarm conditions.
System Overview (cont'd) Entry/Exit Delays Your system has preset time delays, referred to as exit delay and entry delay. Whenever you arm your system, exit delay gives you time to leave through the designated exit door without setting off an alarm. Exit delay begins immediately after entering any arming command, and applies to all modes of arming protection. If programmed, a slow beeping will sound throughout the exit delay period.
System Overview (Cont'd) User Codes Each user must be assigned a name with a corresponding 4-digit user code in order to gain access to various features and functions. Users for the system are programmed in a central user setup location that provides the specific questions for authorization level, partition assignment, and RF button assignment.
System Overview (cont'd) Note that this is a limited mode of operation. While in this mode: • You can use the Security button to access the Console Emulation Mode of operation to try to clear your faults, disarm the system, or enter additional Alpha Keypad commands specified in you panel User Guide. You can perform almost all functions that you can perform from a standard non-graphic alpha keypad.
Security System Operation Introduction to Security System Operation You can arm your system in one of three arming modes: Away, Stay, and Night. The following table lists the three different arming modes and the results of each.
Security System Operation (cont'd) SCREEN ACTION 2. On the "Arming" screen, press the selected arming button. Note: If Quick Arm is Not enabled in your system, you will receive a message to enter your User Code.
Security System Operation (Cont'd) How to Arm Multiple Partitions Note: Some systems may not have multiple partitions and the “Arm Multi-Partitions” button may not be displayed. To arm multiple partitions: 1. From the "Home" screen, press the SECURITY button. The "Arming" screen is displayed. SCREEN ACTION 2. Make certain the Multi-Partitions button is checked. 3. Press the appropriate arming mode button. Note: If any zones are bypassed, a Display Faults button will also be displayed on this screen. 4.
Security System Operation (cont'd) How to Display Faults The Display Faults function is used when you see a Not Ready Fault message and want to determine were the fault is and what type of fault it is. To display faults do the following: 1. From the "Home" screen, press the SECURITY button. The "Arming" screen is displayed. SCREEN ACTION 2. From the "Arming" screen, press the DISPLAY FAULTS button. The "Display Faults" screen is displayed showing a listing of faulted and/or bypassed zones.
Security System Operation (Cont'd) 4. Enter your 4-digit user code.
Security System Operation (cont'd) How to Bypass Zones The Bypass function is used when you want to arm your system with one or more zones left open. Bypassed zones are unprotected and will not cause an alarm when violated while your system is armed. • Residential systems will not allow you to bypass fire or emergency zones. On commercial systems, a specified user may be allowed to bypass fire and system zones if the user was enabled by your system installer.
Security System Operation (Cont'd) SCREEN ACTION 4. Highlight the zone(s) to be bypassed by touching it on the screen when the zones are displayed. 5. Press the BYPASS SELECTED button. The "User Authorization" screen is displayed with the instructions "To Bypass Zones, Enter Code". Note: If zones have already been bypassed, the top of this screen will indicate “Ready Bypass” and the screen will contain a Clear Bypasses button. 6. Enter your 4-digit user code.
Security System Operation (cont'd) SCREEN ACTION 7. Press the BACK button to return to the “Arming” screen.
Security System Operation (Cont'd) How to Remove Bypassed Zones A bypassed zone will automatically be unbypassed when you disarm the system. If a zone is bypassed, you can remove the bypass as follows: SCREEN ACTION 1. View bypassed zones by pressing the SHOW ZONES button. While the TouchCenter is requesting and receiving the zone data from the control panel, the screen displays "Please Wait!". Then the zones, along with their current status, are displayed. 2.
Security System Operation (cont'd) SCREEN ACTION 3. The "User Authorization" screen is displayed with the instructions To Clear Bypasses, Enter Code. Note: If the system is armed and you unbypass a zone, it will disarm the system. Enter your 4-digit user code. The "More Choices" screen is displayed showing the system as Ready to Arm. Note: This will not occur if any zone(s) is open (not ready).
Security System Operation (Cont'd) How to Disarm the System IMPORTANT: If you return and the main burglary sounder is on, DO NOT enter the premises, but call the police from a nearby safe location. If you return after an alarm has occurred and the main sounder has shut itself off, the TouchCenter will beep rapidly upon entering, indicating that an alarm has occurred during your absence. LEAVE IMMEDIATELY and CONTACT THE POLICE from a nearby safe location.
Security System Operation (cont'd) To disarm the system when already in the premises: SCREEN ACTION 1. Press the DISARM button on the "Armed" screen. The "User Authorization" screen is displayed with the instructions “To Disarm, Enter Code”. 2. Enter your 4-digit user code.
Security System Operation (Cont'd) SCREEN ACTION Note: Once the system is disarmed, the TouchCenter will return to the "Home" screen after the selected “To Home Page After” time has expired. This time is selected on the “Setup” screen.
Security System Operation (cont'd) How to Check the Status of Other Partitions This system supports between one and eight Partitions (depending on the system.) Partitioning enables a single physical alarm system to control up to eight areas of protection (partitions) depending on the system you have purchased. Each TouchCenter and other keypad is assigned a default partition for display purposes, and will show only that partition's information.
Security System Operation (Cont'd) SCREEN ACTION 3. Enter the code authorized to access other partition(s). If the code is accepted, the system displays the partitions that user has access to. Note: A code may have access to some or all of the available partitions. This screen displays the available partitions (in this case, Partitions 1 (Main), 2, and 3), and their current status. The current partition is shown at the top of the display (in this example, the device is attached to Partition 1 (Main H).
Security System Operation (cont'd) How to Send Emergency Messages • Emergency messages are optional and may not be available on your system. Ask your system installer if emergency messages are available on your system. • The Emergency screen cannot be accessed while running a screen diagnostic test or while in the clean screen mode. An emergency message for fire, panic, or medical can be sent to the central monitoring station from the Emergency screen.
Security System Operation (Cont'd) How to View the Event Log Your system has the ability to record various events in a history log wherein each event is recorded with the time and date of its occurrence. The control panel must be programmed to record various system events in installer programming mode. To view the Event Log, perform the following: 1. From the "Home" screen, press the SECURITY button. The "Arming" screen is displayed. SCREEN ACTION 2. From the "Arming" screen press the MORE CHOICES button.
Security System Operation (cont'd) SCREEN ACTION The first six events will be displayed. To view all items, press the Show More button and press the up/down arrows to scroll through the event log. Notes: • When All Partitions or All Events button is pressed, and more than 100 events exist, the Show More button text will change to read Next>>. If you press the Next>> button, a <> and <
Fire Alarm System Operation Introduction to Fire Alarm System Operation Your fire alarm system (if installed) is on 24 hours a day, providing continuous protection. In the event of an emergency, the installed smoke and heat detectors will automatically send signals to your Control/Communicator, triggering a loud interrupting sound from the keypad. An interrupted sound will also be produced by optional exterior sounders. A FIRE message will appear at your keypad and remain on until you silence the alarm.
Fire Alarm System Operation (cont'd) c. Press the CLEAR button and then enter your code. This will clear the Fire Alarm from the system. 2. If the keypad does not indicate a READY condition after the second sequence, press the DISPLAY FAULTS key on the Arming screen to display the zone(s) that are faulted. Be sure to check that smoke detectors are not responding to smoke or heat producing objects in their vicinity. In this case, eliminate the source of heat or smoke. 3.
User Code Setup Introduction to User Code Setup Each user must be assigned a name with a corresponding 4-digit user code in order to gain access to various features and functions. The TouchCenter can hold the identity for 10 Users in its memory. If additional Users are needed, define the additional Users using the Console Emulation Mode. Users for the system are programmed in a central user setup location that provides the specific questions for authorization levels assigned to different users.
User Code Setup (cont'd) Guest No Access Can arm the system in assigned partitions, but cannot disarm the system unless the system was armed with this code. Note: Do not assign this level if Quick Arm is enabled in your system. Used to restrict access from a partition. Guest Level 4 Operator B N/A N/A How to Access User Setup Access User Setup as follows: 1. From the "Home" screen, press the SECURITY button. The "Arming" screen is displayed. SCREEN ACTION 2. Press the MORE CHOICES button.
User Code Setup (Cont'd) SCREEN ACTION 4. Press the USER SETUP button on the “Setup” screen. The User Setup screen is displayed. How to Add a User Add a user as follows: SCREEN ACTION Note: Three selections are available: add a user, edit a user, or delete a user. 1. To add a user, press the ADD USER button. The "User Authorization" screen is displayed with the instructions "Enter Authorized Code".
User Code Setup (cont'd) SCREEN ACTION 2. Enter your Authorized code. The “User Options” screen is displayed. Note: The authorized code for adding users is dependent upon the system you have. Check with your system installer to determine who can add users. 3. Press the box next to Enter User Name. The Enter Data keyboard screen is displayed. 4. Type in the user name (6 characters max.) and press the OK button. The “User Options” screen is displayed with Enter User Code… displayed.
User Code Setup (Cont'd) SCREEN ACTION 6. Enter the 4-digit code for this user. The “User Options” screen is displayed with the user’s name and code displayed. 7. Select the partitions and access level for this user. After the access level is selected, the Allow Arm/Disarm from other partitions box becomes available when interfacing with commercial panels. (On residential panels, this box is automatically selected and can not be deselected.
User Code Setup (cont'd) SCREEN ACTION 10. If this user is assigned an RF button zone, touch the box below the RF Button Zone. The "RF Button Zone " screen is displayed with the instructions to enter 2 or 3 digits based on the alarm system being used. Enter the RF Button Zone number that was previously programmed in the control panel. Note that the RF Button Zone does not appear for every user.The User Options screen will be redisplayed. 11. Press the SAVE button. The system will save the configuration.
User Code Setup (Cont'd) How to Delete a User Delete a User as follows: SCREEN ACTION 1. From the User Setup screen, touch the circle next to the user to be deleted and press the DELETE USER button. The "User Authorization" screen is displayed with the instructions "Enter Authorized Code:". 2. Enter your Authorized code. The “Delete Confirmation” screen is displayed. Note: The authorized code for deleting users is dependent upon the system you have.
User Code Setup (cont'd) SCREEN ACTION How to Edit a User Note: You can not edit a User’s name. To modify a User name, you must delete the User and re-enter User. Edit a user as follows: SCREEN ACTION 1. From the User Setup screen, touch the circle next to the user to be edited and press the EDIT USER button. The "User Authorization" screen is displayed with the instructions "Enter Authorized Code:". 2. Enter your Authorized code. The “User Options” screen is displayed.
User Code Setup (Cont'd) SCREEN ACTION 3. Select the options needed for this user and press the SAVE button. The configuration changes are saved and you are returned to the User Setup screen.
Advanced System Features Introduction to Advanced System Features While most of the commonly used security functions are available from the TouchCenter’s advanced user interface, there are some less used, advanced features that can either be accessed through Console Emulation mode on the TouchCenter or a standard alpha keypad. To use features not supported by the TouchCenter, refer to your Control Panel User Guide.
Advanced System Features (Cont'd) 1. From the "Home" screen, press the SECURITY button. The "Arming" screen is displayed. SCREEN ACTION 2. Press the MORE CHOICES button. The "More Choices" screen is displayed. 3. Press the CONSOLE MODE button on the "More Choices" screen. The "Keypad" screen is displayed. 4. Perform functions as you would from a regular alpha keypad.
Voice Messages Introduction to Recording and Retrieving Messages The 6271V provides the capability of recording voices messages for others on the premises. The number of messages is not limited however; the total time of all messages added together cannot exceed 262 seconds. Note: The voice messages are stored in the memory of the 6271V. All messages will be lost if the 6271V loses power or if it is reset. Voice messages are recorded and retrieved using the “Message Center” screen.
Voice Messages (Cont'd) Recording a Voice Message To record a voice message, do the following: 1. From the "Home" screen, press the Message button. The "Message Center" screen is displayed. SCREEN ACTION 2. Press the Record button and record your message while staying within approximately one foot of the TouchCenter and speaking at a normal voice volume.
Voice Messages (Cont'd) Retrieving and Deleting a Voice Message To retrieve a voice message, do the following: 1. From the "Home" screen, press the MESSAGE button. Center" screen is displayed. SCREEN The "Message ACTION 2. Select the message you wish to listen to by touching it in the message list and then pressing the Play Message button. As the message is being played, a “Play (x): Voice Memo…” message is displayed above the message list window.
Summary of TouchCenter LED Operation TouchCenter LED Operation The TouchCenter has three LEDs labeled - ARMED, READY and MESSAGE. The ARMED LED is red, READY LED is green and MESSAGE LED is yellow. Each LED's on and off state has different meanings as described below. LED DESCRIPTION ARMED ON – Security system is armed. OFF – Security system is not armed. READY ON – Security system is disarmed and ready to arm. OFF – Security system is armed or disarmed but not ready.
TouchCenter Setup How to Access TouchCenter Setup Options Setup allows you to make changes to the way your TouchCenter is operating.
TouchCenter Setup (Cont'd) SCREEN ACTION 3. Press the SETUP button on the "More Choices" screen. The "Setup" screen is displayed.
TouchCenter Setup (cont'd) How to Adjust the Touch Screen Contrast You may adjust the touch screen contrast as follows: If… Then… you want to increase contrast move the slide bar above the current contrast setting. you want to decrease contrast move the slide bar below the current contrast setting. If you have made any changes in the contrast settings, when you exit this screen you will be presented with a pop-up asking if you want to remember the new settings.
TouchCenter Setup (Cont'd) How to Adjust the Volume You may adjust the TouchCenter sounder volume by pressing your finger on the TouchCenter slide bar associated with the "Volume" scale and doing the following: If… Then… you want to increase volume move the slide bar above the current volume setting.. you want to decrease volume move the slide bar below the current volume setting.
TouchCenter Setup (cont'd) How to Select Screen Backlight Off Activation Time When the TouchCenter is not active, it will automatically turn the backlight off after the selected backlight off time has expired (unless “Never” option is selected). To select the screen backlight time, do the following: SCREEN ACTION 1. On the "Setup" screen, press the Backlight Off After: "arrow" button. A drop-down list displaying the time period options is displayed. 2.
TouchCenter Setup (Cont'd) SCREEN ACTION 3. Press either the "Home" or "Back" button. A Settings Changed! pop-up window is displayed asking “Remember New Settings?“ Select Yes to save the change or No to discard the change. When the Update is complete the TouchCenter goes to the "Home" screen or "More Choices" screen depending on whether you pressed the "Home" or "Back" button, respectively.
TouchCenter Setup (cont'd) How to Select Homepage After Time When the TouchCenter is not active, it will automatically return to the “Home” screen after the selected to To Homepage After time has expired (unless “Never” option is selected). To select the To Homepage After time, do the following: SCREEN ACTION 1. On the "Setup" screen, press the To Homepage After "arrow" button. A dropdown list displaying the time period options is displayed. 2. Select the time period option you want by pressing it.
TouchCenter Setup (Cont'd) SCREEN ACTION 3. Press either the "Home" or "Back" button. A Settings Changed! pop-up window is displayed asking “Remember New Settings?“ Select Yes to save the change or No to discard the change. When the Update is complete the TouchCenter goes to the "Home" screen or "More Choices" screen depending on whether you pressed the "Home" or "Back" button, respectively.
TouchCenter Setup (cont'd) How to Set the Time and Date You can set the time and date from the Set Time & Date screen. Pressing the Time and Date button located at the bottom of the TouchCenter screen displays the Set Time & Date screen. • When the time is set it will be stored in the TouchCenter and sent to the control panel when you press the Apply button and answer Yes to the following prompt.
TouchCenter Setup (Cont'd) SCREEN ACTION 3. Select if you want a 12-hour or 24-hour format for your time display by touching the circle to the left of the 12 Hour display in the “Settings” area of the screen. A check mark in the circle indicates a 12hour display format. 4. Select if you want Daylight Savings Time to affect your system clock by touching the circle to the left of the DST On display in the “Settings” area of the screen.
TouchCenter Setup (cont'd) SCREEN ACTION 8. Enter the four digits for the current year. The window closes automatically and the selection is displayed. 9. Select if it is AM or PM by pressing on the AM or PM display on the screen. Each depression switches the AM/PM display. 10. Select the day of the month by touching the proper day in the display. The selected date will be highlighted on the screen. 11. On the "Time and Date" screen, press the Hour that is being displayed.
TouchCenter Setup (Cont'd) SCREEN ACTION 13. On the "Time and Date" screen, press the Minutes that is being displayed. An minute screen is displayed with the instructions to Enter 2 digits for the minutes. 14. Enter the two digits for the current minute. The window closes automatically and the selection is displayed. 15. On the "Time and Date" screen, press the Apply button. A confirmation screen is displayed. 16.
TouchCenter Operating Modes Operating Modes (Chime, Voice, and Voice Chime) Operating modes allows you to turn the TouchCenter chime mode on or off. Additionally, you may also turn the voice mode on or off. The operating modes provide the following features: • Chime Mode – When selected, a request is sent to the alarm panel requesting that the panel chime the TouchCenter whenever a change in zone status occurs.
TouchCenter Operating Modes (Cont'd) SCREEN ACTION 3. Press the OPERATING MODES button on the "More Choices" screen. The "User Authorization" screen is displayed with the instructions "Enter Authorized Code". 4. Enter your “Master” code. The "Operating Modes" screen is displayed. 5. Touch the Chime Mode button to turn the Chime Mode on or off. A checkmark appears in the button when the Chime Mode is “ON”. Note that it may take a few seconds for the Chime Mode to take effect. 6.
Maintaining Your System How to Clean your TouchCenter IMPORTANT: Do not use an abrasive cleaning agent or abrasive cloth when cleaning your TouchCenter or damage to the TouchCenter may occur. The Emergency screen cannot be accessed while running in the clean screen mode. Clean the TouchCenter as follows: 1. From the "Home" screen, press the SECURITY button. The "Arming" screen is displayed. SCREEN ACTION 2. Press the MORE CHOICES button. The "More Choices" screen is displayed. 3.
Maintaining Your System (Cont'd) SCREEN ACTION 4. Press the CLEAN SCREEN button. A pop-up window displaying “Touch Screen will be disabled so that you may wipe the screen clean. Please use a damp, soft cloth. DO NOT use any liquids, sprays, or ammonia-based cleansers. Press CONTINUE to disable touchscreen. When the Continue button is pressed the “Touch Screen Disabled for => 30 Seconds” message is displayed.
Glossary The following terms are used throughout the guide. Arm/Disarm: “Armed” simply means that the burglary portion of your system is turned ON and is in a state of readiness. “Disarmed” means that the burglary system is turned OFF, and must be rearmed to become operational. However, even in a “disarmed” state, “emergency” and “fire” portions of your system are still operational. Bypass: To intentionally leave a specific zone unprotected while the rest of the system is armed.
Glossary (Cont'd) Master Code: A 4-digit code that gives users access to all of the system’s functions, including the ability to program other users in the system. See also “User Code. Message Button: A button on the Home screen that allows you to record and retrieve voice messages. Night: An arming mode for the system. Your system installer set the type of arming and the zones armed when using this mode.
NOTES
NOTES
NOTES
NOTES
NOTES
NOTES
ONE YEAR LIMITED WARRANTY Honeywell International Inc., acting through its ADEMCO business ("Seller"), 165 Eileen Way, Syosset, New York 11791, warrants its security equipment (the "product") to be free from defects in materials and workmanship for one year from date of original purchase, under normal use and service.