Portable Electrical Generator Owner’s Manual Manual del Propietario HW5500 HW5500L HW5500E HW5500EL For product inquiries or support, visit www.honeywellgenerators.com or call toll-free at 1-888-HWHELP1 (494-3571). Si tiene preguntas acerca de los productos o requiere de asistencia, visite www.honeywellgenerators.com o llame gratis al 1-888-HWHELP1 (494-3571).
Congratulations on owning a Honeywell portable generator! WARNING This manual contains important instructions for operating this generator. For your safety and the safety of others, be sure to read this manual thoroughly before operating the generator. Failure to properly follow all instructions and precautions can cause you and others to be seriously hurt or killed. Please use the spaces provided below to record important information about your generator.
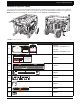
PRODUCT REGISTRATION To register your product, please complete the information below and mail to the address at the end of the form or register online at www.honeywellgenerators.com. 18-digit serial number must be completed in order for warranty to be activated.
3 - DEMOGRAPHIC INFORMATION GENDER: HOUSEHOLD INCOME: MALE LESS THAN $15,000 $100,000 - $124,999 FEMALE $15,000 - $29,999 $125,000 - $149,999 $30,000 - $49,999 $150,000 - $174,999 $50,000 - $79,999 $175,000 - $199,999 $80,000 - $99,999 $200,000 OR OVER MARITAL STATUS: MARRIED SINGLE DATE OF BIRTH: / MM PRIMARY METHOD OF PURCHASING HOUSEHOLD ITEMS: / DD IN-STORE ONLINE YYYY TV INCLUDING YOURSELF, HOW MANY PEOPLE LIVE IN YOUR HOUSEHOLD: NUMBER OF CHILDREN UNDER 18 LIVING IN YOUR HOUSEHOLD
CONTENTS IMPORTANT SAFETY RULES ............................................................................................ 1 Safety Messages ......................................................................................................................................... 1 Location of Important Labels GETTING STARTED Unpacking Guidelines ....................................................................................................................... 3 ....................................
THIS PAGE INTENTIONALLY LEFT BLANK ii www.honeywellgenerators.
SAVE THESE INSTRUCTIONS IMPORTANT SAFETY RULES WARNING ANYONE using or servicing this generator must read, understand, and follow all safety and operation instructions provided in the product manual. Failure to closely follow these instructions can result in circumstances leading to death, serious injury, and property damage.
Safety Messages Electric Shock Hazards Medical and Life Support Uses WARNING WARNING Generator produces powerful voltage that can cause death or great physical harm. • When using generator for back-up power, notify the utility company. Use approved transfer equipment to isolate generator from electric utility. • In case of emergency, call 911 immediately. • NEVER use this product to power life support devices or life support appliances.
Location of Important Labels Location of Important Labels Your generator has several labels which provide important safety and maintenance information. Samples of these labels are provided below. Should any of these labels become illegible or damaged, call 1-888-HWHELP1 (494-3571) for replacements. NOTE: Illustration below shows battery, which is available only with HW5500E and HW5500EL models.
THIS PAGE INTENTIONALLY LEFT BLANK 4 www.honeywellgenerators.
GETTING STARTED Use the information in this section to get your generator ready for operation. WARNING ANYONE using this generator must read, understand, and follow all safety and operation instructions provided in the product manual. Failure to closely follow these instructions can result in circumstances leading to death, serious injury, and property damage. Unpacking Guidelines 1. Set carton on a rigid, flat surface. 2. Remove carton contents.
Assembly Assembly CAUTION Generator must be empty of engine oil and fuel. Drain engine oil and fuel, if necessary. Generator is heavy! Lifting generator can cause back or other bodily injury. NEVER lift generator without assistance. Wheel Kit FIGURE 5: Wheel Assembly Components NOTE: Illustration above shows battery, which is available only with HW5500E and HW5500EL models.
Assembly Step 1: Install Support Legs 5. To install support legs, you will need: Attach a rubber stopper to the bottom of each support leg using a 25 mm full-thread hex bolt and a 13 mm flange serrated nut; tighten until securely seated.
Assembly Step 2: Install Wheel Axle and Wheels 6. To install wheel assembly, you will need: Using needle-nose pliers, bend each end of cotter pin in opposing directions to secure wheel to axle. Wheel axle (1) 16 mm full-thread hex bolts (4) 13 mm flange serrated nuts (4) Axle bracket* (1) Wheels (2) 9/16" washers (4) Cotter pins (2) Socket wrench with 10 mm socket† Needle-nose pliers† FIGURE 11: Cotter Pin Installation * Two brackets are needed to install wheel axle.
Assembly Step 3: Install Handle Assembly 5. To install handle assembly, you will need: Attach chain to handle bracket as illustrated below. Insert pin through bracket and handle. Handle brackets (2) Handle bars (2) Pin and chain (2) Rubber handle grips (2) M6 X 40 X 8 mm flange-head hex bolts (6) 10 mm flange serrated nuts (6) Socket wrench with 8 mm socket* 10 mm open end wrench* FIGURE 14: Attach pin and chain 6. * Not included 1.
Assembly Step 4: Install Battery (HW5500E and HW5500EL Only) WARNING To avoid electric arcing, which can result in electric shock, follow these instructions exactly. When connecting or disconnecting battery leads: To use the electric-start feature, the battery (included) must be connected to generator’s electric starter. • ALWAYS connect positive (+) battery lead first. • ALWAYS disconnect negative (-) battery lead first. • NEVER connect negative (-) battery lead to positive (+) post on battery.
Grounding the Generator Grounding the Generator Using Generator for Back-up Power WARNING Generator must be grounded to prevent electrical shock from faulty appliances. • Before using generator, consult a qualified electrician, electrical inspector, or local agency having jurisdiction for local codes or ordinances that apply to the intended use of generator. The National Electric Code (NEC) requires the generator to be connected to an earth ground.
THIS PAGE INTENTIONALLY LEFT BLANK 12 www.honeywellgenerators.
COMPONENTS Use information provided in this section to become familiar with your generator’s components. CAUTION Information below is provided for reference only. Refer to “OPERATION” on page 15 for instructions on operating the generator.
THIS PAGE INTENTIONALLY LEFT BLANK 14 www.honeywellgenerators.
OPERATION Generator Location When deciding on the location to place your generator, keep in mind the following safety rules: DANGER + Depressed areas such as construction foundations, pools, or any low-lying areas, can cause carbon monoxide to accumulate. Inhalation of carbon monoxide can kill you in minutes. • NEVER use generator inside homes, garages, crawl spaces, sheds, or similar enclosed spaces. Use generator only outdoors and far away from windows, doors, and vents.
Preparing for Operation Starting Generator 5. Press and hold engine control switch in START position until engine starts. WARNING ENGINE Before starting generator, be sure to thoroughly read all information provided in this Owner’s Manual. RUN START NOTICE STOP It is very important to maintain proper level of engine oil to keep engine in good running condition. FIGURE 25: Engine Control Switch • Check engine oil level prior to each use.
Preparing for Operation Manual (Recoil) Start (All Models): 1. 5. Press engine control switch to RUN position. Be sure generator is placed outside, in well-ventilated area. ENGINE START RUN NOTICE Keep the generator at a minimum of 6 feet (2 meters) from any building, object, or wall. 2. STOP FIGURE 30: Engine Control Switch - HW5500E and HW5500EL Models Confirm the circuit breakers are set. ENGINE RUN Set Tripped FIGURE 26: Circuit Breaker Position 3. STOP Turn fuel valve to ON position.
Stopping Generator Stopping Generator Powering Appliances In an emergency: Press engine control switch to STOP position. In this manual, the term “appliance” refers to any electrical device that can be connected to generator for power. NOTE: In normal use: 1. Turn OFF any connected appliances and unplug any connected power cords. 2. Allow generator to run for 2-3 minutes. 3. Press engine control switch to STOP position. 4. Turn fuel valve to OFF position.
Powering Appliances • • Pay attention to appliance operation: If appliance begins to operate abnormally, becomes sluggish, or stops suddenly, turn it OFF immediately. Disconnect appliance and determine whether problem is appliance, or if rated load capacity of generator has been exceeded. Use suitable extension cords: If using an extension cord to connect appliance to generator, use only ULlisted, three-prong extension cords.
THIS PAGE INTENTIONALLY LEFT BLANK 20 www.honeywellgenerators.
MAINTENANCE Maintenance Schedule Periodic maintenance and adjustment is necessary to keep the generator in good operating condition. Perform service and inspection at intervals shown in Generator Maintenance Schedule (see Table 2). WARNING DANGER Accidental starting of generator can cause severe injury or death. Before performing maintenance, disconnect spark plug cap from spark plug.Also disconnect both starting battery cables. Remove the negative (-) cable first to reduce the risk of arcing.
Engine Oil Engine Oil 6. Oil should be filled to the “H” level or somewhere between the “L” and “H”. NOTICE Engine oil is a major factor affecting engine performance and service life. Non-detergent and 2-stroke engine oils will damage engine and are not recommended. • Be sure to use engine oils specified under “Engine Oil Recommendations.” It is very important to maintain proper level of engine oil to keep engine in good running condition. • Check engine oil level prior to each use.
Engine Oil Changing Engine Oil WARNING Frequent or prolonged contact with engine oil may cause skin cancer. • Immediately after handling engine oil, thoroughly wash hands and any areas of skin exposed to engine oil, with soap and water. 6. Remove drain bolt and sealing washer. 7. Allow oil to drain into oil pan or container. 8. Slowly unscrew and remove oil fill cap. To change engine oil, you will need: 3/8” socket wrench with 12 mm 6 pt.
Engine Fuel Engine Fuel TABLE 3. Oxygenated Fuel Types Before each use, check fuel gauge on fuel tank. If fuel level is low, refill tank with recommended fuel. NEVER OVERFILL. Ethanol (ethyl or grain alcohol) Gasoline containing more than 10% ethanol by volume may cause starting or performance problems. Gasoline containing ethanol may be marketed under the name "Gasohol".
Air Filter Maintenance Air Filter Maintenance NOTICE A dirty air filter will restrict air flow to carburetor, which may cause poor engine performance or damage. Never run the generator without air cleaner assembly properly attached. For HW5500 & HW550E Models: • Turn thumbscrew counterclock wise to loosen and remove. • Pull bottom of air cleaner cover out and lift up to release plastic tabs. Clean air filter every 50 hours of generator operation.
Air Filter Maintenance 6. For HW5500 & HW5500E Models: 8A. Reinstall the metal air filter plate in the support brackets if it fell out during air filter removal. Soak air filter in clean engine oil. FIGURE 49: Oil Air Filter 7. Squeeze out excess oil. FIGURE 52: Air Filter Plate Installation —HW5500 & HW5500E Models 8B. Reinstall air filter. 8C. Reinstall air cleaner cover. FIGURE 50: Excess Oil Removal CAUTION Frequent or prolonged contact with engine oil may cause skin cancer.
Battery Service Battery Service Cleaning Fuel Sediment Cup To ensure the battery remains charged, it is recommended that the generator is started every three months. If the unit is stored for more than a year without running, a battery charger may be required to recharge the generator battery. The sediment cup helps prevent fuel tank residue from entering the carburetor. Recommended Battery Replacement: Clean fuel sediment cup at the intervals specified in Table 2.
Spark Plug Service Spark Plug Service 6. To ensure proper engine operation, spark plug must be properly gapped and free of deposits. WARNING If engine has been running, muffler will reach temperatures that could cause severe burns. Do not touch. Recommended Spark Plug Replacement: Bosch W20EPR Champion RN9YC Denso WR7DC 100842A* Inspect spark plug. If spark plug is damaged or excessively worn, or if insulator is cracked or chipped, use a new spark plug.
Cleaning Spark Arrestor Screen Cleaning Spark Arrestor Screen 9. WARNING Muffler reaches temperatures that can cause serious burns if touched. NEVER touch hot surfaces. Inspect spark arrestor screen. If screen is damaged or excessively worn, replace with new screen. If screen is in good condition, clean using wire brush and then reinstall. Generator muffler is equipped with spark arrestor screen, which must be cleaned according to maintenance schedule (Table 2).
Storing Generator Storing Generator Draining Fuel NOTICE Follow service procedures for preparing generator for storage. Inadequate or improper care of generator can result in damage to generator components and will void limited warranty. 1. Turn fuel lever to OFF position. 2. Run engine until it stops due to lack of fuel. 3. Place suitable container underneath drain hole to catch fuel. 4.
TROUBLESHOOTING WARNING ANYONE using or servicing this generator must read, understand, and follow all safety and operation instructions provided in the product manual. Failure to closely follow these instructions can result in circumstances leading to death, serious injury, and property damage. DANGER Using a generator indoors CAN KILL YOU IN MINUTES. Generator exhaust contains carbon monoxide. This is a poison you cannot see or smell.
THIS PAGE INTENTIONALLY LEFT BLANK 32 www.honeywellgenerators.
SPECIFICATIONS HW5500 / HW5500L HW5500E / HW5500EL Length [in / mm] 29 / 736.6 29 / 736.6 Height [in / mm] 27 / 685.8 27 / 685.8 Width [in / mm] 29 / 736.6 29 / 736.6 Dry Weight [lb / kg] 190 / 86 195 / 88 Rated Power [watts] 5500 5500 Maximum Power [watts] 6875 6875 60 60 120 / 240 120 / 240 Maximum [F / C] 104q / 40q 104q / 40q Minimum [F / C] 14q / -10q 14q / -10q 3600 3600 OHV 4-Cycle OHV 4-Cycle 337 337 Fuel Tank Capacity [gal / L] 6.5 / 24.6 6.5 / 24.
THIS PAGE INTENTIONALLY LEFT BLANK 34 www.honeywellgenerators.
WARRANTIES NORTHSHORE POWER SYSTEMS CONSUMER LIMITED WARRANTY Honeywell Portable Generator Effective August 1, 2008 LIMITED WARRANTY Northshore Power Systems, LLC, (NSP) will repair or replace, free of charge, to the original retail customer, in North America, any parts of the portable generator found by NSP or an authorized service center to be defective in material or workmanship. This limited warranty covers the cost of the replacement parts and labor for defects.
NORTHSHORE POWER SYSTEMS EMISSIONS CONTROL WARRANTY NORTHSHORE POWER SYSTEMS EMISSIONS CONTROL WARRANTY Honeywell Portable Generator F. Fuel pump (if equipped) G. Gasoline carburetor and internal components (if equipped) 2. A. Air cleaner B. Intake manifold C. Vent lines WARRANTY STATEMENT The U.S.
NORTHSHORE POWER SYSTEMS EMISSIONS CONTROL WARRANTY warranty does not cover an emission control part that is replaced or repaired as required by the maintenance schedule defined in the Honeywell Generator Owner's Manual. Any replacement part that is equivalent in performance and durability may be used for maintenance or repairs. QUESTIONS If you have questions regarding your emissions warranty rights and responsibilities, you should contact the Warranty and Service department at NSP.
THIS PAGE INTENTIONALLY LEFT BLANK 38 www.honeywellgenerators.
INDEX A H Air Filter Maintenance 25 Appliances powering 18 rules for powering 18 wattage information 19 Assembly handles 9 wheels 8 Handles, Installing 9 High Altitude Operation 18 M Maintenance 21 air filter 25 changing engine oil 23 cleaning spark arrestor 29 fuel sediment cup 27 parts listing 41 schedule 21 spark plug 28 Manual (Recoil) Start 17 B Battery 10 C Checklist, Generator Contents 5 Components and Controls breakers 13 choke control 13 engine switch 13 fuel valve 13 outlets 13 recoil starter g
THIS PAGE INTENTIONALLY LEFT BLANK 40 www.honeywellgenerators.
MAINTENANCE PARTS To order maintenance parts, visit www.honeywellgenerators.com or call the Customer Hotline at 1-888-HWHELP1 (494-3571).
¡Felicitaciones por su adquisición de un generador portátil Honeywell! ADVERTENCIA Este manual contiene instrucciones importantes para el funcionamiento de este generador. Para su seguridad, y la seguridad de los demás, asegúrese de leer minuciosamente este manual antes de hacer funcionar el generador. Si no sigue las instrucciones y las precauciones de manera correcta, se pueden producir graves lesiones o incluso la muerte.
REGISTRO DEL PRODUCTO Para registrar su producto, complete la siguiente información y envíela por correo a la dirección que aparece al final del formulario, o regístrese a través de Internet en www.honeywellgenerators.com. Se deberá llenar el número de serie de 18 dígitos a fin de activar la garantía. 1- INFORMACIÓN PERSONAL NOMBRE DOMICILIO APELLIDO CIUDAD, ESTADO, C.P.
3-INFORMACIÓN DEMOGRÁFICA SEXO: INGRESO FAMILIAR: HOMBRE MENOS DE $15,000 $100,000 - $124,999 MUJER $15,000 - $29,999 $125,000 - $149,999 $30,000 - $49,999 $150,000 - $174,999 $50,000 - $79,999 $175,000 - $199,999 $80,000 - $99,999 $200,000 O MÁS ESTADO CIVIL: CASADO SOLTERO FECHA DE NACIMIENTO: / MM PRINCIPAL MÉTODO DE COMPRA DE LA FAMILIA: / DD EN UNA TIENDA EN LÍNEA AA TELEVISIÓN INCLUYÉNDOSE USTED, ¿CUÁNTAS PERSONAS VIVEN EN SU CASA?: NÚMERO DE NIÑOS MENORES DE 18 AÑOS QUE VIVEN EN
CONTENIDO NORMAS DE SEGURIDAD IMPORTANTES ...................................................................... 1 Mensajes de seguridad ............................................................................................................................... 1 Ubicación de etiquetas importantes PRIMEROS PASOS ............................................................................................................ 3 ...............................................................................
ESTA PÁGINA SE DEJÓ INTENCIONADAMENTE EN BLANCO ii www.honeywellgenerators.
GUARDE ESTAS INSTRUCCIONES NORMAS DE SEGURIDAD IMPORTANTES ADVERTENCIA TODA PERSONA que use o realice servicio a este generador debe leer, entender y seguir todas las instrucciones de seguridad y funcionamiento que se suministran en el manual del producto. Si no sigue estas instrucciones al pie de la letra puede generar circunstancias que pueden causar la muerte, lesiones graves y daño a la propiedad.
Mensajes de seguridad Peligros de descarga eléctrica ADVERTENCIA El amortiguador se calienta demasiado durante el funcionamiento y permanece caliente por un tiempo después de que el motor se ha detenido. ADVERTENCIA El generador produce un voltaje potente que puede causar la muerte o un gran daño físico. • • Al usar el generador para obtener energía de reserva, notifique a la empresa de servicios públicos.
Ubicación de etiquetas importantes Ubicación de etiquetas importantes Su generador tiene varias etiquetas que contienen información importante de seguridad y mantenimiento. A continuación se proporcionan ejemplos de estas etiquetas. Si alguna de estas etiquetas se dañara y ya no fuera legible, comuníquese al 1-888HWHELP1 (494-3571) para solicitar reemplazos. NOTA: La siguiente ilustración muestra la batería, que está disponible solamente con los modelos HW5500E.
ESTA PÁGINA SE DEJÓ INTENCIONADAMENTE EN BLANCO 4 www.honeywellgenerators.
PRIMEROS PASOS Utilice la información que se incluye en esta sección para preparar su generador para su funcionamiento. ADVERTENCIA TODA PERSONA que use este generador debe leer, entender y seguir todas las instrucciones de seguridad y de funcionamiento que se proporcionan en el manual del producto. Si no sigue estas instrucciones al pie de la letra puede generar circunstancias que pueden causar la muerte, lesiones graves y daño a la propiedad. Pautas de desembalaje 1.
Montaje Montaje PRECAUCIÓN El generador no debe contener aceite para motor ni combustible. Si es necesario, drene el aceite para motor y el combustible. ¡El generador es pesado! Levantar el generador puede causar lesiones en la espalda u otras partes del cuerpo. NUNCA levante el generador sin ayuda. Kit de ruedas FIGURA 3: Componentes del conjunto de ruedas NOTA: La ilustración anterior muestra la batería, que está disponible solamente con los modelos HW5500E y HW5500EL.
Montaje Paso 1: Instale las patas de apoyo 5. Para instalar las patas de apoyo, necesitará: (2) pernos hexagonales de hilo completo de 25 mm Instale un tope de goma en la parte inferior de cada pata de apoyo usando un perno hexagonal de hilo completo de 25 mm y la tuerca dentada de brida de 13 mm; apriete hasta que esté firmemente asentado. (2) arandelas de 5/16 pulg.
Montaje Paso 2: Instale el eje de la rueda y las ruedas 6. Para instalar el conjunto de las ruedas, necesitará: (1) eje de la rueda Con el alicate de punta fina, doble cada extremo del pasador de chaveta en direcciones opuestas para asegurar la rueda al eje. (4) pernos hexagonales de hilo completo de 16 mm (4) tuercas dentadas con brida de 13 mm (1) soporte del eje* (2) ruedas (4) arandelas de 9/16 pulg.
Montaje Paso 3: Instale el conjunto de la maniija 5. Para instalar el conjunto de la manija, necesitará: Instale la cadena en el soporte de la manija como se ilustra a continuación. Inserte el pasador a través del soporte y la manija.
Montaje Paso 4: Instale la batería (modelos HW5500E y HW5500EL) ADVERTENCIA Para evitar arcos eléctricos, que pueden causar una descarga eléctrica, siga estas instrucciones al pie de la letra. Al conectar o desconectar los cables de la batería: Para usar la función de arranque eléctrico, la batería (se incluye) debe estar conectada al arrancador eléctrico del generador. • SIEMPRE conecte el cable de batería positivo (+) primero. • SIEMPRE desconecte el cable de batería negativo (-) primero.
Conexión a tierra del generador Conexión a tierra del generador ADVERTENCIA El generador se debe conectar a tierra para evitar una descarga eléctrica de artefactos defectuosos. • Antes de usar el generador, consulte a un electricista calificado, inspector eléctrico u organismo local con jurisdicción los códigos o las ordenanzas locales que se aplican para el uso previsto del generador. El Código Eléctrico Nacional (NEC, por sus siglas en inglés) requiere que el generador esté conectado a tierra física.
ESTA PÁGINA SE DEJÓ INTENCIONADAMENTE EN BLANCO 12 www.honeywellgenerators.
COMPONENTES Utilice la información que se incluye en esta sección para familiarizarse con los componentes de su generador. La siguiente información se proporciona únicamente como referencia. Remítase a “FUNCIONAMIENTO” en la PRECAUCIÓN página 13 para obtener información sobre el funcionamiento del generador.
ESTA PÁGINA SE DEJÓ INTENCIONADAMENTE EN BLANCO 14 www.honeywellgenerators.
FUNCIONAMIENTO Ubicación del generador Al decidir la ubicación para su generador, recuerde las siguientes normas de seguridad: PELIGRO + Las áreas en desnivel, como cimientos de una construcción, piscinas o cualquier área a baja altura pueden causar acumulación de monóxido de carbono. La inhalación del monóxido de carbono puede matarlo en minutos. • NUNCA use el generador dentro de una casa, garaje, espacio debajo del piso, cobertizo o espacios cerrados similares.
Arranque del generador Arranque del generador 5. ADVERTENCIA Pulse y mantenga presionado el interruptor de control en la posición START (Arranque) hasta que el motor arranque. Antes de arrancar el generador, asegúrese de leer minuciosamente toda la información de este Manual del propietario. ENGINE AVISO Es muy importante mantener el nivel adecuado de aceite para motor a fin de mantener el motor en buenas condiciones de funcionamiento. • Revise el nivel de aceite para motor antes de cada uso.
Arranque del generador Arranque manual (cuerda de arranque) (todos modelos) 1. 5. Presione el interruptor de control del motor a la posición RUN (Funcionamiento). Asegúrese de instalar el generador en el exterior en un área bien ventilada. ENGINE START 2. RUN AVISO Mantenga el generador a un mínimo de 6 pies (2 metros) lejos de cualquier edificio, objeto o pared. STOP FIGURA 25: Interruptor de control del motor - modelos HW5500E y HW5500EL Compruebe que estén colocados los disyuntores.
Cómo detener el generador Cómo detener el generador Cómo alimentar artefactos En una emergencia: Presione el interruptor de control del motor a la posición STOP (Detención). En este manual, el término "artefacto" se refiere a cualquier dispositivo eléctrico que se puede conectar al generador para ser alimentado. En uso normal: 1. Apague los artefactos conectados y desenchufe los cables de alimentación conectados. 2. Deje funcionar el motor durante 2 a 3 minutos. 3.
Cómo alimentar artefactos • • Preste atención al funcionamiento de los artefactos: Si un artefacto comienza a funcionar de manera anormal, se torna lento o se detiene repentinamente, apáguelo de inmediato. Desconecte el artefacto y determine si el problema es el artefacto o si se ha excedido la capacidad de carga nominal del generador.
ESTA PÁGINA SE DEJÓ INTENCIONADAMENTE EN BLANCO 20 www.honeywellgenerators.
MANTENIMIENTO Programa de mantenimiento El mantenimiento y ajuste periódicos son necesarios para conservar el generador en buenas condiciones de funcionamiento. Realice servicio e inspecciones en los intervalos que se indican en el Programa de mantenimiento del generador (vea la Tabla 2). PELIGRO El uso de un generador en interiores PUEDE MATARLO EN MINUTOS. El escape del generador contiene monóxido de carbono, que es un veneno que no se puede ver ni oler.
Aceite para motor Aceite para motor 6. AVISO El aceite para motor es un factor importante que afecta el rendimiento y la vida útil del motor. Los aceites para motor no detergentes de dos tiempos dañarán el motor y no se recomienda su uso. • Asegúrese de usar los aceites para motor que se especifican en "Recomendaciones de aceite para motor". Es muy importante mantener el nivel adecuado de aceite para motor a fin de mantener el motor en buenas condiciones de funcionamiento.
Aceite para motor Cambio de aceite para motor ADVERTENCIA El contacto frecuente o prolongado con el aceite para motor puede causar cáncer de piel. • Inmediatamente después de manipular aceite para motor, lave bien sus manos y otras áreas de la piel expuestas al aceite con agua y jabón. 6. Retire el perno de drenaje y la arandela para sellar 7. Deje que el aceite drene hacia el depósito de aceite o receptáculo. 8. Desatornille y retire lentamente la tapa para llenado de aceite.
Cómo agregar combustible Cómo agregar combustible TABLA 3. Tipos de combustibles oxigenados La gasolina que contiene más de 10% de Etanol etanol por volumen puede causar (alcohol etílico o de problemas de arranque o funcionamiento. grano) La gasolina que contiene etanol se puede comercializar bajo el nombre "Gasohol". La gasolina que contiene metanol debe contener cosolventes o inhibidores de la corrosión para proteger el sistema de Metanol combustible.
Mantenimiento del filtro de aire Mantenimiento del filtro de aire AVISO Un filtro de aire sucio limita el flujo de aire hacia el carburador, lo que puede causar un funcionamiento deficiente del motor o daños. Nunca haga funcionar el generador sin el conjunto de filtro de aire correctamente instalado. Modelos HW5500 y HW5500E: • Gire el tornillo de mariposa hacia la derecha para soltar y retirar. • Empuje hacia arriba en la parte inferior de la tapa para soltar las pestañas plásticas.
Mantenimiento del filtro de aire 6. Remoje el filtro de aire en aceite para motor limpio. Modelos HW5500 y HW5500E: 8A. Vuelva a instalar la placa metálica del filtro de aire en los soportes de apoyo si se cayeron durante la extracción del filtro de aire. FIGURA 43: Filtro de aire del aceite 7. Estruje para eliminar el exceso de aceite. FIGURA 46: Instalación de la placa del filtro de aire —Modelos HW5500 y HW5500E 8B. Vuelva a instalar el filtro de aire. FIGURA 44: Eliminar el exceso de aceite.
Servicio de la batería Servicio de la batería Se recomienda arrancar el generador cada tres meses para asegurar que la batería se mantenga cargada. Si se guarda la unidad durante más de un año sin arrancarla, es probable que sea necesario un cargador de baterías para recargar la batería del generador.
Servicio de la bujía Servicio de la bujía 5. Para asegurar un funcionamiento adecuado del motor, la bujía debe tener el espacio adecuado y no debe tener depósitos. Con una llave de dados para bujía de 13/16 pulg., suelte y retire la bujía. ADVERTENCIA Si el motor ha estado funcionando, el amortiguador alcanzará temperaturas que pueden causar graves quemaduras. No toque. Recomendación para reemplazo de bujía: 100842A* Bosch W20EPR Champion RN9YC Denso WR7DC FIGURA 52: Retiro de la bujía 6.
Limpieza de la pantalla protectora contra chispas Limpieza de la pantalla protectora contra chispas ADVERTENCIA El amortiguador alcanza temperaturas que pueden causar quemaduras graves al contacto. NUNCA toque las superficies calientes. El amortiguador del generador está equipado con un protector contra chispas, que se debe limpiar de acuerdo con el programa de mantenimiento (Tabla 2). 6. Deslice la abrazadera del protector contra chispas para sacarlo. 7.
Almacenamiento del generador Almacenamiento del generador AVISO Siga los procedimientos de servicio para preparar el generador para su almacenamiento. Un cuidado inapropiado o incorrecto del generador puede causar daños en los componentes del generador y anulará la garantía limitada. Antes de almacenar el generador durante un periodo prolongado: • Asegúrese de que el área de almacenamiento no tenga exceso de humedad y polvo. • Consulte los procedimientos de preparación recomendados en la Tabla 6.
RESOLUCIÓN DE PROBLEMAS ADVERTENCIA TODA PERSONA que use o realice servicio al generador debe leer, entender y seguir todas las instrucciones de seguridad y funcionamiento que se suministran en el manual del producto. Si no sigue estas instrucciones al pie de la letra puede generar circunstancias que pueden causar la muerte, lesiones graves y daño a la propiedad. PELIGRO El uso de un generador en interiores PUEDE MATARLO EN MINUTOS.
ESTA PÁGINA SE DEJÓ INTENCIONADAMENTE EN BLANCO 32 www.honeywellgenerators.
ESPECIFICACIONES GENERADOR HW5500 / HW5500L HW5500E / HW5500EL Longitud [pulg./mm.] 29 / 736,6 29 / 736,6 Altura [pulg./mm.] 27 / 685,8 27 / 685,8 Ancho [pulg./mm.
ESTA PÁGINA SE DEJÓ INTENCIONADAMENTE EN BLANCO 34 www.honeywellgenerators.
GARANTÍAS GARANTÍA LIMITADA DE NORTHSHORE POWER SYSTEMS Generador portátil Honeywell Vigente a partir del 1 de agosto de 2008 GARANTÍA LIMITADA Northshore Power Systems, LLC, (NSP) reparará o reemplazará, sin costo alguno para el cliente minorista original, en América del Norte, cualquier pieza del generador portátil que NSP o un centro de servicio autorizado considere como defectuosa en material o mano de obra.
GARANTÍA DE CONTROL DE EMISIONES DE NORTHSHORE POWER SYSTEMS GARANTÍA DE CONTROL DE EMISIONES DE NORTHSHORE POWER SYSTEMS 1. Sistema de medición de combustible A. Empaques del carburador B. Sistema de estrangulación C. Abrazaderas D. Filtro de combustible (si está equipado) y pantalla E. Línea de combustible, válvula de control y accesorios F. Bomba de combustible (si está equipada) G. Carburador de gasolina y componentes internos (si está equipada) 2.
GARANTÍA DE CONTROL DE EMISIONES DE NORTHSHORE POWER SYSTEMS 5. 6. para control de emisiones tiene defectos, si el trabajo de diagnóstico se realiza en un distribuidor autorizado del generador NSP Honeywell. Cobertura consecuente. La cobertura aquí establecida se extenderá hasta la falla de cualquiera de los componentes del motor ocasionada por la falla de cualquier pieza para control de emisiones que aún se encuentra bajo garantía. Mantenimiento.
ESTA PÁGINA SE DEJÓ INTENCIONADAMENTE EN BLANCO 38 www.honeywellgenerators.
ÍNDICE ALFABÉTICO A Generador almacenamiento 30 arranque 16 detener 18 especificaciones 33 etiquetas de seguridad 3 funcionamiento 15 información de la placa de identificación 5 tomacorrientes 13 transporte 29 ubicación 15 Aceite, cambio 23 Almacenamiento del generador 30 Arranque manual (cuerda de arranque) 17 Artefactos alimentar 18 Información sobre el vataje 19 normas para alimentar 18 B Batería 10 I C Centro de control de alimentación terminal de conexión a tierra 13 tomacorrientes domésticos 13 Com
ESTA PÁGINA SE DEJÓ INTENCIONADAMENTE EN BLANCO 40 www.honeywellgenerators.
PIEZAS DE MANTENIMIENTO Para ordenar piezas de mantenimiento, visite www.honeywellgenerators.com o llame a la Línea de asistencia al cliente al 1-888-HWHELP1 (494-3571).
Northshore Power Systems, LLC 4425 N. Port Washington Rd., Suite 105 Milwaukee, WI 53212-1082 USA HW5500/HW5500L/HW5500E/HW5500EL February 2009 - P/N: 100900D c 2009 Northshore Power Systems, LLC TEL 1-888-494-3571 The Honeywell Trademark is used under license from Honeywell International Inc. www.honeywellgenerators.com Honeywell International Inc.