View Operator Guide for Rapid Eye Multi-Media Units K5404V9 – 12/04 – Rev.
ISSUE DATE REVISIONS V9 September 2004 Honeywell template V9–B December 2004 Formatting: pagination; minor edits.
Table of Contents 1 Running View................................................................................ 1–1 1.1 Starting View ................................................................................................................................ 1–1 1.2 View Window: the Sites Tab ........................................................................................................ 1–2 1.3 Your Account Information .....................................................................
View: Operator Guide 6.10 Alarm Station.............................................................................................................................. 6–20 6.11 Fault Relay ................................................................................................................................. 6–21 7 Clips and Stills ............................................................................. 7–1 7.1 Making and Saving a Clip ........................................................
1 Running View Preparation Your Rapid Eye Multi system administrator (Multi SA) needs to prepare a Multi database before operators can run View. How to do so is explained in the Admin User Guide, part no. K5403. 1.1 Starting View Figure 1. Shortcut for View, on the Windows desktop !1 To start and log on to View 1. On your Microsoft Windows desktop, do one of the following: • click Start, point or click to Programs and then Rapid Eye Multi-Media. Click Rapid Eye Multi-Media View.
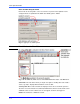
View: Operator Guide User account and password Passwords can be assigned to a user account. Use of passwords is optional. How to setup passwords is explained in the Admin User Guide, part no. K5403. Fig. 2. Logging-on to a Multi system 1.2 View Window: the Sites Tab Fig. 3. On the Sites tab, Multi sites are either Multi-Media units and/or older Multi units. action tabs. The Sites tab is where you begin. See figure 3.
Running View 1.2.1 Selecting a Multi Site A “site” is a Multi-Media unit or Multi unit that is connected and operational. !2 To select a site • After starting View, the Sites action tab and its toolbar are displayed by default. Click a “site” name listed on the tab. For lists of sites that are long, use the Quick Search. Missing site If the site is not listed, click Refresh, as explained 1.3: Your Account Information.
View: Operator Guide 1.2.3 Site Properties A site’s properties—name, location, and connection details—are controlled by a Multi SA. You can view, but not edit, a site's properties. Finding out about a site’s properties can be useful: • to check if the time zone from which images are being obtained is correctly set • to obtain a remote unit’s serial number to report a malfunction • to check the phone number on a dial-up connection, if the connection cannot be established.
Running View Info: viewing your administrative information Multi View makes your Multi account’s information available. Info indicates the database file in use, its location, the name of the user account, the rights of the operator using the account, the status of alarm notification and more. !6 To display the Information dialog • 1.4 Click Info on the View menu. Customizing the View Window Screen real estate: hiding the toolbar and status bar On smaller PC screens, real estate for video can be limited.
View: Operator Guide 1.4.1 Sites Tab: Toolbar Reference Table 1 Sites toolbar Command Function/Session To use the latest Multi database: rights in user account, sites added, modified or deleted, and so on. 1.3 To display this guide in PDF format. 1.5 To display live video from the site that is selected on the Sites tab. 2.1.1 To display recorded video, stored at a site. 3.1.2 To search a site for events that are set to be silently recorded. To search for data from customer devices.
Running View Other guides Other guides by Honeywell are available after installing View software: Honeywell, Please Read This First!, K9700 ———, Multi-Media Software: Software Setup Instructions, K5401 These user guides are available in Adobe’s portable document format (PDF), on the View operator’s PC, by clicking: Start / Programs / Rapid Eye Multi-Media 6.2 / Documentation / … Web site http://www.Honeywellvideo.
View: Operator Guide Please continue.
2 Live Video Live video versus recorded video Using a Live session, you can access and monitor the video feed of many cameras at once, and even access many Multi sites, all at once. This section shows how to: • obtain live video • use cameras that can pan, tilt and zoom • end a Live session. See also recorded video. See 3: Recorded Video, starting on p. 3–1 data. See 11.1: Live Data, on p. 11–1. audio. See 8.2: Live Audio on p. 8–1 On a dial-up connection: do not use audio.
View: Operator Guide 3. Either: • a Connection dialog appears; see figure 7, below. Select a connection, then click OK. A tear-away player then appears, as in figure 8. • a tear-away player appears in the session pane and a list of streams (cameras and other data devices) is displayed; see figure 8. Fig. 7. Choosing a connection. 2.1.2 Selecting Cameras “Stream” identifies the different feeds—video, audio or data—coming through a Multi-Media unit. !10 To select live video feeds from a site 2–2 1.
Live Video Fig. 8. Live session: connection icons ( ) appear on the site list. Fig. 9. Live video feed, from a camera named ‘side entrance’, at a site called ‘Foucault facility, 232’.
View: Operator Guide !11 To move and size a tear-away player window • You can drag a player window from the View window. When dragged away, an asterisk is added to the title of the tear-away player’s name. !12 To return a tear-away player to its session pane Click either: • . The Embed button. It appears when a tear-away player is dragged from the session window. • Embed command, on a session’s Windows menu. A player returns to the session pane.
Live Video Fig. 10. Locating commands to manage video feeds. Fig. 11. The “View” menus: a “main” one, in the View window, and in each player.
View: Operator Guide !16 To toggle the size of a camera window/data window • 2.1.4 Double-click the title bar of a camera window. The camera window quadruples in area; its video is now a “double-sized stream”. To return the camera window to its original size, double-click the title bar again. Video Smoothing and Quality Video smoothing Smoothing markedly improves the display of video on a PC monitor. Smoothing is not recorded; it is an effect that you can apply to live or recorded video.
Live Video Video quality: Live sessions Video quality while monitoring live sessions can be lowered on low-speed dial-up connections to improve the transmission time of images. It can also be heightened on one camera for more detail, as needed. The Video quality of recording is customized globally. Once video is recorded, its Quality setting cannot be changed. See 4.1: Adjusting a Video Feed on p. 4–1. !19 To set the Video Quality on one camera 1.
View: Operator Guide Fig. 13. Globally customizing the time reference. Customizing the time reference does not change the time on your Multi-Media unit or your PC. Only the display changes. See also 6.9.1: Setting the Date for Correct Alarm Sorting, p. 6–20. !23 To temporarily change a time reference Click Set Time Reference on the tear-away player’s File menu. A Customize Time Reference for Session dialog is displayed to set the time display reference to either your LTZ, the camera’s RTZ or to UTC.
Live Video Fig. 15. Microsoft Windows’ screen area settings. Note the change in size of the camera windows, as the screen area changes—camera 2 is highlighted for comparison. More cameras can be seen at once, and at higher resolutions (here five cameras at 320×240 resolution) when a recommended setting is used, as in A or B. Even at settings that are not recommended, video can still be viewed: some camera windows then extend beyond the monitor’s surface.
View: Operator Guide Table 2 Microsoft Windows: Display Properties, Settings Screen area (pixels) Recommended by Honeywell for viewing higher video resolutions 1600 by 1200 yes 1280 by 1024 yes 1152 by 864 no 1024 by 768 no 800 by 600 no 640 by 480 no * Video can still be viewed and worked with by using smaller screen area settings; see figure 15. !25 To change a PC monitor’s Refresh Rate 1. On the Microsoft Windows' desktop, click Start. A list of menus appears showing the Settings menu. 2.
Live Video 2.2.2 Sizing Camera Windows Optimal rendering As an operator makes a camera window larger or smaller, the resolution of its video image changes. The resolution is optimized for window size and speed of delivery. For live work, video at higher resolutions makes more use of the processing power of an operator’s PC. Sizing camera windows An operator can size camera windows optimally for a given resolution. !26 To size a camera window optimally for a resolution 1.
View: Operator Guide Resolution gauge: metering When an operator sizes a camera window smaller or larger than optimal, marks appear in the rectangles of the resolution gauge. Figures 19 and 20 illustrate metering, when an operator sizes a camera window with the mouse. The icon’s bottom row behaves the same way for NTSC and PAL. Fig. 19. Meter in resolution gauge: Camera window is stretched from smaller than optimal size to optimal size. Fig. 20.
Live Video 2.2.4 Initial Camera Window Size You can customize the initial size at which camera windows appear. !27 To customize the size at which camera windows open 1. On the main View menu, click Options, then New Players. The Options for New Players window appears, as in figure 21. 2. Select either Best Fit or Image Size. If you select Image Size, you can then choose a size for Multi-Media units using NTSC, PAL or both. Fig. 21. Changing the size at which Camera windows appear. 2.2.
View: Operator Guide Table 4 Resolution legend: NTSC camera (pixel × pixel). resolution gauge n/a resolution legacy 160×120 320×240 640×240 640×480* 704×480* * Not shown when connected to Multi-Media LT units.
Live Video Table 7 Unit’s message message CPU version* Rapid Eye Multi-Media V6.2 P4 4.5 Rapid Eye Multi-Media V6.1 P4 4.4 Rapid Eye Multi-Media V5.2 P3 4.5 Rapid Eye Multi-Media V5.1 P3 4.4 ADEMCO Video Multi*Media V5 P3 4.1.0 to 4.3.0 * The version is listed in Maintenance on the System tab. Older units Older Rapid Eye units (Multi, Plus) use a “Legacy” resolution of 320 × 192 pixels. When viewing video from an older unit, Camera windows are smaller and no resolution gauge appears.
View: Operator Guide 2.3 Pan, Tilt and Zoom Flexibility Like most of the Multi security features, use of cameras that can pan, tilt and zoom (PTZ) is optional. Your Multi SA can inform you if PTZ cameras are connected to Multi-Media unit(s) in your system. Before you can use a PTZ camera ... To use the PTZ controls, your Multi SA first has to: • add the Use PTZ right to a View operator account. This enables the PTZ toolbar in a live session.
Live Video !30 To pan/tilt a PTZ camera • Click the mouse when the pointer displays an arrow. !31 To stop a PTZ camera that continues to pan/tilt 2.3.1 1. Move the pointer to the center of the image until a small, white, octagon—a “stop” icon—appears. 2. Click the stop icon. Using Preset PTZ Positions Security effects of PTZ use on recorded video Moving a camera affects the video being recorded by your Rapid Eye Multi-Media unit.
View: Operator Guide Table 8 Position after close of session, for PTZ cameras Session ends... Behavior Stay put The camera remains in the last position used by the operator. If it is panning, it keeps on panning; if it is not moving, it stays put. The “stay put” behavior makes available the Return to Auto-iris and Return to Auto-focus options. Go to preset 1 The camera returns to “preset 1” configured using Multi. Start tour 1* Some camera models can keep moving when not in use by an operator.
Live Video 2.4 Ending a Live Session !34 To end a live video monitoring session • Close the tear-away player “Live from …” window. - or - • Click Disconnect on the View toolbar. This also closes other sessions such as retrieval or alarm at the site. This removes the “Live” indicator beneath that site, on the Site action tab. Ending a live session discards all video feeds. A live session also ends when you exit View.
View: Operator Guide Please continue.
3 Recorded Video Recorded video Using a Retrieval session, you can access the recordings from many cameras, and even access many Multi sites, all at once. 3.1 Viewing Recorded Video Process Start by selecting a Multi site and then running a Retrieval session. You can specify the date and time of the start of the video. Recorded video reaches your PC until you end the Retrieval session. Use procedures !35 to !39. 3.1.1 Selecting a Site !35 To select a site 3.1.2 1.
View: Operator Guide 3.1.3 Specifying the Start Time When you start a Retrieval session, Multi automatically sets the start date and time to the nearest minute. You can change the start of a Retrieval session. You have the option of specifying the beginning date/time of the retrieval session before or after selecting video feeds. !37 To type the start date and time of a retrieval 1. In the Stream List dialog, click the part of the date or time that you want to change in the Retrieve from boxes. 2.
Recorded Video !38 To set the date of a retrieval with the calendar utility 3.1.4 1. In the Stream List dialog, display the calendar utility by clicking the arrow next to the date box. See figure 24, above. 2. Click a date in the calendar. To go to another month, click the arrow keys next to the month/year heading in the utility. Selecting Cameras You have the option of selecting cameras before or after specifying the beginning date/time of the retrieval session.
View: Operator Guide 3.2.2 Skipping Through Video For quickly spotting recorded video, use the skip-to-time slider. !42 To spot video by skipping through it • Drag the skip-to-time slider to the right of its center position. The amount of skip appears as a tool tip on the slider. See figure 27. After using the time slider, the time in a Camera window caption changes and the skip-to-time slider returns to a central, “Now” position.
Recorded Video Power outages and so on, can temporarily stop a unit from recording. When recording resumes, there is a “hole” in the video archive. These holes can cause the later media indicator to appear. !44 To obtain a report on later media • If after skipping through video (see above) a later media indicator appears and flashes, click its clock-face icon. A report appears, as in figure 30. Right-clicking hides the icon and no report is produced. Fig. 30. Obtaining a later media report. 3.2.
View: Operator Guide Table 10 Jump-to-time results recorded video (time) tool tip (text) jumps to... (time) 10:02:02 2 minutes later 10:04:00 10:02:57 2 minutes later 10:04:00 10:02:02 2 minutes earlier 10:01:00 10:02:57 2 minutes earlier 10:01:00 Requesting video from many cameras Since images from many cameras may need a few seconds more to appear, retrieving video from many cameras at once offers images from slightly before the top of the minute of the “Go to time” you request.
Recorded Video Fig. 31. Image size: menu and report, available in a camera window during a Retrieval session. Resolution gauge: the resolution at which the recording was made During a Retrieval session, a resolution gauge reports if a camera window’s size is smaller-than-optimal, optimal or greater-than-optimal for the recorded resolution. The icon is shown in figures 32 (for NTSC) and 33 (for PAL). Fig. 32. Resolution gauge for NTSC: indicates resolution setting for video recorded by that camera. Fig.
View: Operator Guide Table 13 Recording: resolution selection for PAL camera (pixel × pixel) resolution 192×144 384×288 704×288 704×576* gauge * Not available on Multi-Media LT units. 3.4 Ending a Retrieval Session !46 To end a recorded video monitoring session Do one of the following: • Close a “Retrieval from [site name]” window. - or - • Click Disconnect on the Toolbar. This also closes other sessions (e.g., live video, retrieval, alarm) at the site.
4 Troubleshooting Video 4.1 Adjusting a Video Feed Camera attributes of video feed To adjust the video feed of cameras, ask your Multi-Media system administrator (Multi SA) or View operator that has the right to run maintenance sessions. Video feeds are adjusted individually for each camera while running a maintenance session. You can adjust a video feed’s: • brightness • contrast • hue • saturation • gain (AGC) Fig. 34. The Motion and PTZ selections show different controls.
View: Operator Guide The cameras connected to a Multi-Media unit are detected automatically. You can name a camera and adjust a camera’s picture settings during a maintenance session. !47 To configure a Rapid Eye site’s camera(s) 1. Run a maintenance session at the site. 2. Click the Video tab and adjust Picture controls as needed. See figure 34. The adjustments are made on the fly; you do not need to click the Apply button, as for older Multi units. 3.
Troubleshooting Video Fig. 35. High recording rates can slow live sessions. System priority If overtaxed, the priority of a Multi-Media unit is always to capture and store video, audio, data and alarms. This may result in slower service to View operators. If the video you are observing appears sluggish, Honeywell recommends that a Multi SA: • Set similar recording rates for all cameras. Try to set up similar recording rates for all cameras.
View: Operator Guide 4.2 At the Source… Cameras in the environment Normal operation of View can reveal weaknesses in the position of cameras. Video surveillance can be hampered by: • blind spots. Mobile equipment, vehicle docking, renovation work, and so on. • environmental lighting. a camera can be rendered ineffective by direct sunlight, artificial lighting or their opposite, darkness. • environmental conditions.
5 Searching for Motion 5.1 Setup Before you can use motion search, your Multi SA needs to run a maintenance session to enable Motion detection for each of the cameras whose video may eventually be searched for motion. !48 To enable motion detection • See the Admin User’s Guide. Motion search works only if “motion detection” was enabled during the recording of the video that you plan to search. Fig. 36. Motion button, for starting a Motion session. Starting a Session Fig. 37.
View: Operator Guide A “Search for Motion at [sitename]” session appears in the session pane. Contextual help A reminder of the next step that you need to take is displayed near the upper-right corner of the Search for Motion window. See figure 37, above. 5.2 Preparation Fig. 38. Steps to prepare a search for motion. !50 To prepare a motion search 5–2 1. Click Motion Search and click the arrow in the Stream box to display a list of the site’s cameras. Other streams are not listed in a Motion Search.
Searching for Motion 5.2.1 Early “From”; Future “To” First available video From. If the “from time…” for a motion search is a time at which the unit was not recording video, the first image after the requested time is displayed. A flashing later media icon appears, indicating that the image in a still frame is later than the “from time” requested. See figures 39 and 40. The earliest date that can be selected using the calendar utility is January first, 2000. Fig. 39.
View: Operator Guide 5.2.2 Motion Threshold Options can be ignored The simplest way to obtain a report of motion in the video is to click Search after clicking Fetch; see procedure 50 in 5.2, above. Use of Motion Threshold or Masking that Detects Motion, explained in this section and 5.2.3, are optional. If this is your first read-through of these options, please skip to p. 5–7 for 5.3: Search Report, and come back to find out about the search options later. See figure 41. Sensitivity.
Searching for Motion !52 To focus motion search on an area of a video feed’s picture 1. After preparing a motion search, as explained in 5.2, Preparation, click the Show / Hide mask button. You have the option of clicking the Show / Hide masking grid button. 2. , , On the larger image, click where you need the motion search to occur. Blocks appear as you click on the image. You can click as many times as needed. See figure 42. !53 To remove a block in a mask • Click the block.
View: Operator Guide Global masking commands Show mask. Displays/hides where the search for motion occurs. When masks are hidden, the entire area of the video is searched. Show grid. Toggle to display a grid overlay, to help select the area(s) used to search for motion. Works like the Show / Hide masking grid button. Set all. Covers the entire area of a video image with a mask. The mouse can then be used to remove part of the mask, as needed.
Searching for Motion 5.3 Search Report !57 To obtain a report • After preparing a motion search (see 5.2, Preparation), and using the optional motion options, click Search. A motion search report is produced. See figure 43. Motion is reported each time it is detected between the From and To date and time. Fig. 43. Motion search report. 5.3.1 Report Options Magnitudes filter (Filter Mag.
View: Operator Guide Example To obtain a report of only the highest magnitudes, say from 90% to 100%: • click in the From box and then type “90”, without quotation marks. The report is updated on-the-fly. Fig. 44. Detail of selection in frequency chart of a report. Selecting items in the report You can select one or more items in the report using either: • the list of every detected motion. • the density chart, at the top of the report. See figure 44.
Searching for Motion Unselect To show the report without any highlighting, click Unselect. Fig. 45. Effect of Zoom button on selection of list items. Zooming makes a cluster of items appear more spread-out, and facilitates a finer selection. Items that are out-of-order in the list Setting the clock on the Multi-Media unit back in time can produce such results. The items are still in order, even if the time index contradicts the list. 5.
View: Operator Guide Fig. 46. Detection options toolbar: Sensitivity and Interval. You can control the playback using the playback toolbar, much as you would in a Retrieval session. See figure 47, in the next section. 5.4.1 Video Controls for Motion Replay video: seeing a video excerpt again The Replay button restarts an excerpt of video. Step / next frame Click repeatedly, as needed, to view video frame-by-frame. Useful if the pause button is clicked just a moment too soon.
Searching for Motion Fast-forward to next event The fast-forward button speeds up video, then slows down video to 1x speed (auto1x), four seconds before the video shows the detected motion. The slowing of video is a cue that motion is about to be displayed. After you have witnessed the motion, you have the option of leaving the video at 1x speed or of clicking the fast-forward button again, speeding up video leading to the next instance of motion. This behavior can be defeated; see procedure !61.
View: Operator Guide 5.5 Opting for a Retrieval Session Video from many cameras To view video from many cameras, at the time that the motion was detected, a Retrieval session can be started from a Motion Search session. !63 To view video in a Retrieval session 1. Select one or many items in the Motion Search report. 2. Click Retrieval. A Retrieval session starts, starting at the time indicating that motion was detected, using all cameras. A box is added, showing that a Motion event is being shown.
Searching for Motion 5.6 False Positive Reports Motion search can be triggered by changes in lighting or movement outside of an area of interest. 5.6.1 Flashing Lights A Source of false positives A computer monitor can also be a source of false positives. To unmask it or a flashing light from a search for motion, see figure 51. !65 To mask out a flashing monitor 1. After preparing a motion search (see 5.2, Preparation), click Hide mask button. 2.
View: Operator Guide 5.6.2 Smaller Detection Masks The easiest solution for false reports of motion is to use smaller masks to search for motion. For example: to search for the opening of a door, when many people walk by that door, set the motion search mask on the top corner of the door. See figure 52. Fig. 52. A small detection mask. Dotted line shows lower bound of the mask. Motion masks behave differently when used to trigger alarms. Read about motion detection in the Admin User Guide. Fig. 53.
Searching for Motion 5.6.3 Using Highlighting Motion Highlighting. Enables/disables the highlighting of motion. If you are getting more reports of movement than you expect (false positives), click the Motion Highlighting button, while running a video feed. This lets you “see motion” as it is detected by a Multi-Media unit: when enabled, moving objects produce colored pixels. The color indicates if Multi will report the movement or not. For the location of the button, see figure 47. • red or green.
View: Operator Guide 5.7 Saving & Reusing Search Data You can save the: • date and time for a motion search and its motion detection options for reuse. - and/or - • 5.7.1 lists of movement found in the video or edited lists, for further use with word processing software or spreadsheets. Repeating a Motion Search !68 To save the date, time, mask, motion options 1. You have the option of saving all preparation settings by clicking Save Cfg (“save the configuration settings”).
6 Alarms and Events 6.1 About Alarms Flexibility A Multi system administrator (Multi SA) can set a Multi-Media unit to: • log events and/or have them trigger an alarm. No special hardware is needed for such alarms: they ring on an operator’s PC. By default, some events are always logged, for administrative purposes. • send alarms to a designated PC. Such a PC is then known as a Multi-Media alarm station. See 6.10: Alarm Station, starting on p. 6–20. Fig. 54.
View: Operator Guide Viewing video from the time of the alarm A View operator has the option of customizing if and how video from the time and site of the alarm is received. Video can be seen: • immediately. Live video from the site where the alarm was sent is seen fullscreen. See 6.2: Live-alarmed Session. Alarms are then acknowledged and rearmed as needed. • on request. See 6.3: Alarm Session. Video from multiple alarms can be managed, with video retrieved as needed. Event processing Fig. 56.
Alarms and Events Options Run live alarm session on alarm. Running a live session while an alarm is pending causes live video of all cameras at a site to be displayed full screen. Receiving an alarm during an alarm session does not open a Live-alarmed session. See 6.2: Live-alarmed Session. Beep on alarms. Makes the operator’s PC produce and repeat a short, pitched, electronic tone when a Multi-Media unit reports an alarm.
View: Operator Guide 6.1.2 Alarm Rights for Operators !72 To receive and process alarms A View operator needs the Multi SA to: 1. Add the Process alarms right to a View-operator account. - and to - 2. Grant access to sites set to send alarms. Time limit for operating sites: suspended while processing alarms Operator accounts restricted by a time limit for operating Multi-Media units do not show a countdown when processing alarms: the time limit is cancelled while processing alarms.
Alarms and Events Fig. 59. Location of toolbar in a full-screen Live Alarmed session. This Multi-Media site is using only four of a possible sixteen cameras. 6.2.1 Clip of Alarm Video A clip of all live cameras can be made manually or automatically. Preparation • Automatic. Select Automatic record for live alarm box, as explained in 6.1.1: Customizing Alarms. During a Live-alarmed session, the clip starts recording without prompting, in the background. • Manual.
View: Operator Guide !74 To stop making a clip during an alarmed-live session 6.3 1. To stop recording, do one of the following: • click • close the live alarmed session. 2. Either: • save the clip. Type a name for the clip in the Save dialog that appears and click OK. • discard the clip. Click Cancel. , the recording-a-clip button Alarm Session Depending on your selection of alarm handling options, a live alarm session may be disabled.
Alarms and Events 6.3.2 Acknowledging an Alarm Why acknowledge (ACK) before REARM? When operators ACK alarms, the alarms remain listed, for operator reference. Alarms cannot be triggered again if not rearmed. This can be simpler than turning alarms off, for example: during construction work or other temporary onsite situations. See your security officer about alarm handling and alarm suspension. !76 To acknowledge an alarm in an alarm session 1. Start an alarm session, or switch to one.
View: Operator Guide !77 To acknowledge all alarms in a live-alarmed session 1. Set your copy of View to “Automatically acknowledge alarms”, as explained in 6.1.1: Customizing Alarms. 2. In a live-alarmed window click the small next to alarms in the alarm list. on the toolbar. An “(A)” appears If Automatically Acknowledge Alarms is not enabled the button only stops the alarm bell. If disconnected...
Alarms and Events !80 To view recorded video from the time of an alarm 1. While running an alarm session, select an alarm from the session’s tear-away player, as explained in 6.3: Alarm Session. 2. To start a Retrieval session from the time of the alarm, click Video. When a site has many cameras, you are asked to select one or more. See figure 60 and 61. 3. To watch video obtained before or after the time of the alarm, use the jump-totime slider as needed. For other controls, see 3.
View: Operator Guide Surveillance common sense View operators may find that security video from outside world and customer-device events is usually more informative than from other events. For example, viewing video from the time of an alarm, caused by an intrusion detection sensor at your site, makes good sense. Video from the time of a session start might/might not make as much sense since the event did not happen at a Multi site.
Alarms and Events Terminology note Outputs can also be referred to as general-purpose outputs (GPOs), in some technical documentation. 6.6.1 Peephole Application One application for outputs is to remotely unlock a door after visual inspection of a doorway. Preparations Installation personnel wire two devices to a Multi-Media unit: • the locking mechanism of a security door (or gate) • a doorbell.
View: Operator Guide How can Multi events be processed? Events are set during site-by-site maintenance sessions, to either: 6.7.1 • sound an alarm. View operators are warned when the event occurs. Operators can use information about it, to search for video at the time of the event. See figure 56. • be logged. The event name and its time are logged on the remote video unit. Logged events are not listed during an alarm session. See figure 76 on p. 10–1. • do both.
Alarms and Events Multi-Media unit back to the state that it was in, before the two “applies”. For an illustration of these buttons in the Maintenance window, see figure 62 on p.6–13. 6.7.2 Events !87 To set an alarm on the events tab 1. Continue or start a maintenance session. To start a session, see 6.7.1: Maintenance Session. 2. Click the Events tab. Select a sub-tab, as needed.
View: Operator Guide 6.7.3 Customer Device Selecting a customer device Your Multi SA configures your Multi system to deal with customer devices. For example, a retail store wants to obtain video of employees at a point of sale (POS), when goods are purchased. Figure 63 shows what the Data Recording tab might look like. !88 To set an alarm for a customer device 1. Continue or start a maintenance session. See 6.7.1: Maintenance Session. 2. Click the Data Recording tab.
Alarms and Events 6.8 Multi-Media Event Reference Flexibility Your Multi SA, security personnel or View operators decide which events should trigger alarms. Sources of events • outside world. Events triggered by sensors connected to a unit or by Rapid Eye’s motion detection. • customer-device. Messages from a cash register, card swipe and so on, that can be sent to a Multi-Media unit. • Multi-Media unit. For notification a Multi SA of events at the unit.
View: Operator Guide Table 15 Event default settings for log and alarm source event log alar m View operator Session: connect, reject and disconnect nil nil Maintenance: configuration, security, system files, synchronize time, clear storage, clear stream “ “ Outputs: activate, deactivate* “ “ Multi-Media unit System: run-time failure, self-restart, reboot, no video recording, time server unusable, no synchronization in 24 hours, excessive system clock drift, SMART disk failure log by default
Alarms and Events Table 16 Event reference, by source and tab.
View: Operator Guide 6.8.1 Testing Alarms It is a good idea to test the alarms that you set. Find out if you are better served with a Live-alarmed response from View. To set alarm options, see 6.1.1: Customizing Alarms, on p. 6–2. 6.8.2 Logging Events Silently “Logged” events that do not produce an alarm are stored in the Rapid Eye Multi-Media unit, onsite. Logged events are not listed in the alarm log; to find them, see 10.2: Searching for Event Records, on p. 10–1. !89 To log an event 1.
Alarms and Events !90 To display the alarm log 1. Using View, click the Log action tab. The buttons on the View toolbar may change. 2. Leave or select another “earliest date and time” in the Show Alarms from boxes. See figure 65. 3. Leave or select another “latest date and time” in the Show Alarms up to boxes. 4. Click Display Alarm Log or pane. . The alarm log appears in the session !91 To input different times and dates Click on the part of the time or date that you want to change.
View: Operator Guide 6.9.1 Setting the Date for Correct Alarm Sorting Multi-Media reports use true chronological lists of alarms only if care is taken to express the date in numbers. Make the date display as “yyyy-MM-dd” in Microsoft Windows. !94 To set the windows date 6.10 1. Using Microsoft Windows, click Start. 2. Click Control Panel on the Settings menu. 3. Double-click the Regional Settings icon. A Regional Settings Properties window appears.
Alarms and Events Speed of alarm notification After you have set events to “alarm”, and alarm hardware connected to the video unit is triggered, notification of the event is either: • immediate. Your Multi-Media units are networked to the alarm station or an alarm session is in progress at the site where the alarm occurs. Note that units using dial-up connections monopolize an operator’s modem: it is not possible to run alarm sessions at many of these sites, at the same time.
View: Operator Guide Please continue.
7 Clips and Stills 7.1 Making and Saving a Clip Definition A clip is a copy of video, audio or data. A clip is made during a live session or a retrieval session. Clips are listed on the Clips action tab. See figure 66. Purpose of clips After using View to make clips, you can: • view portions of video without having to connect to a site • review clips at a later time • copy clips to other computers. How to check folders for clips is explained in 7.2.
View: Operator Guide 7.1.1 Clip of Live Video Clips made from live video hold all streams, unlike clips made from recorded video. !96 To make a clip from live video 1. From a site, start a live session; see 2.1.1: Starting a Live Session, p. 2–1. 2. Select the streams that you need to record. Only the video that is being shown is recorded. You have the option of adding/removing streams while the clip is playing. Only while their camera windows are open will their video be part of the clip. 3.
Clips and Stills 5. When all the video you need is recorded, click again. A dialog is displayed: Retrieval at [site name]: Save Recorded Clip to File. 6. As you would with any file, name the clip and choose a folder where the clip will be stored. When you save the clip, it is stored as a *.rem file and the …Save… dialog is closed. 7. You have the option of ending the session. See 3.4, on p. 3–8. Honeywell recommends storing stills and clips in their own folder.
View: Operator Guide 7.1.5 Customizing Storage Clips and stills are stored by default in the Multi application folder. To store them elsewhere, use the next procedure (98) to create a folder. !98 To create a folder to store stills and/or clips 1. Using View, click the Clips action tab. 2. Click the Directory button. 3. Click the “create new folder” button, 4. Type the name of your choice for the stills and clip folder, such as: “Multi Clips and Stills”. 5.
Clips and Stills 7.2 Viewing a Clip Play options Using View, you can play • one clip at different speeds, as during a retrieval session. • many clips at once, each in its own session. Use this to compare two scenes or two subjects at different times. - or - • copies of the same clip. Use this to compare a clip with itself, to note minute details of what is captured on video, or to compare two times within the same clip. Fig. 68. List of clips on the Clips action tab !101 To view a clip 1.
View: Operator Guide Double-clicking several *.rem files causes multiple MultiClip Player sessions to be opened. To free up Windows resources, remember to close MultiClip Player sessions when finished. 7.3 Coarse Editing Comparing events: making a clip with a jump While making a clip from recorded video: after clicking on the Playback toolbar, you to jump to a past or future time. This have the option of using the Go to command coarse editing is useful for comparing two events within the same clip. 7.
Clips and Stills !106 To view copies of the same clip at once To highlight a portion of a clip, you may want to view a copy of it slightly out of sequence with the original. 7.4 1. Using Microsoft Windows’ Explorer, duplicate the *.rem file in its folder. To do so, use Windows explorer to locate the file and to make a copy of it in the same directory. By default, Windows makes a copy of filename and names it copy of filename. Use standard Windows techniques to rename the copy of the file as you see fit.
View: Operator Guide Fig. 69. Enabling production of still shots from video (i.e. bitmaps). After enabling View to produce bitmaps, a stills button appears on the session toolbar when you run live, retrieval or clip sessions. See figure 70. Many bitmaps from one click Stills are produced at a rhythm matching the camera frame rate. For example, setting cameras to capture 10 frames of video per second each produces ten bitmap files (*.BMP) per second, per open camera.
Clips and Stills !108 To produce bitmaps of a camera feed • While running a live, retrieval or clip session, click the stills button. The button starts flashing. !109 To stop producing bitmaps of a camera feed • 7.4.2 While the stills button is flashing, click it. Still: Name Reference Fig. 71. Stills listed on the Clips action tab. Note the *.bmp files. Microsoft Windows file explorer The File Type for bitmaps is “Bitmap Image” in Windows.
View: Operator Guide 7.4.3 Still: Size Reference The size of Multi-Media stills gets bigger with higher resolution. For the meaning of resolution gauge readings and resolution settings, see 2.2: Resolution of Live Video, starting on p. 2–8. Table 19 Size of Multi-Media stills (bitmaps with *.
8 Audio 8.1 Overview Flexibility of Multi audio Like most of the Multi features, use of audio is optional. Audio can monitored and recorded along with video or independently of it. Your Multi system administrator (Multi SA) can inform you about which Multi sites have audio in an operational state. Hardware need View operators need a sound card in their PC to hear sound from the Rapid Eye site, to send sound to it and to have the audio toolbar shown in figure 2, appear in the session pane. Fig. 2.
View: Operator Guide Do not use audio on a dial-up connection with video. Video can be corrupted due to bandwidth limitations. Live video can be combined with audio only on a network connection. To minimize background noise • End audio monitoring of the Multi sites that do not need it. Background noise can build-up as an operator monitors more sites all at once. To talk to a Multi site • Click the channel 1 Talk button on the audio toolbar, the channel 2 Talk button or both.
Audio In many situations, unwarranted recording of audio can be unlawful. Check with local authorities if you are unsure. 8.4 Setting Up Audio setup is performed during a maintenance session. Microphones, speakers, and so on are needed for audio, both at the operator’s station and at the Multi-Media site. For audio setup procedures, see the Multi-Media Unit Installation Instructions, K9696 and the Admin User Guide, K5403. 8.5 Audio for Multi-Media LT 8.5.
View: Operator Guide Testing recording If audio recording is used, Honeywell recommends testing if the recorded audio meets your needs. After recording a few typical audio interactions, run a retrieval session to hear what was recorded. You may need to further adjust the gain controls for microphones and the volume on your speaker systems. Testing while audio interference occurs (alarm bells and so on) can reveal other needs. Fig. 4. Audio tab detail. You have the option of recording audio.
9 Watching Site Tours 9.1 About Site Tour Flexibility Like most of the Multi security features, use of site tours is optional. Your Multi system administrator (Multi SA) can inform you about which sites (if any) are part of a tour. Multi View Operators can consider these guidelines as suggestions. They are intended to complement your organization’s security policies and procedures. Process Site Tour acts like a security guard: “electronically” visiting sites in a sequential order.
View: Operator Guide 9.2 Running a Site Tour !111 To start a Site Tour 1. Click the Tours action tab in the Multi View window. Tours that are listed have been set up using the Admin software. Fig. 73. Samples of Site Tours in List Click beside the tour name to display the sequence of the sites that will be toured. Click beside the tour name to collapse the branch. Fig. 74. Site Tour Information Displayed in Title Bar 9.2.1 2. Select a tour on the tab and do one of the following: 3. Click 4.
Watching Site Tours 9.3 Site Tour: Properties You can display properties of the site tour such as the sites to be visited and the duration of time of each. These properties reflect the site tour settings made using Admin software. See your Multi SA to setup or modify a site tour. !112 To display site tour properties Do one of the following: • Select a site tour on the Tours action tab and click [Properties] on the toolbar. • Right-click on a site tour and select [Properties].
View: Operator Guide 9.4.1 Ending a Site Tour !115 To end a Site Tour • 9–4 Click the x in the top-right corner of the Site Tour window.
10 Event Search Session 10.1 Overview Preparation: only “logged” events can be searched Before you can search for the record(s) of an event, you or your Multi SA needs to set the event to “log” prior to an event’s occurrence. Fig. 76. You can set a Rapid Eye Multi-Media unit to log an event. See also 6.8.2: Logging Events Silently, on p. 6–18. 10.2 Searching for Event Records !116 To find and list records of events 1. Click on a site in the Sites tab 2. Display the Events window by clicking 3.
View: Operator Guide !117 To input different times and dates Click on the part of the time or date that you want to change and either: • press cursor keys on the keyboard. The → ← keys move the cursor to the next field, and the ↑ ↓ keys increase/decrease a value. • type a value, as needed. !118 To set the date of a retrieval with the calendar utility 1. In the Stream List dialog, display the calendar utility by clicking the arrow next to the date box. 2. Click a date in the calendar.
Event Search Session 10.3 Results You can use the search results to: • view video from the time of events located by a search. • print the log entry of an event - or - • make a copy of the log entry in a *.txt file. !119 To view video from the time of an event 1. Locate records of events, as explained above, in 10.2: Searching for Event Records. 2. From the results (see figure 77), select a record. The Video button becomes available. 3. Click Video.
View: Operator Guide Please continue.
11 Customer Devices 11.1 Live Data Messages from hardware Hardware devices that provide messages over a serial cable can be connected to a Multi-Media unit. These messages can be viewed in real time, in a live session. See also video. Section 2: Live Video, on p. 2–1. audio. Section 8.2: Live Audio on p. 8–1. 11.2 Recorded Data Purpose View can be used to search for messages from non-Multi hardware devices/systems such as: cash registers, door access sensors, a guest registration system, and so on.
View: Operator Guide Fig. 78. Search for Data window !121 To find and list records of events 1. Click on a site in the Sites tab. 2. Display the Events window by clicking 3. Either: • select events that you want to search for, by selecting them. on the Toolbar. - and / or • type an ad hoc rule in the Edit Search Data box, then click Add. Regular expressions can be used to search. Table 20 on p. 11–4 lists the special characters that can be used for performing an extended search. 4.
Customer Devices Calendar You can display a calendar utility by clicking the arrow next to the date box. !123 To set the date of a retrieval with the calendar utility 1. In the Stream List dialog, display the calendar utility by clicking the arrow next to the date box. 2. Click a date in the calendar. To go to another month, click the arrow keys next to the month/year heading in the utility.
View: Operator Guide !124 For a quick reminder of the labels associated with serial device data • 11.3.1 Run a Search for Events session, as explained in 10: Event Search Session, p. 10–1, and click the Data Recording tab. The data/rules are listed along with its labels. These are the same labels that are assigned to data during the maintenance session for the serial device.
Customer Devices Technical users who know how to use a regular expression (RE) benefit most from using the special characters in a rule. 11.3.2 Defining a Data Message What you need to know You can define messages from a customer device as: • customer-device events for Multi, during a maintenance session, by using the Data Recording tab (illustrated in figure 80). This is usually best handled by your Multi SA. - or using - • ad hoc means, by typing in a data rule and using regular expressions. Fig.
View: Operator Guide !125 To add a data-recording rule to a customer device 1. Select a data-recording device, click the Events Name box, and then type a name. 2. In the Rule box, type a code obtained from the cash register manufacturer. For example, a credit sale message could simply be coded as “CARD”, a number or some other rule. 3. Click Add, on the Events side of the tab. 4. Compare the value in the Buffer Size box to the possible length of data returned by rules typed in step 2.
12 Scheduling Flexibility Use of scheduling is optional. You also have the option of scheduling cameras and alarms before or after they are setup. Scheduling is performed unit-by-unit. A benefit of scheduling is that it spares storage on your Multi-Media unit. In a nutshell A Multi-Media unit can be set to record video only at times or days that you specify. For example, your organization might need to record video only for holidays or at night, and so on.
View: Operator Guide 12.1 Camera Schedule Basic schedule By default, all of a Multi-Media unit’s cameras are assigned to the basic schedule. Customizing the basic schedule coordinates the recording of all cameras on that unit. !127 To customize the basic schedule on one unit 1. Continue or start a maintenance session for the Rapid Eye site, as explained in the Admin User Guide. 2. To use the Basic schedule grid, click the Recording Schedule tab. 3.
Scheduling !129 To specify holidays and exceptions on one unit 1. Continue or start a maintenance session for the Rapid Eye site, as explained in the Admin User Guide. 2. Click the Recording Schedule tab. 3. Click Holiday/Exception days. See figure 82. 4. Type the day’s name in the Name box. 5. Choose whether to list the day as a holiday or an exception by clicking the arrow in the Type box. 6. To enter a date, either: • Type. Click the part of the date that you want to change in the Date box.
View: Operator Guide 12.1.2 Customizing Schedules Camera and groups of cameras You can customize the schedule of an individual camera, then assign other cameras to that schedule or to its own. !132 To assign a camera, or groups of cameras, to a schedule 1. Continue or start a maintenance session for the Rapid Eye site. 2. Click the Recording Schedule tab. 3. Click Custom schedules. The tab displays a list of cameras, along with a schedule grid. See figure 83. 4.
Scheduling 12.2 Alarm Schedule Global schedule All of a Multi-Media unit’s alarms are assigned to the alarm schedule. Customizing the alarm schedule disarms all of the alarms at these times, on those days. Fig. 84. Arming alarms for weekends, holidays and exception days. Holiday or exception days Holidays and exceptional days on the Recording schedule and Alarm schedule tabs are set using the same procedure. See 12.1.1: Holiday and Exception.
View: Operator Guide Please continue.
13 Find-it 13.
View: Operator Guide 13–2 !28 To identify a unit’s processor 2–14 !29 To see PTZ controls in a live session 2–16 !30 To pan/tilt a PTZ camera 2–17 !31 To stop a PTZ camera that continues to pan/tilt 2–17 !32 To return a PTZ camera to a preset position 2–17 !33 To set a PTZ preset 2–17 !34 To end a live video monitoring session 2–19 !35 To select a site 3–1 !36 To obtain a tear-away, video player 3–1 !37 To type the start date and time of a retrieval 3–2 !38 To set the date of a retriev
Knowledge Base: Find-it !63 To view video in a Retrieval session 5–12 !64 To return to a Motion Search from a Retrieval session 5–12 !65 To mask out a flashing monitor 5–13 !66 To turn motion highlighting on or off 5–15 !67 To adjust for false positives or false negatives 5–15 !68 To save the date, time, mask, motion options 5–16 !69 To reuse a date and time for a motion search 5–16 !70 To Save a motion Report as a text file 5–16 !71 To customize alarm options in View 6–2 !72 To receive an
View: Operator Guide 13–4 !98 To create a folder to store stills and/or clips 7–4 !99 To browse other folders for clips (*.REM files) 7–4 !100 To delete a clip 7–4 !101 To view a clip 7–5 !102 To view a clip in reverse 7–5 !103 To play *.
Tables: Find-it 13.2 Tables Table 1 Sites toolbar 13.3 1–6 Table 2 Microsoft Windows: Display Properties, Settings 2–10 Table 3 Multi-Media unit, NTSC video feeds: resolutions offered for viewing 2–13 Table 4 Resolution legend: NTSC camera (pixel × pixel). 2–14 Table 5 Dynamic resolutions for PAL cameras 2–14 Table 6 Resolution legend: PAL camera (pixel × pixel).
View: Operator Guide Fig. 8. Live session: connection icons ( ) appear on the site list. Fig. 9. Live video feed, from a camera named ‘side entrance’, at a site called ‘Foucault facility, 232’. 2–3 Fig. 10. Locating commands to manage video feeds. 2–5 Fig. 11. The “View” menus: a “main” one, in the View window, and in each player. 2–5 Fig. 12. Video Smoothing is off by default, to avoid taxing slower PCs. 2–6 Fig. 13. Globally customizing the time reference. 2–8 Fig. 14.
Illustrations: Find-it Fig. 33. Resolution gauge for PAL: indicates resolution setting for video recorded by that camera. 3–7 Fig. 34. The Motion and PTZ selections show different controls. 4–1 Fig. 35. High recording rates can slow live sessions. 4–3 Fig. 36. Motion button, for starting a Motion session. 5–1 Fig. 37. Online reminder of what comes next when searching for motion. 5–1 Fig. 38. Steps to prepare a search for motion. 5–2 Fig. 39.
View: Operator Guide Fig. 61. Retrieval session started from an Alarm session. An alarm is selected, then Video is clicked. The Retrieval session has been dragged down, revealing the Alarm session in the background. For the location of Video button in an Alarm session, see figure 60. 13–8 6–9 Fig. 62. Using maintenance to set events to report an alarm. 6–13 Fig. 63 . Events for a customer device are listed in a maintenance session. You can use these events to trigger an alarm, be logged, or both.
FAQs: Find-it 13.4 FAQs These answers to frequently asked questions (faq) include recommendations and warnings by Honeywell. On a dial-up connection: do not use audio. Video can be corrupted by using audio over dial-up. Live video can be combined with audio only on a network connection. 2–1 “Stream” identifies the different feeds—video, audio or data—coming through a Multi-Media unit.
View: Operator Guide 13–10 Power outages and so on, can temporarily stop a unit from recording. When recording resumes, there is a “hole” in the video archive. These holes can cause the later media indicator to appear. 5–3 Video keeps playing until you stop it or until the Motion Search session is closed. 5–9 Procedure !56, on p. 5–6 also explains how to exclude an area. 5–13 Motion masks behave differently when used to trigger alarms. Read about motion detection in the Admin User Guide.
FAQs: Find-it The audio toolbar (illustrated in figure 2) does not appear on a PC without a sound card. 8–1 Do not use audio on a dial-up connection with video. 8–2 Background noise can build-up as an operator monitors more sites all at once. 8–2 In many situations, unwarranted recording of audio can be unlawful. Check with local authorities if you are unsure. 8–3 Do not use audio on a dial-up connection with video. 8–3 In many situations, unwarranted recording of audio can be unlawful.
14 Index A account right: PTZ, to use, 2–16 action tab, 1–2 alarm. See also event; acknowledge automatically, 6–3; handling options, 6–3; limiting callbacks, 6–3; make clip automatically, 6–3; options, 6–3 alarm bell, and audio interference, 8–4 asterisk: in regular expression, 11–4; in tearaway player’s title, 2–4 audio: Eagle Audio, 8–4; listening to, 8–1; live, 8–1; many View operators, 8–1, 8–2; monitor, 8–3; record, 8–3; soundcard needed, 8–1; toolbar, 8–1 auto-focus. See PTZ, commands auto-iris.
View: Operator Guide F fast-forward: button, 5–11 FAULT RELAY, 6–21 Fetch, button, 5–2 first preset, PTZ, 2–18 G gain, video feed, 4–1 Go To command: while making Clip, 7–6 go to time. See retrieval session GPO (general purpose output).
Index O operator: time limit at site, 1–4, 6–4 output, technical term, 6–11 P pan-tilt-zoom. See PTZ personnel: security officer, 6–7 playback. See retrieval session Plus unit. See Multi-Media unit, historical note position of camera, 5–15 pre-detection: duration of video preview, 5–11 preset 1, PTZ.
View: Operator Guide W tilt, camera.
NOTES
Honeywell Video Systems 171 Eileen Way Syosset, NY 11791, USA www.honeywellvideo.com TEL 1-800-796-CCTV TEL+1–516–921–6704 Honeywell Security Australia Pty Ltd. Unit 5, Riverside Centre, 24–28 River Road West Parramatta, NSW 2150, Australia www.ademco.com.au TEL +61–2–8837–9300 Honeywell Video Systems UK Ltd. Aston Fields Road, Whitehouse Ind Est Runcorn, Cheshire, WA7 3DL, UK www.videocontrols.co.uk TEL +44–1928–754–000 Honeywell Security Asia Pacific Ltd.