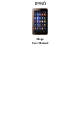
Mega User Manual 1
Welcome! Please read this information before using the phone to make a better use of your phone. we are not responsible for any damage due to your misunderstanding of this information and misacting. We are endeavoring to improve our products and services and we reserve all the rights to revise and change the description of this product and its software as well as this user’s manual without obligation to notify any person of such revisions and changes.
terminal, short circuit may occur resulting in property damage, bodily injury or burn. To avoid risk of leaking electricity, take care when handling a charged battery particularly when placing it inside your pocket, purse or other container with metal objects. Keep your mobile device from water: Keep your mobile device dry. Use while driving Always obey the laws and regulations on the use of mobile devices in the area where you drive.
device near pacemakers nor carry in the breast pocket. Accessories and battery Use the accessories, batteries and chargers approved by manufacturer. Use of batteries not approved by manufacturer may cause injury. Do not place the battery in fire ; follow local laws and ordinances in Disposing used battery. Check the model number of the charger before using it to charge the mobile. Only use approved battery , charger and accessories applicable to the specific mobile model .
your permission. Keep away from children Keep the phone, battery and charger away from children to avoid any personal injury. Use and Care To care for this mobile device, keep it away from: Any kind of fluid Keep the device away from water, rain, humidity, sweat or other moisture. Extreme heat or cold Avoid the temperature below -10℃/14℃ or above 45℃/113℃. Microwave Don’t try to dry your phone in a microwave oven.
Chapter 0 - Skills Introduction 0.1 Finger gestures Tap When you want to type using the keyboard, select items onscreen such as application and settings icons, or press onscreen buttons, simply tap them with your finger. Press and hold To open the available options for an item (e.g. contact or link in a web page), simply press and hold the item. Swipe or slide To swipe or slide means to quickly drag your finger vertically or horizontally across the screen or optical trackball.
0.2.2 Entering your PIN If your SIM card is preset with a PIN (personal identification number), you will be prompted to enter the PIN to proceed. Enter the SIM PIN, and then tap OK. Most SIM cards are preset with a PIN (personal identification number) that is provided by your mobile operator. When prompted, enter the preset PIN, and then tap Enter. If you enter the wrong PIN three times, the SIM card is blocked.
4. Tap Wallpaper to choose from preset wallpapers and then tap Set wallpaper. 0.4.2 Adding a widget to Home screen A wide selection of widgets is available for you to choose from, such as Calendar, Music, Photo Album, Friend Stream, and more. 1. Enter the main menu and slide to the right. Slide left and right to seek for the proper widget. 2. Press and hold the widget to move to the main screen to you want to put it in. 0.4.
0.4.5.1 Moving a widget or icon 1. Press and hold the widget or icon you want to move. The phone vibrates and you’ll see a blue box around the widget or icon. Don’t release your finger. 2. Drag the widget or icon to a new location on the screen. Pause at the left or right edge of the screen to drag the widget or icon onto another Home screen panel. 3. When the widget or icon is where you want it, release your finger.
Disk drive mode is available only when you have installed a microSD card on your phone. When your phone is connected to the computer, open the notification panel (see 0.6.1 Opening the Notification panel) and tap USB connected to open USB Mass Storage page, tap Turn on USB storage. Select this mode when you want to use your storage card as a USB thumb drive, and copy files between your phone’s storage card and your computer.
body of the message. 1. Tap the message with the phone number. 2. On the Select action screen, tap the number you want to call. 3. The dialer screen then opens, with the phone number automatically filled in and ready to be dialed. To place the call, press call and select SIM 1 or SIM 2 by yourself. 1.1.1.3 Calling a phone number in contacts Enter contacts list and select a contacts. In the contact information details screen, tap call button behind the number you want to call. 1.1.1.
Warning! To avoid damage to your hearing, do not hold your phone against your ear when the loudspeaker is turned on. 1.1.4 Ending a call Do one of the following to end the call: • Tap End call. • If you are using the provided wired headset, press and hold the button to end the call. 1.2 Using Call Log When you miss a call, the missed call icon appears in the title bar. Use the Call log tab of the Contacts screen to check who the caller was or view all your dialed numbers and received calls. 1.2.
You can do the follows to enabling or disabling Airplane mode: 1. Press HOME> MENU, then tap System Settings >more.> Wireless&networks, Select the Airplane mode check box to enable or disable Airplane mode. When enabled, the Airplane mode icon displays in the status bar. 2. Long press Power and then tap Airplane mode. 3. At the top of Notification number, you can tap the Airplane mode shortcut to turn on or turn off the Airplane mode.
Tips: After synchronizing contacts with your Google account, add the contact to the phone, you must select “All Other Contacts” item in Gmail account display option, the contacts will displayed in the list. 2.2.5 Import/Export Start the phone will automatically import SIM1 and SIM2 card contacts; you can cancel it in “Display options”. 1. On the contacts list screen, press MENU, and then tap Import/Export. 2.
one, but count as more than one message. These are called concatenated messages. Multimedia messages, also known as MMS, can contain text and a picture, a recorded voice, an audio or video file, a picture slideshow. 3.1.2 To create and send a text message 1. On the All Messages screen, tap create the compose screen opens. 2. Enter the phone number (the message recipient) in the To field. As you enter the phone number, matching contacts will appear on the screen.
slide. Tap the created slide (for example, Slide 1), tap Insert picture, and then select the picture you want to add to the slide. You can also navigate to the text box and enter a caption for the picture. When finished, tap Done to attach the slideshow to your message. Tips: When editing multiple slides, tap to edit the next slide or tap to return to the previous slide. While editing the slideshow, press MENU to let you preview the slideshow, add music or video to a slide, remove a slide, and more. 6.
Notes: When Auto-retrieve in MMS settings is disabled, only the message subject is downloaded. To download the entire message, tap the Download button at the right side of the message. Once the message has downloaded, tap the Play button to view the message. • If you are concerned about the size of your data downloads, check the multimedia message size before you download it. 3.2 3.2.
General settings Set the account name, your name, Signature, email check frequency, default email account. Notification settings Set the email notification, select ringtone and vibrate. Server settings Set incoming settings, outing settings. 3. Press BACK to save your changes. 3.2.6 Deleting an email account 1. On the email account Inbox screen, press Menu -> Accounts. 2. On the accounts list screen, press and hold the account, on the popup option, select Remove Account.
4.2.2 Shooting videos When you open Camera, the preview screen orientation will depend on how you are holding the phone. 1.Aim your object with the screen. 2.Touch the “shutter” button on the screen. 3.After taking,videos will save to the camera’s galley folder with the name of taking time. 4.You can view the videos by touching the preview box button. 5.Video camera settings You can touch the button of “set” in the interface of camera to do the settings 4.2.
Signing in to your Google Account lets you synchronize Gmail/Google Mail, Calendar, and Contacts between your phone and the web. You also need to sign into a Google Account to use Google Apps such as Google Talk™ and Android Market. When you turn on the phone for the first time, you are given the option to sign in to your Google Account. 1. In the Setup accounts screen, tap Google account > Yes > Next. 2. Tap Sign in. Enter your user name and password, and then tap Sign in.
3. Enter the email subject, and then compose your email. Tips: If you want to add a picture attachment, press Attach. Select the picture you want to attach, and then tap OK. 4. After composing your email, tap Send. Note: While composing the message, tap Save as draft or press the BACK button to save it as a draft. To view your draft email messages, in the Inbox, press MENU and then tap View labels > Drafts. 5.2.3.2 To view your sent messages In the Inbox, press MENU and then tap View labels > Sent.
will be automatically connected to the network. If you selected a network that is secured with WEP, enter the key and then tap Connect. 6.2.2 Checking the wireless network status You can check the current wireless connection status from the following: • Status bar When your phone is connected to a wireless network, the Wi-Fi icon appears in the status bar and tells you the approximate signal strength (number of bands that light up).
Bluetooth icon appears in the status bar. 3. Tap Bluetooth settings, then tap Discoverable to chose how long the phone discoverable to other Bluetooth devices that are within range, never, in 2 minutes or forever. 6.4 Data usage This is for your use of the GPRS traffic monitoring; you can also set their own needs. 6.5 More 6.5.
4. Open the web browser to access resources such as intranet sites on your corporate network. 6.5.1.5 Disconnecting from a VPN 1. Press and hold the title bar, and then slide down your finger to open the Notifications panel. 2. Tap the VPN connection to return to the VPN settings screen, and then tap the VPN connection to disconnect from it. When your phone has disconnected from the VPN, the VPN disconnected icon is displayed in the notification area of the title bar. 6.5.
1. When checked use wireless networks, the mobile network /Wi-Fi to determine the location. 2. Use of GPS satellites to determine your location. 6.12 Security In accordance with the options to lock screen with a pattern, PIN, or password. 6.13 Language & input Set the phone language, personal dictionary and input method and so on. 6.14 Backup & reset Its main application is loaded back up, if reinstall an application, restore backed up settings or other data.
You can use Clock to set alarms. 7.1.1 Setting the local date, time zone, and time By default, your phone automatically uses the network-provided date, time zone, and time. You can set the date, time zone, and time manually. Tips: You can also press HOME > MENU, and then tap System Settings > Date & time. 7.1.2 Setting alarms 1. Tap one of the default alarms on the screen. 2. In the Set alarm screen, set the alarm time by sliding your finger up or down on the numbers and AM/PM. 3.
1. Search: Search all the channels. 2. Speaker: You can start up loudspeaker to make the sound louder. 3. Record FM: You can record your favorite music or program. 7.4 Calendar Calendar makes it easy to stay on schedule. You can view individual calendars, or several calendars at once. You can view your events by day, by month, or in a list. You can search the titles, invitees, locations, and notes of events. If you enter birthdays for your contacts, you can view those birthdays in Calendar.
Chapter 8 - TV You can use this feature to watch Analog TV program anytime anywhere. 8.1 Turn on TV Pull out mobile phone upper right antenna, tap TV icon to turn on TV, Tap Set Region to find your location and tap Scan to enable TV program auto search, it will play the first program if the search is successful, or, please try again. 8.2 Turn off TV Tap Return/Home key to exit TV interface 8.
This TABLET meets the government's requirements for exposure to radio waves. The guidelines are based on standards that were developed by independent scientific organizations through periodic and thorough evaluation of scientific studies. The standards include a substantial safety margin designed to assure the safety of all persons regardless of age or health. FCC RF Exposure Information and Statement The SAR limit of USA (FCC) is 1.6 W/kg averaged over one gram of tissue.