EN User instructions ® DYM 762T WIFI DYM 762TX WIFI DISHWASHER
CONTENTS pag. pag. pag. pag. pag. pag. pag. pag. pag. pag. pag. pag. pag. pag. pag. pag. pag. pag. pag. pag. pag.
above and persons with reduced physical, sensory or mental capabilities or lack of experience and knowledge if they have been given supervision or instruction concerning use of the appliance in a safe way and understand the hazards involved. Children shall not play with the appliance. Cleaning and user maintenance shall not be made by children without supervision.
■ In general it is not advisable to use adaptors, multiple plugs and/or extension cables. ■ For the maximum place loading, please refer to the "TECHNICAL DATA" table/section. ■ Do not remove the plug from the mains supply socket by pulling the mains cable or the machine itself. WARNING ! Knives and other utensils with sharp points must be loaded in the basket with their points down or placed in a horizontal position. ■ Do not leave the appliance exposed to the elements (rain, sun etc).
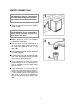
■ If it you need to move the machine after removing the packaging, do not try to lift it by the bottom of the door. Open the door slightly and lift the machine by holding on the top. Appliance complies European Directives: with ■ 2006/95/EC (LVD); ■ 2004/108/EC (EMC); ■ 2009/125/EC (ErP); ■ 2011/65/EU (RoHS) and subsequent amendments ■ For the installation of built-in appliances, please refer to the specific chapter or to the instructions enclosed with the booklet.
WATER CONNECTION IMPORTANT The appliance must be connected to the water mains using new hose-sets. The old hose-sets should not be reused. 1 ■ The inlet and drain hoses can be directed to left or right. IMPORTANT The dishwasher can be connected to either cold or hot water, as long as it is no hotter than 60°C. ■ Water pressure must be between 0,08 MPa and 0,8 MPa. 2 ■ The inlet hose must be connected to a tap so that the water supply can be cut off when the machine is not in use (fig. 1 B).
■ The hose can be hooked over the side of the sink, but it must not be immersed in water, in order to prevent water from being syphoned back to the machine when this is in operation (fig. 4Y). Connecting the outlet hose ■ The outlet hose should disharge into a standpipe, making sure that there are no kinks (fig. 4). ■ When installing the appliance under a worktop the hose pipe clamp must be attached to the wall in the highest possible position under the worktop (fig. 4Z).
■ The salt dispenser has a capacity of between 1.5 and 1.8 kg and, for efficient use of the appliance, it should be refilled from time to time according to the regulation of the water softener unit. LOADING THE SALT ■ The appearance of white stains on dishes is generally a warning sign that the salt container needs filling. ■ On the bottom of the machine there is a container for the salt for regenerating the softener.
ADJUSTMENT OF THE UPPER BASKET 1 If 29 cm to 32,5 cm plates are normally used, load them onto the lower basket after the upper basket has been placed in its upper position and proceed as detailed below: 1. Pull out the upper basket; 2 2. Then grasp the basket from both sides and lift it upwards (fig. 1). a b a Dishes that are bigger than 20 cm in diameter can no longer be loaded onto the upper basket and the mobile supports cannot be used when the basket is in the upper position.
A standard daily load is represented in figs. 1, 2 and 3. LOADING DISHES Using the upper basket Upper basket (fig. 1) A = soup plates B = dinner plates C = dessert plates D = saucers E = cups F = glasses ■ The upper basket is provided with mobile racks hooked to the sides of the basket, which can be regulated into 4 positions. ■ In the lowered position (A-A1) the racks may be used for such items as: tea and coffee cups, kitchen knives and ladles.
- POSITION “B”: for dishes which, although standard size, have a particular shape (very deep bowls, square dishes or ones without borders etc.). Upper basket (fig. 3) A = glasses B = saucers C = cups D = small bowl E = medium bowl F = large bowl G = dessert plate H = serving spoons I = ladle L = cutlery 3 - POSITION “C”: for larger than average flat plates and/or ones with nonstandard shapes (square, hexagonal, oval, pizza dishes etc.).
Please load the dishwasher sensibly to ensure the best wash results. A standard daily load is represented in figs. 7 and 8. Lower basket (fig. 7) A = medium-sized saucepan B = large saucepan C = frying pan D = tureens, serving dishes E = cutlery F = oven dishes G = medium bowl H = small bowl IMPORTANT The lower basket has a safety-stop device, for its safe extraction, also especially useful with a full load.
LOADING THE DETERGENT The detergent IMPORTANT It is essential to use a detergent that is specifically designed for dishwashers either in powder, liquid or tablet form. B After pouring the detergent into the container, close the lid, firstly pushing (1) and then pressing on it (2) until you hear the click. “FINISH” gives very good results and can be easily obtained.
■ the effectiveness of detergents containing the built in water softener/salt depends on the hardness of your water supply. Check that the hardness of your water supply is within the effective range given on the detergent packaging. TYPES OF DETERGENT Detergent tablets Detergent tablets of different manufacturers dissolve at different speeds, for this reason, during short programmes, some detergent tablets may be not fully effective, because they are not completely dissolved.
LOADING THE RINSE AID The rinse aid The rinse aid, which is automatically released during the last rinsing cycle, helps the dishes to dry quickly and prevents spots and stains forming. Filling the rinse aid container C The rinse aid container can be found to the left of the detergent container (fig. A "3"). To open the lid, push the reference mark and, in the same time, pull the tab of opening. It is always advisable to use rinse aid that is specifically designed for dishwasher.
CLEANING THE FILTERS The filter system (fig.A “4”) consists of: 1 a central container that traps the larger particles; a flat gauze that continuously filters the wash water; a micro filter, located beneath the gauze, that traps the tiniest particles ensuring a perfect rinse. ■ To achieve excellent results every time, the filters should be checked and cleaned after each wash. ■ To remove the filter unit, simply turn the handle anticlockwise (fig. 1).
PRATICAL HINTS How to make savings ■ If you want the dishwasher to give a complete wash, place the dishes in the dishwasher at the end of each meal and if necessary turn on the COLD RINSE cycle to soften the food remains and remove bigger particles of food from the new load of dishes. When the dishwasher is full start the complete wash cycle programme.
CLEANING AND MAINTENANCE 1 1b ■ To clean the dishwasher outside, do not use solvents (degreasing action) neither abrasives, but only a cloth soaked with water. ■ The dishwasher does not require special maintenance, because the tank is self-cleaning. ■ Regularly wipe the door gasket with a damp cloth to remove any food remains or rinse aid. 2 ■ Dishwasher cleaning is recommended, in order to remove limestone deposits or dirt.
DESCRIPTION OF THE CONTROL PANEL A B C D "ON/OFF" button E F G Digital display H I L M N O P "PROGRAMME SELECTION" button "DELAY START" button "START"/"RESET" button (start/cancelling programme) "ACTION PRO" button "SUPER ECO" option button "ALL IN 1" option button "SALT EMPTY" light "RINSE AID EMPTY" light "ACTION PRO" lights "OPTION SELECTION" lights Wi-Fi light ( ) Programme guide DIMENSIONS With working top Without working top 60 x 85 x 60 120 59,8 x 82 x 57,3 117 Width x Height x Depth (
■ If you wish to select an option, press the corresponding button (the indicator light will turn on). PROGRAMME SELECTION AND SPECIAL FUNCTIONS (Use in conjunction with programme guide) ■ Press the "START" button. The length of the program will be shown on the display alternating hours with minutes [I.e: 1 h (1 hour) / 25 (25 minutes)]. "ACTION PRO" button ■ When the door is shut, after an audible signal has sounded, the programme will start automatically.
Option buttons WARNING! If you open the door during the drying cycle, an audible audio signal advises you that the drying cycle has not yet finished. "SUPER ECO" button This button provides an energy and time saving of 25% on average (according to the select cycle) reducing the wash water temperature and the drying time during the final rinse. This programme is recommended for light soil washes, and for slightly wet dishes that are not fully dry, & improved drying results.
Alarm mute for the PROGRAMME END "DELAY START" button Dishwasher start time can be set with this button, delaying start from 1 to 23 hours. The alarm for the programme end may be muted as follows: Proceed as follows to set a delayed start: IMPORTANT The dishwasher must ALWAYS be off before start of this procedure. ■ Press the "DELAY START" button ("00" will appear on the display). 1.
Memorization of the last programme used 4. Press the same button again ("A1" will appear on the display to indicate that the memorization is on). The last programme used can memorized by following the below: be 5. Turn off the dishwasher by pressing the "ON/OFF" button to confirm the new setting. IMPORTANT The dishwasher must ALWAYS be off before start of this procedure. To disable the memorization, follow the same procedure.
WATER SOFTENER UNIT * The softener unit is set in the factory at level 4 (d4) as this satisfies the requirements of the majority of users. Depending on the source of the supply, water contains varying amounts of limestone and minerals which are deposited on the dishes leaving whitish stains and marks. The higher the level of these minerals present in the water, the harder the water is.
PROGRAMME GUIDE Wash with prewash For wash programmes with prewash, it is advisable to add a second dose of detergent (max. 10 g) directly in the machine. Programme Description = is the program which allows you to access the functions An antibacterial cycle, intended for washing and sterilising dishes (even heavily stained ones) babies’ bottles etc. Cycle with alternated action of water jets and steam.
N/A = OPTION NOT AVAILABLE * "DELAY START" button "SUPER ECO" button "ALL IN 1" button 75°C 140 YES YES YES 75°C 130 YES YES YES 65°C 85 YES YES YES 70°C 125 YES YES YES 60°C 120 YES YES YES 55°C 80 YES YES YES 55°C 240 YES YES YES 45°C 170 YES YES YES 45°C 85 YES YES YES 65°C 59 YES YES YES 50°C 24 YES N/A YES 5 YES N/A 27 Programme contents Avarage duration in minutes Special function buttons available WITH HOT WATER THE TIME REMAINING UNTIL THE END OF THE PROGRAMME IS AUTOMAT
- MODEM SETTING: To activate the Wi-Fi capabilities of your dishwasher, you will need to link it to your internet router or hub. To establish a wireless connection, you will need to input the router/hub ID and password. The dishwasher will only be compatible with a modem that has the specifications shown in the table below. If it doesn’t, then you may not get a Wi-Fi signal. DISHWASHER ENROLMENT Terminology and tools Wi-Fi uncertified routers may fail to establish the connection.
FUNCTIONS - POWER CONTROL: The app is able to show the levels of energy consumption at various stages of the wash cycle, as well as providing daily and weekly energy reports. Furthermore, once the cost of the household electricity supply is determined, the app will suggest the best time to use the dishwasher. The WI-Fi app allows you to manage the dishwasher from either indoors or outdoors. To comply with relevant standards, the door of the dishwasher needs to be closed to control the appliance remotely.
IDENTIFYING MINOR FAULTS Should the dishwasher fail to operate, before contacting the Service Centre, make the following checks: FAULT 1 - Machine completely dead 2 - Machine does not draw water 3 - Machine does not discharge water 4 - Machine discharges water continuously 5 - Spray arms are not heard to rotate 6 - On electronic appliances without a display: one or more LED flashing quickly.
FAULT CAUSE See causes for no.
Hoover guarantees all parts of this product for 5 years from the date of purchase. During that time Hoover will replace or repair all defective parts free of charge, except for parts subject to fair wear and tear such as belts. The call out fee and labour costs are chargeable after the first 12 months.
This appliance is marked according to the European directive 2012/19/EU on Waste Electrical and Electronic Equipment (WEEE). WEEE contains both polluting substances (which can cause negative consequences for the environment) and basic components (which can be re-used). It is important to have WEEE subjected to specific treatments, in order to remove and dispose properly all pollutants, and recover and recycle all materials.
HOOVER SERVICE FOR YOUR LOCAL ENGINEER PLEASE CALL OUR NATIONAL NUMBER 08444 995599 EN 15.