Owner’s Manual Operating and Servicing Instructions Español - página E1 ® www.hoover.com Deep Cleaner IMPORTANT: READ CAREFULLY BEFORE ASSEMBLY AND USE. Questions or concerns? For assistance, please call Customer Service at 1-800-944-9200 Mon-Fri 8am-7pm EST. PLEASE DO NOT RETURN THIS PRODUCT TO THE STORE. THIS PRODUCT IS INTENDED FOR HOUSEHOLD USE ONLY. IF USED COMMERCIALLY WARRANTY IS VOID. ©2010 Techtronic Floor Care Technology Limited. All rights reserved.
Thank you for choosing a HOOVER® product. Please enter the complete model and Manufacturing Code in the spaces provided. Model MFG. CODE Hint: Attach your sales receipt to this owner’s manual. Verification of date of purchase may be required for warranty service of your HOOVER® product. Manufacturing code Be sure to register your product online at Hoover.com or call 1-800-944-9200 to register by phone. (Label located on lower handle of cleaner) Contents Important Safeguards..............................
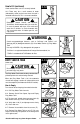
IMPORTANT SAFETY INSTRUCTIONS SAVE THESE INSTRUCTIONS When using an electrical appliance, basic precautions should always be followed, including the following: READ ALL INSTRUCTIONS BEFORE USING THIS APPLIANCE. WARNING: TO REDUCE THE RISK OF FIRE, ELECTRIC SHOCK OR INJURY: • Fully assemble before operating. • Operate cleaner only at voltage specified on data plate on lower handle of cleaner. • Do not leave appliance when plugged in. Unplug from outlet when not in use and before cleaning or servicing.
• Do not use without Tanks or Filters in place. • WARNING: This product contains chemicals known to the State of California to cause cancer, birth defects or reproductive harm. Caution - to reduce the risk of damage: • • • • Avoid picking up hard, sharp objects with this product, as they may cause damage. Store in a dry place. Do not expose machine to freezing temperatures. Do not use sharp objects to clean out hose as they can cause damage.
1. Cleaner asseMbly Carton Contents A. Base, Hose and Removable Dirty Water Tank B. Upper Handle C. Handle Bolt (located in handle of unit) D. SpinScrub® 60 Brush Assembly or SpinScrub® 77 Brush Assembly (Assembled on unit) E. Stair/Upholstery Nozzle (Assembled on unit) F. SpinScrub® Hand Tool* G. Clean Water Tank/ Carry Handle H. Squeegee* (Assembled on unit) I. Solution Bottle 1.
Store tools (Tools may vary) 1.8 Store Tools on back side of cleaner as shown. A. Upholstery Nozzle* B. SpinScrub® Hand Tool* C. Hard Floor Squeegee Tool* 1.8 *Available on select models only. B A C 2. HOW TO USE Cleaner Description 1. Hand Grip 2. Clean Surge Button* 3. SolutionTrigger 4. ON/OFF Switch 5. Wash/Rinse Setting Switch 6. SpinScrub® Hand Tool* 7. Carry Handle 8. Clean Water Tank 9. Detergent Container 10. Dirty Water Tank Handle 11. Dirty Water Tank 12. SpinScrub® Mode Selector* 13.
Transporting 2.4 To move your cleaner from room to room, put handle in upright and locked position, tilt cleaner back on wheels and push forward. Carry handle 2.4 2.5 The cleaner may also be lifted by the upper clean water tank handle as shown. Be sure tank is properly latched in place. 2.5 2.6 SpinScrub® mode selector (Available on select models only) 2.6 Your carpet cleaner has three agitator brush settings.
how to fill (continued) 2.12 Check tank to make sure it is securely latched. 2.12 There may be a small amount of water (indicated by arrow) on the base when the tank is removed from the unit. This is a normal condition. ! CAUTION ! Detergents contain Anionic and Nonionic Surfactants. Avoid contact with eyes and skin. In case of contact with eyes, flush with cold water for 15 minutes. In case of contact with skin, wash with water. If irritation persists, call a physician.
Automatic shut off When the Dirty Water Tank (lower tank) is full the automatic shut off mechanism will shut off the cleaner suction (suction will be noticeably reduced). 2.19 2.19 At that time, the yellow float disk will rise to the top of the Dirty Water Tank lid (B). The cleaner will no longer pick up dirty solution and the motor sound will become noticeably higher in pitch. When this happens, turn cleaner off and empty Dirty Water Tank before continuing use.
8&5 Fill Clean Water Tank according to instructions for Fig. 2.9. Fill detergent container with Hoover® detergent according to instructions for Fig. 2.10. SE RIN Select proper SpinScrub® mode (Fig. 2.6). %3: 3.2 3.1/3.1a %3: Read “Before You Begin Cleaning” instructions. 8&5 Cleaning Carpet WASH Pull Trigger = WET Release Trigger = DRY Dry hands and plug cord into a properly grounded outlet. IMPORTANT 3.3 3.2a Do not clean over floor electrical outlets.
Clean Surge® Button (Available on select models only) The Clean Surge® button can be used to dispense extra solution when cleaning particularly soiled areas of carpet or spots. To use, press Clean Surge® button while squeezing solution trigger. For normal solution spray, release button and continue to squeeze solution trigger. Picking up spills Your HOOVER® carpet cleaner may also be used to pick up small liquid spills (one gallon or less, never to exceed 1/8” in depth). Do not submerge unit in liquid.
To clean HARD floorS (Continued) Rinsing is not necessary, but will help remove detergent residue from the floor. 10. Empty recovery tank when the motor sound becomes higher pitched and there is a loss in suction (see “Automatic shut-off”, Fig. 2.19). 11. When finished cleaning, follow “After cleaning” instructions on page 12. Unplug cleaner from electrical outlet and remove squeegee from nozzle. Rinse it in clear water. (Reference Figs. 2.13 - 2.17) After cleaning 3.
How to Attach Tools ! CAUTION 4.3 G ! To reduce the risk of injury from moving parts, unplug cleaner before connecting SpinScrub® Hand Tool. Not to be used for grooming a pet. H Place handle in upright position and remove hose from rack. Using your thumb, push forward and up on the latch (H) to remove tool. Turn off and unplug cleaner from electrical outlet. All tools attach to the hose in the same manner: 4.3 Connect tool to hose by sliding it onto connector until the tab (G) locks it securely.
Cleaning upholstery 4.6 Read “Before You Begin Cleaning” instructions on page 9. 4.7 Be sure to check the cleaning code on your upholstery. Use your cleaner only on upholstery marked “W” or “W/S”. Place handle in upright position. Agitator brushes will not rotate while handle is in upright position. Fill Clean Water Tank according to instructions for Fig. 2.9. 4.7 For heavily soiled areas, it may be necessary to repeat the cleaning process.
5. MAINTENANCE Familiarize yourself with these home maintenance tasks as proper use and care of your cleaner will ensure continued cleaning effectiveness. Any other servicing should be done by an authorized service representative. nozzle: How to Clean 5.1 If lint or other debris becomes lodged in nozzle, it can be removed for cleaning. 5.2 A C Turn off and unplug cleaner from electrical outlet. Remove both tanks as described in Figs. 2.8 and 2.13.
Dirty Water Tank : 5.5 How to Clean A 5.5 Clean and rinse inside of tank. Remove dirt and debris from inside door (A) and plunger (B). Make sure both move freely. 5.6 Remove lint and debris from lint screens (C). B Storage Before storing: • Empty Clean Water Tank and let air dry. Replace on cleaner. • Empty Dirty Water Tank, rinse tank and lid thoroughly with clean water and let air dry. • Verify door lid and plunger on tank and move freely.
6. TROUBLESHOOTING If a minor problem occurs, it usually can be solved quite easily when the cause is found by using the checklist below. Any other servicing should be done by an authorized service representative. ! WARNING ! To reduce risk of personal injury - unplug cleaner before servicing. PROBLEM POSSIBLE CAUSE POSSIBLE SOLUTION Cleaner won’t run. 1. Not firmly plugged in. 1. Plug unit in firmly. 2. No voltage in wall plug. 3. Blown fuse or tripped breaker. 1.
Helpful Reminders ! CAUTION 6.2 6.1 A ! Unplug the cleaner before doing any of the following. • Use HOOVER® brand detergents; others may foam too much, or cause leaking, or damage cleaner. B • Use extra dry strokes to aid in faster drying of the carpet. • 6.2 Secure Dirty Water Tank lid before use. • 6.1 Fill tank (A) with hot (under 140˚F /60˚C) tap water ONLY. Do not put any detergent in water tank. Fill detergent container (B) with HOOVER® detergent. (Reference Fig. 2.
7. CleaninG CLEANING produCts PRODUCTS 8. 8"3/*/( To reduce the risk of fire and electric shock due to internal component damage, use only Hoover® cleaning products and Hoover® hard surface attachments intended for use with the appliance as noted below.
9. WARRANTY Limited TWO Year Warranty (Domestic Use) WHAT THIS WARRANTY COVERS When used and maintained in normal household use and in accordance with the Owner’s Manual, your HOOVER® product is warranted against original defects in material and workmanship for a full two years from date of purchase (the “Warranty Period”). During the Warranty Period, Hoover® will provide labor and parts, at no cost to you, to correct any such defect in products purchased in the United States, U.S.
MANUAL DEL PROPIETARIO Instrucciones de Funcionamiento y Servicio ® www.hoover.com Deep Cleaner IMPORTANTE: LEA ATENTAMENTE ANTES DE ENSAMBLAR Y USAR. ¿Tiene alguna pregunta o inquietud? Para obtener asistencia, llame al Servicio de atención al cliente al 1-800 944 9200, de lunes a viernes, de 8 a.m. a 7 p.m., hora del ESTE. POR FAVOR, NO DEVUELVA ESTE PRODUCTO A LA TIENDA. ESTA ASPIRADORA PARA ALFOMBRAS ESTÁ DISEÑADA PARA USO DOMÉSTICO. EL USO COMERCIAL DE ESTE PRODUCTO ANULA LA GARANTÍA.
Gracias por haber elegido un producto HOOVER®. Anote los números completos de Código de fabricación en los espacios provistos. Modelo CÓDIGO DE FABRICACIÓN Consejo: Adjunte su recibo de compra a este Manual del propietario. Para obtener el servicio de garantía de su producto HOOVER® puede requerirse la verificación de la fecha de compra. Inscriba su producto en línea en Hoover.com, o llame al 1-800-944-9200 si prefiere hacerlo por teléfono.
¡SALVAGUARDIAS IMPORTANTES! ¡GUARDE ESTAS INSTRUCCIONES! Al usar un aparato eléctrico, observe siempre las precauciones básicas, incluyendo las siguientes: LEA TODAS LAS INSTRUCCIONES ANTES DE USAR ESTE APARATO ADVERTENCIA: PARA REDUCIR EL RIESGO DE INCENDIOS, CHOQUES ELÉCTRICOS O LESIONES: • Ensamble completamente el producto antes de hacerlo funcionar. • Cualquier otra tarea de mantenimiento debe ser realizada por un representante de mantenimiento autorizado.
• No aspire ningún objeto que se esté quemando o que libere humo, como cigarrillos, fósforos o cenizas calientes. • No use sin filtros y tanques. • ADVERTENCIA: Este producto contiene sustancias químicas reconocidas por el estado de California como causantes de cáncer, defectos congénitos o daño reproductivo. ADVERTENCIA: PARA REDUCIR EL RIESGO DE DAÑOS: • • • • Evite aspirar objetos duros y filosos con este producto, ya que pueden causar daños. Guarde la máquina en un lugar seco.
1. Cleaner asseMbly Carton Contents A. Base, manguera y tanque de agua sucia desmontable. B. Mango superior C. Perno del mango (ubicado en el mango del producto) D. SpinScrub® 60 Brush Assembly or SpinScrub® 77 Brush Assembly (Montado en el producto) E. Boquilla para escaleras/tapizados (Montado en el producto) F. SpinScrub® cepillos del accesorio* G. Tanque de agua limpia superior/ Mango de transporte H. Suelos duros* (Montado en el producto) I. Botella de solución 1.
Guarde los accesorios 1.8 Guarde los accesorios en la parte posterior de la limpiadora, como se muestra. A. Boquilla para escaleras/tapizados* B. Accesorio de mano SpinScrub®* C. Accesorio escurridor para suelos duros* 1.8 Los accesorios no incluidos con su modelo. A B C 2. FUNCIONAMIENTO Descripción de la aspiradora 1 2. 3. 4. 5. Empuñadura del mango Botón Clean Surge* Gatillo para la solución Interruptor para encender/apagar Interruptor de posición Wash/ Rinse (Enjuague) 6.
Mango de transporte 2.4 2.5 2.5 También es posible levantar la aspiradora colocando una mano por encima del mango del tanque de solución limpia superior, como se muestra. Los tanques: Tanque de agua limpia 2.6 1 ILL ILE NT WER 2 GE 3 PO 2.6 Su limpiadora para moquetas tiene tres posiciones de cepillos del agitador. SPILL PICK-UP (ASPIRADO DE DERRAMES): Cepillos apagados para aspirar derrames o limpiar alfombras y suelos duros cuando no se requiere cepillado.
Cómo llenar (continuado) 2.12 Revise el tanque para asegurarse de que esté bien trabado. 2.12 Es posible que haya una pequeña cantidad de agua (indicada con flechas) en la base cuando se retira el tanque de la unidad. Esto es normal. ! PRECAUCIÓN ! Los detergentes contienen surfactantes aniónicos y no iónicos. Evite el contacto con los ojos y la piel. En caso de contacto con los ojos, enjuáguelos con agua fría durante 15 minutos. En caso de contacto con la piel, lávela con agua.
Apagado automático Cuando el tanque de recuperación (tanque inferior) está lleno, el mecanismo de apagado automático apaga la succión de la aspiradora (la succión se reduce de manera significativa). 2.19 2.19 En ese momento, el disco flotante amarillo se eleva a la parte superior de la tapa del tanque de recuperación (B). La aspiradora ya no aspira más solución sucia, y el sonido del motor se vuelve mucho más agudo.
SE RIN Pise el pedal para soltar el mango y baje el mango a la posición de funcionamiento. PARA MODELOS SIN LA OPCIÓN DE ENJUAGUE AUTOMÁTICO 3.1 Coloque el Interruptor de posición Wash/ Rinse (Enjuague) en WASH (LAVADO-Enjuague). Encienda la aspiradora. Oprima el gatillo para aplicar la solución de limpieza y empuje lentamente la aspiradora hacia adelante (equivale a una pasada húmeda). 3.
Botón Clean Surge® (Disponible sólo en algunos modelos) El botón Clean Surge® puede usarse para dispensar solución adicional al limpiar áreas particularmente sucias de la alfombra o manchas. Para usarlo, presione el botón Clean Surge® mientras oprime el gatillo para la solución. Para un rociado normal de la solución, suelte el botón y continúe oprimiendo el gatillo para la solución.
9. Si es necesario enjuagar el suelo, coloque el interruptor de posición Rinse (Enjuague) en RINSE (ENJUAGUE). Repita los pasos 7 y 8. Esta posición aplica el enjuague sólo con agua al realizar pasadas tanto hacia delante como hacia atrás. 11. Cuando termine de limpiar, siga las instrucciones “Después de limpiar” que aparecen en la página 12. Desenchufe la aspiradora de la toma de corriente eléctrica y retire el escurridor de la boquilla. Enjuáguelo con agua limpia. (Refiérase a la Figs. 2.13 - 2.
Cómo conectar los accesorios ! 4.3 PRECAUCIÓN G ! Para reducir el riesgo de lesiones ocasionadas por piezas en movimiento, desenchufe la limpiadora antes de conectar el accesorio de mano SpinScrub®. No use para asear una mascota. Coloque el mango en posición vertical y retire la manguera del soporte. H Apague y desconecte la limpiadora del tomacorriente eléctrico. Todos los accesorios deben conectarse a la manguera de la misma manera. 4.
Limpieza de tapizados 4.6 Lea las instrucciones “Antes de comenzar a limpiar” que se encuentran en la página 9. 4.7 Asegúrese de consultar el código de limpieza en su tapizado. Use su aspiradora sólo en tapizados marcados con “W” o “W/S”. Coloque el mango en posición vertical. Los cepillos del agitador no giran mientras el mango se encuentra en posición vertical. Llene el tanque de agua limpia de acuerdo con las instrucciones que aparecen desde la Fig. 2.9.
5. MANTENIMIENTO Familiarícese con estas tareas de mantenimiento en el hogar, ya que el uso y cuidado apropiados de su aspiradora asegurarán una limpieza continuamente eficaz. Cualquier otra tarea de mantenimiento debe ser realizada por un representante de mantenimiento autorizado. boquilla: Cuándo limpiarlo 5.1 Si se depositan pelusas o cualquier otro residuo en la boquilla, puede retirarla y limpiarla. 5.2 A C Apague y desconecte la limpiadora del tomacorriente eléctrico.
Tanque de recuperación : 5.5 Como vaciarlo 5.5 Verifique que la puerta de la tapa (A) y el émbolo (B) se mueven libremente. Límpielos después de usar el producto. 5.6 Quite las pelusas y los restos de basura de los filtros (C). Almacenamiento Antes de guardarlo: • Vacíe el tanque de agua limpia y deje secar al aire. Vuelva a colocarlo en la aspiradora. • Vacíe el tanque de recuperación, enjuague bien el tanque y la tapa con agua limpia y deje secar al aire.
6. Solución de problemas Si ocurre un problema menor, generalmente puede resolverse con bastante facilidad cuando se halla la causa, usando esta lista de verificación. Cualquier otra tarea de mantenimiento debe ser realizada por un representante de mantenimiento autorizado. ! ADVERTENCIA ! Para reducir el riesgo de lesiones ocasionadas por piezas en movimiento, desenchufe la aspiradora antes de realizar el mantenimiento. Problema Causa posible Causa posible La limpiadora no funciona. 1.
Recordatorios útiles ! PRECAUCIÓN 6.2 6.1 A ! Desenchufe la aspiradora antes de hacer lo siguiente. • Utilice los detergentes de marca HOOVER®. Otros pueden producir mucha espuma o fugas, o dañar la lavadora. B • Use pasadas adicionales en seco para que la al fombra se seque más rápidamente. • 6.1 Llene el tanque (A) SOLAMENTE con agua caliente (menos de 60˚C/ 140˚F)de grifo. No coloque ningún detergente en el tanque de agua. Llene el recipiente para el detergente (B) con detergente de HOOVER®. • 6.
8. 7. produCtos PRODUCTOS de DE liMpieza LIMPIEZA "%7&35&/$*" Para reducir el riesgo de incendio y descarga eléctrica debido a daños de los componentes internos, use únicamente productos de limpieza de Hoover® y accesorios para suelos duros diseñados para uso con este aparato (véase abajo).
9. Garantía Garantía limitada dos años (Para uso doméstico) QUÉ CUBRE ESTA GARANTÍA Siempre que el uso y el mantenimiento de su producto HOOVER® se realicen en condiciones de uso doméstico normales y según el Manual del usuario, el producto estará garantizado contra defectos originales en el material y la fabricación durante de dos años completos desde la fecha de compra (el “Período de Garantía”).
Guide d’utilisation Instructions d’utilisation et d’entretien ® www.hoover.com Deep Cleaner IMPORTANT : LIRE CES INSTRUCTIONS ATTENTIVEMENT AVANT D’UTILISER L’ASPIRATEUR. Vous avez des questions ou des inquiétudes? Veuillez appeler le service à la clientèle au 1 800 9449200 du lundi au vendredi, de 8 h à 19 h (HNE). VEUILLEZ NE PAS RETOURNER CE PRODUIT AU MAGASIN. L’UTILISATION DE CE PRODUIT À DES FINS COMMERCIALES INVALIDE LA PRÉSENTE GARANTIE. ©2010 Techtronic Floor Care Technology Limited.
Merci d’avoir choisi un produit HOOVERMD. Veuillez inscrire les numéros de modèle et de série COMPLETS dans les espaces fournis à cet effet Modèle Code de fabrication Conseil: Il est recommandé de joindre votre reçu de caisse au guide de l’utilisateur, car une vérification de la date d’achat peut être effectuée avant toute réparation couverte par la garantie de votre produit HOOVERMD. N’oubliez pas d’enregistrer votre produit en ligne, à l’adresse Hoover.com, ou par téléphone, au 1-800-944-9200.
CONSIGNES DE SÉCURITÉ IMPORTANTES RANGER ET CONSERVER CES INSTRUCTIONS Durant l’utilisation d’un appareil électrique, toujours respecter les précautions élémentaires, y compris les suivantes : LIRE TOUTES LES INSTRUCTIONS AVANT D’UTILISER CET APPAREIL. AVERTISSEMENT: Afin de réduire au minimum les risques d’incendie, de choc électrique ou de blessures : • Assembler complètement avant l’utilisation. • N’utiliser l’aspirateur qu’à la tension spécifiée sur la plaque signalétique située au dos de l’appareil.
• N’aspirer aucune matière brûlante ou dégageant de la fumée, comme des ciga rettes, des allumettes ou des cendres chaudes. • Ne pas nettoyer au-dessus de prises électriques situées au sol. • Do not use without filters or tanks in place. • MISE EN GARDE : Cet appareil contient des produits chimiques reconnus par l’État de la Californie comme pouvant causer le cancer ou, entraîner des malformations congénitales ou d’autres troubles de la reproduction.
1. ensaMblado de la aspiradoran Contenu de l’eMballaGe 1.1 b A. Base, tuyau et réservoir d’eau sale amovible. B. Poignée supérieure C. Boulon du manche (situé dans la poignée de l’appareil) D. Assemblage de la brosse 66 SpinScrubMD / Assemblage de la brosse 70 SpinScrubMD (assemblé à l’appareil) E. Buse pour escaliers/meubles (assemblé à l’appareil) F. Accessoire portatif SpinScrub®* G. Réservoir d’eau propre supérieur / Poignée de transport H. Plancher* (assemblé à l’appareil) I.
Rangement des accessoires en option 1.8 Ranger les accessoires à l’arrière de la shampouineuse, tel qu’illustré. A. Buse pour escaliers/ meubles* Accessoire pour planchers sans moquette B. Accessoire portatif SpinScrub®* C. Racloir pour planchers durs* 1.8 B A C *Seulement sur certains 2. Utilisation Description de l’aspirateur 1. Poignée 2. Bouton Clean Surge* 1 3 3. Gâchette pour l’application de 2 solution 4. Interrupteur ON/OFF 6 5 (marche/arrêt) 5. Commutateur du mode de rinçage 4 6.
Poignée de transport 2.4 2.5 2.5 L’aspirateur peut également être soulevé par la poignée supérieure du réservoir d’eau propre, comme illustré. Veillez à ce que le réservoir soit bien maintenu en place par le loquet. Sélecteur de mode SpinScrub® SPILL PICK UP (ramassage de liquides renversés) – mode sous lequel les brosses sont désactivées 2.6 2 L ILE NT 2 GE WER POWER SCRUB (récurage à haute puissance) – les brosses tournent à la vitesse maximale pour le nettoyage de moquettes.
remplissage (continu) 2.12 S’assurer que le réservoir est solidement fixé en place. 2.12 Il est possible qu’il y ait une petite quantité d’eau (indiquée par des flèches) sur la base quand vous retirez le réservoir de l’appareil. Cela est normal. ! MISE EN GARDE ! Les détergents contiennent des surfactants anioniques et non ioniques. Éviter tout contact avec les yeux et la peau. En cas de contact oculaire, rincer les yeux à l’eau froide pendant 15 minutes.
Fonction d’arrêt automatique Quand le réservoir de récupération (réservoir inférieur) est plein, le mécanisme d’arrêt automatique arrête l’action de succion de l’aspirateur (la succion sera considérablement réduite). 2.19 2.19 À ce moment, le disque flottant jaune remontera jusqu’au couvercle du réservoir de récupération (B). L’aspirateur ne ramassera plus le liquide et le moteur émettra un son nettement plus aigu.
SE RIN WASH Remplir le contenant de détergent avec la solution nettoyante de HooverMD, conformément aux instructions illustrées sur les figure 2.10. Sélectionner le mode SpinScrub® approprié (Fig. 2.6). Actionner la détente = mouillé Relâcher la détente = sec 3.3 3.2a Essuyer vos mains et brancher le cordon dans une prise électrique adéquatement mise à la terre. %3: Remplir le réservoir d’eau propre conformément aux instructions illustrées sur la figure 2.9. %3: 3.2 3.1/3.
Bouton Clean SurgeMC (sur certains modèles) Le bouton Clean SurgeMC peut servir à appliquer une quantité supplémentaire de solution pour le nettoyage de taches tenaces ou de zones particulièrement sales sur la moquette. Pour utiliser cette fonction, appuyer sur le bouton Clean SurgeMC tout en serrant la gâchette pour l’application de solution. Pour la vaporisation normale de la solution, relâcher le bouton et maintenir enfoncée la gâchette pour l’application de solution.
1. Remplir le réservoir d’eau conformément aux instructions illustrées sur les figure 2.9. où la solution vient d’être vaporisée. Utiliser des mouvements de va et vient. 2. Remplir le contenant de détergent avec la solution nettoyante pour planchers durs de HOOVERMD, conformément aux instructions illustrées sur la figure 2.10. 9. Si vous désirez rincer le plancher, mettre le commutateur du mode de rinçage à Wash/Rinse (rinçage). Répéter les étapes 7 et 8.
Accessoire portatif SpinScrub® 4.2 (Seulement sur certains) 4.2 Pour retirer l’accessoire portatif SpinScrubMD, tirer l’accessoire vers le haut et vers l’extérieur. Pour le replacer, effectuer cette étape à l’inverse. Fixation des accessoires ! MISE EN GARDE 4.3 G ! Pour réduire les risques de blessures causées par des pièces en mouvement, débrancher l’appareil avant d’insérer l’accessoire portatif SpinScrubMD. Ne pas utiliser pour toiletter un animal.
Chevaucher les passages de ½ po (1,3 cm) afin d’éviter les marques. Vider le réservoir de récupération lorsque le son du moteur devient plus aigu et que la force de succion de l’aspirateur diminue (voir « Arrêt automatique », fig. 2.19). Il est préférable d’alterner entre des passages humides et à sec, tel qu’indiqué ci dessus. Terminer avec des passages à sec supplémentaires pour accélérer le séchage de la moquette.
5. Entretien Il est recommandé de vous familiariser avec les tâches d’entretien; l’utilisation et l’entretien appropriés de l’appareil assureront son bon fonctionnement. Toute autre tâche d’entretien doit être confiée à un représentant de service autorisé. 5.2 5.1 la buse : Quand le nettoyer B Si des peluches ou d’autres débris s’accumulent dans la buse, ils peuvent être retirés pour le nettoyage. Éteindre l’appareil et le débrancher de la prise de courant.
Réservoir de récupération: 5.5 Quand le nettoyer A 5.5 Rincer l’intérieur et laisser sécher. Vérifier que la porte située dans le couvercle bouge librement (A). Vérifier que le poussoir bouge librement (B). Nettoyer après l’utilisation. B 5.6 Retirer la peluche et les débris des filtres à peluche (C). Rangement Avant de ranger l’appareil : • Vider le réservoir d’eau et le laisser sécher à l’air. Replacer le réservoir sur l’appareil.
6. DÉPANNAGE Si un problème mineur survient, il est habituellement possible de le résoudre facilement si la cause est déterminée à l’aide de la liste ci dessous. Toute autre tâche d’entretien doit être confiée à un représentant de service autorisé. ! AVERTISSEMENT ! Pour réduire les risques de blessures causées par des pièces en mouvement, débrancher l’appareil avant d’en effectuer l’entretien. PROBLÈME CAUSE POSSIBLE SOLUTION POSSIBLE L’aspirateur ne démarre pas. 1.
Aide-mémoire pratique ! MISE EN GARDE 6.2 6.1 ! A Débrancher l’appareil avant d’effectuer l’une ou l’autre des actions suivantes. B • Utilisez les détergents HOOVER®; les autres risquent de trop mousser, de causer des fuites ou d’endommager l’aspirateur. • Passer l’aspirateur en mode extra sec pour ac célérer le séchage de la moquette. • 6.1 Remplir le réservoir (A) avec de l’eau chaude (moins de 140 ˚F/60 ˚C) du robinet SEULEMENT. Ne pas mettre de détergent dans le réservoir d’eau.
7. 8. PRODUITS produits NETTOYANTS nettoyants "7&35*44&.&/5 Pour réduire les risques de choc électrique causés par des composants internes endommagés, n’utiliser que les produits nettoyants HooverMD et les accessoires pour les surfaces dures conçus pour cet appareil, tel qu’il est indiqué cidessous. (VJEF EF QSPEVJUT OFUUPZBOUT )PPWFS.
9. Garantie Garantie limitée deux ans (Usage domestique) ÉLÉMENTS COUVERTS PAR LA PRÉSENTE GARANTIE Votre produit HOOVERMD est garanti pour des conditions normales d’utilisation et d’entretien domestiques, comme il est stipulé dans le Guide de l’utilisateur, contre les défauts de matériaux et de fabrication pour une période complète de duex ans à compter de la date d’achat (la « Période de garantie »).