ENGLISH ➜ pp. 1-14 ESPAÑOL ➜ pág. 16-24 ™ ™ Your HOOVER® Carpet Cleaner is fully assembled and ready to begin cleaning! SteamVac™ Carpet Cleaner cleans carpet fibers by applying, scrubbing and removing hot tap water and cleaning solution. www.hoover.
Important Safeguards! When using an electrical appliance, always follow basic precautions, including the following: READ ALL INSTRUCTIONS BEFORE USING APPLIANCE. Grounding Instructions A B WARNING: To reduce the risk of fire, electric shock, or injury: • Use indoors only. • Use only on surfaces moistened by the cleaning process. Do not immerse product. • Connect to a properly grounded outlet only. See “Grounding Instructions”. • Do not clean over floor electrical outlets.
To contact us: Contents • www.hoover.com Important safeguards . . . . . . . . 2 Carton contents . . . . . . . . . . . . . . 3 Cleaner description. . . . . . . . . . . 4 Carpet cleaner basics . . . . . . . . . 5 Filling the tank . . . . . . . . . . . . . 5 Emptying the recovery tank. . 6 Attaching the hose . . . . . . . . . 7 Selecting & attaching tool . . . 7 Draining & storing hose. . . . . 8 Cleaning carpet . . . . . . . . . . 10-11 Cleaning upholstery . . . . . . 11-12 Basic steps for cleaning . . . .
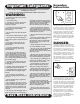
Cleaner Description 1 13 3 2 4 14 5 6 7 12 11 1. 2. 9 21 8 10 16 13 23 15 16 22 17 21 18 20 19 Your HOOVER® Carpet Cleaner is fully assembled and ready to begin cleaning! 4 3. 4. 5. 6. 7. 8. 9. 10. 11. 12. 13. 14. 15. 16. 17. 18. 19. 20. 21. 22. 23.
Carpet Cleaner Basics Fill the solution tank 3 Unplug carpet cleaner from electrical outlet. ✓ Press button (A) and remove solution tank (Fig. 3) ✓ Release latches (B) on tank cap and remove (Fig. 4) ✓ Use cap (Fig.
Empty the recovery tank 8 Unplug carpet cleaner from electrical outlet. A ✓ An automatic shut-off device prevents the cleaner from picking up more dirty water than it can hold in the recovery tank. B 9 You will know the tank needs to be emptied -- • The amount of dirty water has reached the full line (A). • When the motor sound rises in pitch. C • You do not see dirty solution coming up through the nozzle. • The float (B) inside the recovery tank has risen to the top of the tank (Fig. 8).
Attach the hose Unplug carpet cleaner from electrical outlet. 13 A ✓ Place handle in upright position. ✓ The hose and tool caddy can be removed from the cleaner if you desire. ✓ Remove hose from tool caddy. 14 ✓ Open hose door (A) on back of carpet cleaner (Fig. 13). A C ✓ Align hose connector with hose and solution ports (C) (Fig. 14). ✓ Push hose into port and lock in place. ✓ To remove hose: Squeeze latches (D) on top and bottom of hose. Remove hose from port (Fig. 15).
The handle must be in the upright position in order to get cleaning solution through the hose. 20 Drain the hose A When finished using the hose and tool, remove water from the hose. B 21 C ✓ Turn carpet cleaner on and hold end of hose up for several seconds (A). Do not press trigger. (Fig. 20) ✓ Turn carpet cleaner off and unplug it. ✓ Hold hose connector in sink and press trigger to remove solution from hose (B) (Fig. 20). Store hose Unplug carpet cleaner from electrical outlet.
Hose caddy 25 You can either store the hose caddy on the cleaner or remove it to store separately. H To store caddy on the cleaner: ➤ Slide tabs (G) on caddy into slots on back of cleaner (Fig. 25). G ➤ Hook top of caddy to cleaner (H). I ➤ Wrap cord around cord hooks (I) on caddy (Fig. 26). Rotate top hook to release cord. To remove caddy from the cleaner: ➤ Lift caddy off cleaner (Fig. 27). 26 27 ➤ Wrap cord around cord hooks (J) on back of cleaner (Fig. 28).
1 2 31 3 4 32 5 33 34 35 A Vacuum carpet thoroughly to remove loose dirt, hair, lint and other debris (Fig. 31). Test detergent for colorfastness on a hidden area of carpet. Wet a white cloth or paper towel with some detergent. Gently rub onto a hidden area of carpet. Wait ten minutes. Blot with white cloth or paper towel and check for color transfer. Pretreat spots, stains and high traffic areas with HOOVER Spot and Stain Spray (Fig. 32). Spray spot or area with Spot and Stain Spray.
1 Cleaning upholstery 2 3 4 5 6 7 8 9 Check fabric cleaning code (Fig. 36). Look on the furniture manufacturer’s tag for a ‘W’ or ‘WS’ code. These codes indicate that it is alright to use your carpet cleaner to clean the upholstery. Do not use the carpet cleaner on upholstery marked ‘S’, ‘X’ or ‘Dry Clean Only’. PENALTY ALL NEW OF LAW MATERIAL 36 W LICENSE STAMP NUMBER: HERE THE UPHOLSTER Y COMPANY Vacuum upholstery thoroughly with your vacuum cleaner’s attachments.
Routine care for your Carpet Cleaner 41 A Clean the nozzle Unplug carpet cleaner from electrical outlet. ➤ Remove solution and recovery tanks to prevent possible leaks. ➤ Lift up on top of nozzle (A) and slide off cleaner (Fig. 41). 42 ➤ Wipe debris off nozzle and front of cleaner with a damp cloth. ➤ Tilt cleaner back, raising front of cleaner off floor. Slide nozzle (B) up from bottom of cleaner (Fig. 42). B ➤ Press on upper portion of nozzle to snap in place.
Storing your Carpet Cleaner ✓ Empty solution tank and rinse thoroughly. ✓ Place empty solution tank on carpet cleaner. Turn carpet cleaner ON. Squeeze trigger and push carpet cleaner forward and back several times. This will clear any solution remaining inside the cleaner. ✓ Empty recovery tank, rinse thoroughly and let air dry. ✓ Allow brushes and underside of carpet cleaner to air dry thoroughly before storing carpet cleaner on a carpeted or wood surface.
Troubleshooting Use the list below to help solve minor problems. What’s the problem? Carpet cleaner won’t run Low suction Cleaning solution won’t dispense Brushes won’t rotate Low suction in hose during tool use What to do ✓ Make sure the cleaner is plugged in firmly. ✓ Check the fuse or breaker. ✓ Empty the recovery tank; it may be full and the automatic shut-off engaged. ✓ Make sure recovery tank cap is securely latched. ✓ Make sure tool door is closed.
HOOVER ® ™ ™ ¡Salvaguardias importantes! Al usar un aparato eléctrico, observe siempre las precauciones básicas, incluyendo las siguientes: LEA TODAS LAS INSTRUCCIONES ANTES DE USAR ESTE APARATO. ADVERTENCIA: Para reducir el riesgo de incendios, choques eléctricos o lesiones: ENGLISH ➜ pp. 1-14 ESPAÑOL ➜ pág. 16-24 Instrucciones para conexión a tierra Este aparato debe tener conexión a tierra.
Anote y guarde Índice Salvaguardias importantes . . . . . . 16 Contenido de la caja . . . . . . . . . . . . . 17 Descripción de la limpiadora . . . . . 17 Características esenciales de la limpiadora para alfombras . . . . . . . 18 Llenado del tanque . . . . . . . . . . . . 18 Vaciado del tanque de recuperación . . . . . . . . . . . . . . . . . . 18 Colocación de la manguera . . . . 19 Selección y colocación del accesorio . . . . . . . . . . . . . . . . . . . . . .
Características esenciales de la limpiadora para alfombras Llene el tanque para la solución Desenchufe la limpiadora para alfombras de la toma de corriente eléctrica. ✓ Presione el botón (A) y saque el tanque para la solución (fig. 3) ✓ Suelte las trabas (B) en la tapa del tanque y sáquela (fig. 4) ✓ Use la tapa en el tanque para la solución (fig.
Coloque la manguera Desenchufe la limpiadora para alfombras de la toma de corriente eléctrica. ✓ ✓ ✓ ✓ ✓ ✓ ✓ ✓ Coloque el mango en posición vertical. Si lo desea, la manguera y el portaaccesorios se pueden sacar de la limpiadora. Saque la manguera del portaaccesorios. Abra la puerta de la manguera (A) en la parte posterior de la limpiadora para alfombras (fig. 13). Alinee el extremo de la manguera con el orificio de entrada para la manguera (B) y el orificio de entrada para la solución (C) (fig.
1 Limpieza de alfombras 2 3 4 5 6 7 8 9 10 11 12 13 20 Saque los muebles livianos (mesas, lámparas, etc.) del área que se va a limpiar. Proteja los muebles restantes recogiendo las faldillas de los muebles con alfileres y colocando papel de aluminio o plástico debajo de las patas. Pase bien una aspiradora por la alfombra para eliminar la suciedad suelta, cabellos, pelusas y otros residuos (Fig. 31). Pruebe el detergente para ver si destiñe el color en un área escondida de la alfombra.
1 Limpieza de tapicería 2 3 4 5 Revise el código de limpieza de la tela (Fig. 36). Busque un código ‘W’ o ‘WS’ en la etiqueta del fabricante del mueble. Estos códigos indican que puede usarse la limpiadora para alfombras para limpiar la tapicería. No use la limpiadora para alfombras en tapicería marcada ‘S’, ‘X’ o ‘Dry Clean Only’ (limpieza en seco solamente). Pase bien la aspiradora por la tapicería con los accesorios de su aspiradora.
Cuidado rutinario de su limpiadora para alfombras Limpie la boquilla Limpie el filtro de las escobillas Desenchufe la limpiadora para alfombras de la toma de corriente eléctrica. Desenchufe la limpiadora para alfombras de la toma de corriente eléctrica. ➤ Levante la parte superior de la boquilla (A) y deslícela para sacarla de la limpiadora (fig. 41). ➤ Incline la limpiadora hacia atrás de modo que el mango descanse en el piso.
Servicio Para obtener el servicio aprobado HOOVER y piezas genuinas HOOVER, localice el Centro de ventas y de servicio de Hoover o el Concesionario autorizado de servicio de garantía de Hoover (depósito) más cercano: ✓ Consultando la sección “Service” (Servicio) de Hoover en línea en www.hoover.
Garantía de un año completo (Uso doméstico) Su aparato HOOVER® está garantizado para uso doméstico normal, según el Manual del propietario, contra defectos originales en el material y la fabricación por el período de un año completo a partir de la fecha de compra. La presente garantía cubre gratuitamente toda la mano de obra y las piezas necesarias para dejar este aparato en buen estado de funcionamiento durante el período de garantía.
40321128 40321048 40301448 1 1 1 1 1 1 $14.99 $15.99 $12.99 $13.99 $ 8.59 $21.99 $11.99 $15.99 No.of Packs 7.50 TOTAL PARTS & ACCESSORIES MAIL ORDER FORM 40321049 40322032 40322016 1 1 $ 7.99 $ 7.99 $ 2.49 No. in Cost/ Pack Per Pack 40321050 40325032 1 1 1 Part No. 40303032 48417003 39514001 $ $ $ ® Part No. 40321128 40321048 40301448 40321049 40322032 40322016 40321050 40325032 40303032 48417003 39514001 Total Detach this section and mail to: No.
$ $7.50 $ ❑ MasterCard ❑ Discover Firma (Requerida)____________________________________ Teléfono diurno y código de área________________________ Nombre en la tarjeta__________________________________ No.
8-06 F6213-910 HOOVER and ® are registered trademarks HOOVER y ® son marcas registradas Printed in U.S.A.