
Manual

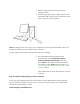
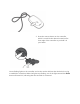

1. Remove the green label from the wireless
gaming receiver.
2. Insert the gaming receiver’s USB connector into
a powered USB 2.0 port on the computer (on the
front or back of your computer).
Note The USB ports on the front of your computer may not be powered USB 2.0 ports. Try
using one of the ports on the back of your computer.
A green light on the receiver indicates that the unit is working.
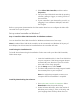
3. If the Add New Hardware Wizard starts
automatically, select Install the software
automatically (Recommended), and then
select Next. If the wizard installs the software
successfully, select Finish and then skip to Step
3: Connect the Xbox 360 wireless controller to your
computer, below.
If the wizard fails to install the software, continue
to Step 2.
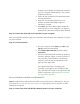
Step 2: Install the Xbox gaming receiver software
If you have the installation disc that came with your Xbox 360 Wireless Gaming Receiver,
you can install the software from that disc. If you don’t have the disc, you can install the
software by downloading it online.
Install using the installation CD: