
User Manual

KDAR Company 7
Operation
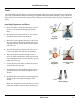
Shutting Down
1. Using the acetylene control knob turn off the
flow of acetylene to the welding tip. This will
allow oxygen to continue to flow and will insure
any debris that may be in the orifice is blown
out.
2. Turn off the oxygen using the oxygen control
knob on the torch handle.
3. If shutting down for only a short period of time,
close the tank valve on both the acetylene and
oxygen and leave the hoses filled with gas.
4. If shutting down for a longer period of time,
close the tank valve on both the acetylene and
oxygen.
5. Bleed the acetylene line by opening the acety-
lene control knob on the torch handle. Watch the
regulator gauge, it should move to reading zero.
6. Close the acetylene control knob on the torch
handle.
7. Bleed the oxygen line by opening the oxygen
control knob on the torch handle. Watch the reg-
ulator gauge, it should move to reading zero.
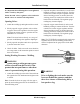
8. Finally release the pressure on the regulator dia-
phragm by opening the regulator valve until little
or no pressure is felt. This will significantly im-
prove the life of the regulator.
Setting Working Pressures—Cutting
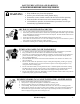
While setting working
pressure gases will be released from the
torch. It is important that no open flame
or other heat source is present during this
operation.
Note: At this point the tanks should be turned off
and both the acetylene and oxygen lines cleared of
gas.
WARNING
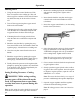
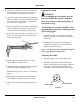
1. Remove the welding tip from the torch handle
and attach the cutting head. Tighten with a
wrench.
2. Insure that the both the acetylene and oxygen
control knobs on the torch handle are closed
(clockwise).
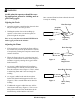
3. Insure the oxygen control knob (1) on the cutting
head is closed (clockwise).
4. Select the appropriate cutting tip for the material
being cut and attach it to the cutting head (the
VTK-HD-B is shipped with a #1 tip assembled
to the cutting head). Tighten with a wrench.
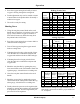
Note: The char t on page 9 can be used as a
guide for selecting the correct tip for the job.
5. Close (counter clockwise) both the acetylene and
oxygen regulator valves.
6. Slowly open the oxygen cylinder valve to allow
oxygen to flow to the regulator. Once the regula-
tor begins to register pressure, open the valve an
additional 1 to 1 1/2 turns.
Note: This must be done slowly, as a surge of
pressure could damage the regulator diaphragm.
7. Open the oxygen regulator until the regulator
reaches the desired working pressure.
Note: Working pr essur e char ts ar e found on
page 9.
1