Istruzioni per luso LAVASTOVIGLIE IT Italiano, 1 EN English,13 Sommario Installazione, 2-3 Posizionamento e livellamento Collegamenti idraulici ed elettrici Dati tecnici Descrizione dellapparecchio, 4 Vista dinsieme Pannello di controllo Caricare i cestelli, 5 Cestello inferiore Cestello delle posate Cestello superiore Avvio e utilizzo, 6 ,1.
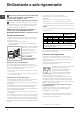
Installazione 16 È importante conservare questo libretto per poterlo consultare in ogni momento. In caso di vendita, di cessione o di trasloco, assicurarsi che resti insieme allapparecchio. Leggere attentamente le istruzioni: ci sono importanti informazioni sullinstallazione, sulluso e sulla sicurezza. In caso di trasloco tenere lapparecchio in posizione verticale; se fosse necessario, inclinarlo sul lato posteriore.
Sicurezza antiallagamento Per garantire che non si generino allagamenti, la lavastoviglie: - è dotata di un sistema che interrompe lingresso dellacqua nel caso di anomalie o di perdite dallinterno. Alcuni modelli sono dotati di un dispositivo supplementare di sicurezza New Acqua Stop*, che garantisce lantiallagamento anche in caso di rottura del tubo di alimentazione.
Descrizione dellapparecchio 16 Vista dinsieme 1. 2. 3. 4. 5. 6. 7. 8. 9. 10. 11. 12. Cestello superiore Irroratore superiore Ribaltine Regolatore altezza cestello Cestello inferiore Irroratore inferiore Cestello posate Filtro lavaggio Serbatoio sale Vaschette detersivo e serbatoio brillantante Targhetta caratteristiche Pannello comandi*** Pannello comandi Tasto Selezione Programma Spia ON-OFF Spie Programmi Tasto ON-OFF/RESET *** Solo sui modelli ad incasso totale * Presente solo su alcuni modelli.
Caricare i cestelli Prima di caricare i cesti, eliminare dalle stoviglie i residui di cibo e vuotare bicchieri e coppe dei liquidi rimasti. Dopo aver caricato, controllare che gli irroratori ruotino liberamente. Cesto inferiore Il cesto inferiore può contenere pentole, coperchi, piatti, insalatiere, posate ecc..secondo gli Esempi di caricamento. Piatti e coperchi grandi vanno sistemati di preferenza ai lati del cesto, facendo attenzione a non bloccare la rotazione dellirroratore superiore.
Avvio e utilizzo 16 Avviare la lavastoviglie Caricare il detersivo 1. Aprire il rubinetto dellacqua. 2. Aprire la porta e premere il tasto ON-OFF: si sente un breve bip, la spia ON/OFF, e le spie programmi si illuminano per alcuni secondi. 3. Dosare il detersivo (vedi sotto). 4. Caricare i cestelli (vedi capitolo Caricare i cestelli). 5.
Programmi Tabella dei programmi 16 Se le stoviglie sono poco sporche o sono state sciacquate precedentemente sotto lacqua, ridurre sensibilmente la dose del detersivo. Il numero e il tipo di programmi ed opzioni, variano in base al modello di lavastoviglie. Detersivo (A) = vaschetta A (B) = vaschetta B Indicazioni per la scelta Programma dei programmi Stoviglie e pentole molto sporche (da non usare per pezzi delicati). Stoviglie e pentole normalmente sporche. Programma standard giornaliero.
Brillantante e sale rigenerante 16 Usare solo prodotti specifici per lavastoviglie. Non usare sale alimentare o industriale nè detersivi per il lavaggio a mano. Seguire le indicazioni riportate sulla confezione. Se si usa un prodotto multifunzione, non è necessario aggiungere brillantante, si consiglia invece di aggiungere sale, specie se lacqua è dura o molto dura. Seguire le indicazioni riportate sulla confezione.
Manutenzione e cura Escludere acqua e corrente elettrica Chiudere il rubinetto dellacqua dopo ogni lavaggio per eliminare il pericolo di perdite. Staccare la spina dalla presa di corrente quando si pulisce la macchina e durante i lavori di manutenzione. Pulire la lavastoviglie La superficie esterna e il pannello di controllo possono essere puliti con un panno inumidito con acqua non abrasivo. Non usare solventi o abrasivi.
Precauzioni e consigli 16 Lapparecchio è stato progettato e costruito in conformità alle norme internazionali di sicurezza. Queste avvertenze sono fornite per ragioni di sicurezza e devono essere lette attentamente.
Anomalie e rimedi Può accadere che lapparecchio non funzioni. Prima di telefonare allAssistenza controllare che non si tratti di un problema facilmente risolvibile aiutandosi con il seguente elenco. Qualora il problema persista chiamare il Servizio Assistenza Tecnico Autorizzato: Numero Unico Nazionale 199.199.199 (costo massimo al minuto per chiamate da rete fissa Euro 0,1426).
16 12
Operating instructions EN English, 13 DISHWASHER Contents Installation, 14-15 Positioning and levelling Connecting the water and electricity supplies Advice regarding the first wash cycle Technical data Description of the appliance, 16 Overall view Control panel Loading the racks, 17 DIF 14 Lower rack Cutlery basket Upper rack Start-up and use, 18 Starting the dishwasher Measuring out the detergent Wash options Wash cycles, 19 Table of wash cycles Rinse aid and refined salt, 20 Measuring out the
Installation EN Keep this instruction manual in a safe place for future reference. If the appliance is sold, given away or moved, please ensure the manual is kept with the machine, so that the new owner may benefit from the advice contained within it. Please read this instruction manual carefully: it contains important information regarding the safe installation, use and maintenance of the appliance.
Anti-flooding protection To ensure floods do not occur, the dishwasher: - is provided with a special system which blocks the water supply in the event of anomalies or leaks from inside the appliance. Some models are also equipped with the supplementary safety device New Acqua Stop*, which guarantees antiflooding protection even in the event of a supply hose rupture.
Description of the appliance EN Overall view 1. 2. 3. 4. 5. 6. 7. 8. 9. 10. 11. 12. Upper rack Upper sprayer arm Tip-up compartments Rack height adjuster Lower rack Lower sprayer arm Cutlery basket Washing filter Salt dispenser Detergent and rinse aid dispensers Data plate Control Panel *** Control panel Select wash cycle button ON/OFF indicator light Wash cycle indicator lights ON/OFF/RESET button ***Only in completely built-in models. * Only available in selected models.
Loading the racks Before loading the racks, remove all food residues from the crockery and empty liquids from glasses and cups. After loading the appliance, check that the sprayer arms can rotate freely. Lower rack The lower rack can hold pans, lids, plates, salad bowls, cutlery, etc. as seen in the Loading examples. Plates and large covers should be placed at the sides of the rack, ensuring that they do not block the rotation of the upper sprayer arm.
Start-up and use EN Starting the dishwasher Measuring out the detergent 1. Turn the water tap on. 2. Open the door and press the ON/OFF button: you will hear a short beep and the ON/OFF and wash cycle indicator lights switch on for a few seconds. 3. Measure out the detergent (see below). 4. Load the racks (see chapter entitled Loading the racks). 5.
Wash cycles If the crockery is only lightly soiled or if it has been rinsed with water before being placed in the dishwasher, reduce the amount of detergent used accordingly. EN The number and type of wash cycles and options may vary depending on the dishwasher model. Wash cycle selection instructions Extremely soiled dishes and pans (not to be used for delicate items). Normally soiled pans and dishes. Standard daily wash cycle.
Rinse aid and refined salt EN Only use products which have been specifically designed for dishwashers. Do not use table salt or industrial salt, or washing up liquid. Follow the instructions given on the packaging. If using a multi-functional product it is not necessary to add rinse aid; however, we recommend that you add salt, especially if you live in an area where the water is hard or very hard. Follow the instructions given on the packaging.
Care and maintenance Shutting off the water and electricity supplies Turn off the water tap after every wash cycle to avoid leaks. Always unplug the appliance when cleaning it and when performing maintenance work. Cleaning the dishwasher The external surfaces of the machine and the control panel may be cleaned using a non-abrasive cloth which has been dampened with water. Do not use solvents or abrasive products.
Precautions and advice EN This appliance was designed and manufactured in compliance with current international safety standards. The following information has been provided for safety reasons and should therefore be read carefully.
Troubleshooting Whenever the appliance fails to work, check for a solution from the following list before calling for Assistance. Problem: Possible causes / Solutions: The dishwasher does not start or cannot be controlled • Switch off the appliance by pressing the ON/OFF button, switch it back on after approximately one minute and reset the program. • The appliance has not been plugged in properly. • The dishwasher door has not been shut properly. The door won’t close • The lock was released.
195091767.