Instructions for Installation and Use Build-in Electric double oven Contents GB English, 2 GB Warnings, 2 Introduction, 3 Safety Information, 4 Installation, 5 Tall Cabinet Ventilation, 6 The main parts of your Double Oven, 8 Start-up and use, 9 The Cooking Modes in your Double Oven, 11 Solarplus Grill, 14 Top Oven - Conventional Cooking, 16 Top Oven Temperature Charts - Meat, 17 Top Oven Temperature Charts - Baking, 18 Main Oven - The Intelligent Cooking System, 19 Temperature Conversion Chart, 21 Care
Warnings GB • WARNING: The appliance and its accessible parts become hot during use. • Care should be taken to avoid touching heating elements. • Children less than 8 years of age shall be kept away unless continuously supervised.
Introduction To the Installer: Before installation, fill in the product details on the back cover of this book. The information can be found on the rating plate. To the User: You must read the instructions prior to installing and using the appliance and then retain them for future reference. ! Before operating your new appliance please read this instruction booklet carefully. It contains important information concerning the safe operation, installation and maintenance of the appliance.
Safety Information GB When used properly your appliance is completely safe but as with any electrical product there are certain precautions that must be observed. PLEASE READ THE PRECAUTIONS BELOW BEFORE USING YOUR APPLIANCE. SAFETY ADVICE IN THE EVENT OF A CHIP PAN OR ANY OTHER PAN FIRE: Always Always make sure you remove all packaging and 2. literature from inside the oven and grill compartments before switching on for the first time.
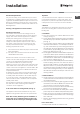
Installation Electrical Requirements For your own safety, we recommend that your cooker is installed by a competent person such as one who is registered with NICEIC (National Inspection Council for Electrical Installation Contracting). The cooker should be installed in accordance with the latest edition of the IEE Regulations. Warning: This appliance must be earthed. Electrical Connections The installer must check that the voltage shown on the rating plate corresponds with the house electricity supply.
Tall Cabinet Ventilation GB Fig. 1 Ventilation Slot required here if cabinet does not fit to ceiling - 51mm x 457mm min. area 50 mm Air Gap Ventilation Slot required here if the cabinet does not fit to the ceiling - 51mm x 457mm min. area 50 mm Air Gap Ventilation Slot required here - 51mm x 457mm min.
GB 562mm 570mm ndle exc. ha b o kn s Viewed down through cabinet 561 mm Cabinet 882mm No. 6x25mm screw (4 supplied) Fig. 3 870mm Oven Door 595 mm mm 550 Fig. 2 562 882mm, 870mm if cooker trim is to overlap top edge of shelf mm Connector Box mm 550 * n i m Fig.
The main parts of your Double Oven GB Overall view Control Panel MODEL & SERIAL NUMBER LABEL Record the Model No. and the Serial No. on back page.
Start-up and use ! The first time you use your appliance, heat the empty oven with its door closed at its maximum temperature for at least two hours. Make sure that the room is well ventilated before switching the oven off and opening the oven door. The appliance may emit a slightly unpleasant odour caused by protective substances used during the manufacturing process burning away. ! To make the setting process easier, press and hold the + and – buttons to scroll through the numbers on the display rapidly.
GB 7. During cooking it is always possible to: - change the temperature by pressing the + Demo mode button, - followed by the and buttons (manual modes only); - set the duration of a cooking mode (see Cooking Modes); button to stop cooking. In this case the - press the appliance stores the temperature modified previously in its memory (manual modes only); button for 3 - switch off the oven by pressing the seconds. 8.
The Cooking Modes in your Oven Your new appliance is equipped with a number of different cooking modes: Manual cooking modes ! All cooking modes have a default cooking temperature which may be adjusted manually to a value between 30°C and 250°C for TOP OVEN, between 800°C and 230°C for MAIN OVEN,(for GRILL mode- from 5% to 100%).
GB • • • • • • • • Form the dough into a ball shape, place it in a large bowl and cover it with transparent plastic wrap to prevent the surface of the dough from drying out. Select the manual LOW TEMPERATURE function on the oven and set the temperature to 40°C. Place the bowl inside and leave the dough to rise for approximately 1 hour (the dough should double in volume). Cut the dough into equal sized loaves. Place them in the dripping pan, on a sheet of baking paper. Dust the loaves with flour.
Programming cooking Practical cooking advice ! A cooking mode must be selected before programming can take place. ! Do not place racks in position 1 and 5 during fanassisted cooking. This is because excessive direct heat can burn temperature sensitive foods. ! In both TOP and MAIN ovens for the manual cooking programs it is possible to set the cooking time from 00:01 to 23:59.
Solarplus Grill GB CAUTION: Accessible parts may become hot when the grill is in use - children should be kept away. Your cooker is not fitted with a conventional type of grill. The solarplus grill is designed to reduce your grilling times. It is quicker because it takes less time to warm up from cold. Conventional grills require 5 minutes pre-heat before food is placed beneath them, but for normal grilling the solarplus grill can be used from cold without any pre-heat.
Using the grill pan kit GB The grill pan handle is detachable from the pan to facilitate cleaning and storage. Fix the pan handle securely before use: 1. Fit the handle to the grill pan so that the external ‘hooks’ embrace the edge of the pan (fig. 1) 2. Make sure that the middle part of the handle fits exactly the protruding support of the pan (fig .2) and holds the pan from the bottom. The food must be placed on the rack in the grill pan. Position the grill pan on top of the oven rack.
Top Oven Conventional Cooking GB The heat for conventional cooking in the top oven is provided by the grill element and the element under the floor of the oven. It is ideal for the slow cooking of cheaper cuts of meat in casseroles etc. but can also be used for small joints of meat up to 1.5kg (3lb). See cooking charts for temperatures and shelf positioning.
Top Oven Temperature Charts - Meat Pre-heat Temperature °C Time (approx.) Beef/ Lamb (slow roasting) Yes 170/180 35 mins per 450g (1lb) + 35 mins over.
Top Oven Temperature Charts - Baking GB Pre-heat Temperature °C Time in mins. Position in Oven Scones Yes 210/220 10-15 Runner 2 from bottom of oven. Small Cakes Yes 180/190 20-25 Runner 2 from bottom of oven. Victoria Sandwich Yes 170/180 20-30 Runner 2 from bottom of oven. Sponge Sandwich (fatless) Yes 180/190 20-25 Runner 2 from bottom of oven. Swiss Roll Yes 200/210 10-15 Runner 2 from bottom of oven.
Main Oven - The Intelligent Cooking System The main oven of your new cooker is equipped with an intelligent electronic cooking system that gives you additional cooking performance, flexibility and features over traditional cooking products. See cooking charts for temperatures and shelf positioning. Cooking temperature ranges The intelligent cooking system will automatically suggest a suitable cooking temperature for several cooking modes.
Main Oven - The Intelligent Cooking System GB Cooking Advice Table COOK CHART - Fan oven mode: COOK CHART - Traditional mode: Meat Pre-heat Temperature Shelf Cooking Time Position Meat Beef yes 190/200°C 2 or 3 Beef (foil covered) yes 190/200°C 2 or 3 20-25 minutes per 450g (1lb) + 20 minutes extra 35-45 minutes per 450g (1lb) Lamb yes 190/200°C 2 or 3 25-30 minutes per 450g (1lb) + 25 minutes extra Lamb (foil covered) yes 190/200°C 2 or 3 35-45 minutes per 450g (1lb) Pork yes 19
Temperature Conversion Chart GB Gas Mark °F Main Conventional Oven Main Fan Oven ½ 250 120 100 1 275 140 120 2 300 150 130 3 325 160 140 4 350 180 160 5 375 190 170 6 400 200 180 7 425 220 200 8 450 - 210 9 475 - 220 PLEASE PHONE US TO REGISTER YOUR APPLIANCE AND ACTIVATE YOUR PARTS GUARANTEE ON 08448 24 24 24 21
Care and Cleaning GB Warning: Before cleaning, please ensure that the electricity supply to the appliance is switched off and the appliance is fully cold. ! Never use steam cleaners or pressure cleaners on the appliance. ! Clean the glass part of the oven door using a sponge and a non-abrasive cleaning product, then dry thoroughly with a soft cloth. Do not use rough abrasive material or sharp metal scrapers as these could scratch the surface and cause the glass to crack.
Care and Cleaning 3. OVEN DOORS 5. HOW TO CLEAN THE LAMP LENS TOP OVEN LAMP CONTROL PANEL OVEN DOORS MAIN OVEN LAMP Warning: To avoid electric shocks - please ensure that the electricity supply to the appliance is switched off and the appliance is fully cold, before cleaning lamp lens. (a) Control Panel Regularly wipe with a clean, damp cloth and polish with a clean, dry cloth. (b) Inner Door Panels & Glass Open the door fully. The glass panel may now be washed.
Care and Cleaning GB CLEANING THE DOORS Take particular care not to damage the inner surface of the door inner glass that is coated with a heat reflective layer. Do not use scouring pads, or abrasive powder, which will scratch the glass. Ensure that the glass panel is not subjected to any sharp mechanical blows. Stubborn stains can be removed by using a fine steel wool soap pad. For slight soiling the inner glass panel may be cleaned, while still warm, without removing it from the door.
If something goes wrong... Before calling a Service Engineer, please check through the following lists. THERE MAY BE NOTHING WRONG. Problem Check Slight odour or small amount of smoke when grill / oven used for first time This is normal and should cease after a short period. Nothing works If you find that the timer display is blank, then it is likely that there is no electricity supply to your oven.
If something goes wrong... GB Problem Check Oven light does not work The oven lamp is not covered by the guarantee. The part is easily changed (see the section on oven lamp replacement). A new lamp may be obtained from our Parts department see back page. Draught from beneath control panel A gentle flow of air will be blown from beneath the control panel when the appliance is used. If the appliance is still warm, this cooling fan may run on, or restart itself when all controls have been turned off.
Guarantee 12 months Parts and Labour Guarantee Your appliance has the benefit of our manufacturer’s guarantee, which covers the cost of breakdown repairs for twelve months from the date of purchase. This gives you the reassurance that if, within that time, your appliance is proven to be defective because of either workmanship or materials, we will, at our discretion, either repair or replace the appliance at no cost to you.
10/2013 - 195102603.02 XEROX FABRIANO After Sales Service GB No one is better placed to care for your Hotpoint appliance during the course of its working life than us - the manufacturer. Essential Contact Information Hotpoint Service We are the largest service team in the country offering you access to 400 skilled telephone advisors and 1100 fully qualified engineers on call to ensure you receive fast, reliable, local service. UK: 08448 224 224 Republic of Ireland: 0818 313 413 www.hotpoint.co.