
Instruction for Use


EN
9
OVEN LIGHT
Turn the knob to
to switch on the oven light. At
the same time, will be activated also the turnspit (if
present).
ELECTRICAL TIMER
SETTING THE TIME
You will need to set the time when you switch on the
appliance for the rst time: “AUTO” and “0.00” ash on
the display.
A
U
T
O
To set the time of day, press the central button ,
then set the clock using the + and - buttons. After 5
seconds the time of the day will be conrmed.
Please note: To change the time of the day afterwards for
example following lengthy power outages, you will need to
reset the time following the same operations.
SETTING THE MINUTE MINDER
This option does not interrupt or activate cooking but
allows you to use the display as a timer, both while a
function is active and when the oven is o.
To activate the timer, press the + button until the
symbol appears on the display.
A
U
T
O
Use the + and - buttons to set the desired duration:
the countdown begins after a few seconds.
A
U
T
O
The display shows the time of the day and the
remains lit, conrmating the timer has been set.
Please note: To view the countdown and change it if
necessary, press the time button 2 seconds again.
When the set time has elapsed, the alarm will sound.
The alarm tone will stop by pressing any button.
RECIPE FUNCTION PREHEAT
TEMPERATURE (°C) /
GRILL POWER
DURATION (MIN)
LEVEL
AND ACCESSORIES
Swiss roll
- Yes
210 15 - 20
4
Short pastry
- Yes
200 10 - 12
3
Dough with rising agent
- Yes
200 25 - 30
3
Sponge cake
- Yes
190 20 - 25
3
Leavened dough
- Yes
180 40 - 50
3
Pu pastry
- Yes
190 20 - 30
2
Souè
- Yes
180 35 - 40
2
Sacher torte
- Yes
180 55 - 60
2
Fruit pie
- Yes
160 160 - 180
2
Choux pastry
- Yes
200 35 - 40
2
Roast beef
- Yes
200 90 - 120
2
Pizza
- Yes
200 20 - 25
2
Baked sh
- Yes
200 50 - 60
4
Baked vegetables
- Yes
170 30 - 40
3
Poultry
- Yes
190 - 200 60 - 70
4
Steaks
-
10 10 - 15
4 3
Coutlet
-
10 15 - 25
4 3
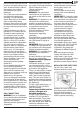
ACCESSORIES
Wire shelf
Baking dish or cake tin on the
wire shelf
Tray Tray with 200 ml of water
COOKING TABLE