EN English Instructions for use - HOB Contents Important safety instructions 5 Safeguarding the environment 6 Declaration of conformity 6 Before use 6 Existing pots and pans 6 Recommended pot bottom widths 6 Power level table 7 Installation 7 Electrical connection 8 Instructions for use 9 Cleaning 11 Troubleshooting guide 11 Noises made by the hob 11 After-sales service 12
10 mm 180 mm 180 mm 145 mm 180 mm 180 mm 180 mm 145 mm 210 mm 145 mm 180 mm 280/230/180 mm 145 mm 210 mm 145 mm 210 mm 145 mm 180 mm 145 mm 210 mm 180 mm 145 mm 280/180 mm 145 mm 180 mm 280/180 mm 145 mm 210 mm 180 mm 260 mm 145 mm 280 mm 180 mm 180 mm 210 mm 180 mm 145 mm 210 mm 180 mm 180 mm 280/230/180 mm 145 mm 180 mm 210 mm 210 mm 280 mm 210 mm 210 mm 240 mm 180 mm 210 mm 260 mm 145 mm 260 mm 210 mm 145 mm 145 mm 210 mm 210 mm 145 mm 180 mm 145 mm 28
R = Min. 6,5 mm Max. 8 mm 0 560 +2 mm Min. 50 mm 580mm 650mm 700mm 0 490 +2 510 mm mm mm 54 mm A 0 30 553 mm R = 11,5 mm 583 +2 mm +1 0 483 mm 0 490+2 mm 0 560+2 mm 0 513 +2 mm R = 11,5 mm 6 mm R = Min. 6,5 mm Max. 8 mm B R = Min. 6,5 mm Max. 8 mm 0 750 +2 mm Min. 50 mm 0 490 +2 510 mm +1 0 30 mm 54 mm 770 mm 483 mm 742 mm mm 0 R = 11,5 mm 773 +2 mm Min. 50 mm 0 0 513 +2 mm 0 750+2 490+2 mm mm R = 11,5 mm R = Min. 6,5 mm Max. 8 mm Min. 3 cm Max. 6 cm Min.
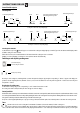
1 2 3 Min. 40 cm Min. 10 cm Min.
IMPORTANT SAFETY INSTRUCTIONS These instructions shall also be available on website: www.hotpoint.eu YOUR SAFETY AND THAT OF OTHERS IS VERY IMPORTANT This manual and the appliance itself provide important safety messages, to be read and always observed. This is the danger symbol, regarding safety, warning of potential risks to users and others.
SAFEGUARDING THE ENVIRONMENT Disposal of packing The packing material is 100% recyclable and marked with the recycling symbol ( disposed of in compliance with local regulations. ). The various parts of the packing must not be dispersed in the environment, but Disposal This appliance is marked in conformity with European Directive 2012/19/EU on Waste Electrical and Electronic Equipment (WEEE).
RECOMMENDED POT POSITION For best performance, when you use two pots simultaneously, put them according to the pictures below: POWER LEVEL TABLE Power level Max.
ELECTRICAL CONNECTION Disconnect the appliance from the power supply. Installation must be carried out by qualified personnel who know the current safety and installation regulations. The manufacturer declines all liability for injury to persons or animals and for damage to property resulting from failure to observe the regulations provided in this chapter. The power cable must be long enough to allow the hob to be removed from the worktop.
INSTRUCTIONS FOR USE Control Panel Description Control panel Power management step 1 On/Off Timer Control panel lock/Special function/ Power management step 2 and 4 Power management step 1 Cooking zone controls and corresponding display Power management step 1 On/Off Timer Control panel lock/Special function/ Power management step 2 and 4 Power management step 1 Cooking zone controls and corresponding display Switching the hob ON/OFF To switch the hob on, press the button for approx.
sounds and the cooking zone switches off automatically. To deactivate the timer, keep the Timer button pressed for at least 3 seconds. To set the timer for another zone, repeat the above steps. The timer display always shows the timer for the selected zone or the shortest timer. To modify or deactivate the timer, press the cooking zone selection button for the timer in question. Control panel warnings Residual heat indicator. The hob is fitted with a residual heat indicator for each cooking zone.
Activation/deactivation of the acoustic signal After switching the hob on, press and hold the “+” button and the outermost button on the right simultaneously for at least three seconds (“control panel lock”). 5 Sec CLEANING WARNING - Do not use steam cleaners. Before cleaning, make sure the cooking zones are switched off and that the residual heat indicator (“H”) is not displayed. IMPORTANT: Do not use abrasive sponges or scouring pads. Their use could eventually ruin the glass.
AFTER-SALES SERVICE Before contacting the After-sales Service: 1. See if you can solve the problem yourself with the help of the “Troubleshooting guide”. 2. Switch the appliance off and then on again it to see if the problem has been eliminated. If the problem persists after the above checks, contact the nearest After-Sales Service.
EN 19513638400 06/15