Quick Start Guide Guía de inicio rápido Guide de démarrage rapide HP Photosmart D5100 series
1 Unpack the HP Photosmart printer Desembale la impresora HP Photosmart Déballez l’imprimante HP Photosmart a g b f e c d English Español Français Thank you for purchasing an HP Photosmart printer! Read this booklet and other accompanying documentation to help you get started and get the most out of your printer. Gracias por haber adquirido una impresora HP Photosmart.
2 Connect the power only Conecte sólo la alimentación Mettez l’imprimante sous tension Power button Connect power only Botón de encendido Conecte sólo la alimentación Bouton Marche Branchement électrique uniquement English Español Français 1. Connect the power cord to the printer and to a wall outlet. 1. Conecte el cable de alimentación a la impresora y a una toma de pared. 1. Branchez le câble d’alimentation sur l’imprimante et sur une prise secteur. 2.
3 Load plain paper Cargue papel normal Chargez du papier ordinaire Output tray Bandeja de salida Bac de sortie Photo tray 1 Bandeja de fotos 5 Bac photo 2 4 Paper-width guide Main tray Guía de anchura del papel Bandeja principal Guide de largeur du papier Bac principal 3 English Español Français For best calibration results, load plain paper in preparation for the print head alignment.
4 Install the print cartridges Instale los cartuchos de impresión Installez les cartouches 2 – 3 1 4 5 6 English Español Français 1. Raise the main cover. 1. Levante la cubierta principal. 1. Relevez le capot. 2. Unwrap one of the print cartridges. 2. Quite el envoltorio de un cartucho de impresión. 2. Déballez l’une des cartouches. 3. Gently pull the pink tab to remove the clear tape from the genuine HP print cartridge. Avoid touching the ink nozzles or coppercolored contacts. 4.
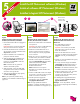
5 1 Install the HP Photosmart software (Windows) Instale el software HP Photosmart (Windows) Installez le logiciel HP Photosmart (Windows) 2 3 – 4 5 USB connection Conexión USB Connexion USB Windows Windows Windows English Español Français Windows® 98, Me, 2000 Professional, XP Home, XP Professional, x64 Edition Windows® 98, Me, 2000 Professional, XP Home, XP Professional, x64 Edition 1. Disconnect the USB cable if it is plugged in to the printer. 1.
5 1 Install the HP Photosmart software (Mac OS X) Instale el software HP Photosmart (Mac OS X) Installez le logiciel HP Photosmart (Mac OS X) 2 USB connection 3 4 Conexión USB Connexion USB Mac OS X Mac OS X Mac OS X English Español Français Mac OS X 10.3, 10.4 and later Mac OS X 10.3, 10.4 y versiones posteriores 1. Connect the USB cable to the printer and to the computer. 1. Conecte el cable USB a la impresora y al equipo. Macintosh OS X 10.3, 10.4 et versions ultérieures 2.
Installation troubleshooting Solución de problemas de instalación Dépannage de l’installation English If the printer software did not install successfully, or if the printer and computer are not communicating properly after software installation, check this page for possible solutions. Check all cable connections between the printer and computer, and be sure you are using the most recent version of the printer software. You can acquire the latest software updates by visiting the HP support website at www.
instrucciones para volver a instalar el software. Vuelva a conectar el cable USB sólo cuando se le indique durante la instalación del software. Problema: la comprobación de los requisitos del sistema indica que el equipo está ejecutando una versión antigua de Internet Explorer. Solución: presione las teclas Ctrl + Mayús del teclado y haga clic en Cancelar en el cuadro de diálogo Requisitos del sistema para omitir el bloque y finalizar la instalación del software.
Print your first borderless photo Imprima la primera fotografía sin bordes Impression de la première photo sans bordure 1 Print photos without a computer Imprima fotografías sin un equipo Imprimez des photos sans ordinateur English Español Français The HP Photosmart D5100 series printer allows you to print beautiful photos from a digital camera without connecting to a computer by following the simple, step-by-step instructions on the following pages.
2 Load 13 x 18 cm (5 x 7 inch) photo paper Cargue papel fotográfico de 13 x 18 cm (5 x 7 pulgadas) Chargez du papier photo 13 x 18 cm (5 x 7 pouces) 1 2 Output tray latch Lengüeta de la bandeja de salida Loquet du bac de sortie Output tray 5 3 4 Paper-width guide Bandeja de salida Photo tray Bac de sortie Bandeja de fotos Guía de anchura del papel Guide de largeur du papier Bac photo English Español Français 1.
3 Insert a memory card Inserte la tarjeta de memoria Insérez une carte mémoire Memory Stick/Memory Stick Duo xD Picture Card Memory Stick/Memory Stick Duo Tarjeta xD-Picture Memory Stick/Memory Stick Duo Carte xD Picture Compact Flash/Microdrive Secure Digital/MultiMediaCard Compact Flash/Microdrive Tarjeta Secure Digital/MultiMediaCard Compact Flash/Microdrive Carte Secure Digital/MultiMedia Card English Español Français Note: Insert only one memory card into the printer at a time.
4 Select and print a photo Seleccione e imprima una fotografía Sélectionnez et imprimez une photo OK OK 3 Bouton OK 2 Photo Tray Light Photo Index Select Photos Seleccione fotografías Print 4 Imprimir Bouton Sélectionner photos Bouton Imprimer Indicador luminoso de la bandeja de fotos Índice de fotografías Bouton Page d’index Voyant Bac photo 1 Photo Tray Cancel Bandeja de fotos Cancelar Bouton Bac photo Bouton Annuler English Español Français Tip: To print a list of the photos on
Quick tips Consejos prácticos Conseils pratiques 1 Print with a computer and HP Photosmart software Imprima con un equipo y el software HP Photosmart Imprimez à l’aide d’un ordinateur et du logiciel HP Photosmart English Español Français The possibilities are endless when you use HP Photosmart software to create your photo projects. Cuando utiliza el software HP Photosmart para crear sus proyectos fotográficos, las posibilidades son infinitas.
2 1 Print on a CD or DVD Imprima en un CD o DVD Procédez à une impression sur CD ou DVD Create a project in the Create tab CD/DVD holder CD/DVD tray Soporte para CD/DVD. Bandeja para CD/DVD. Support de CD/DVD Bac CD/DVD 2 Cree un proyecto en la ficha Create (Crear). 3 Créez un projet dans l’onglet Create (Créer) 4 Line up the markings 5 Click Print in the software Alinee las marcas. Haga clic en Imprimir en el software.
Need more information? ¿Necesita más información? Plus d’informations ? Read the User Guide for a description of the printer features, troubleshooting information, and explanations of how to perform specific printing tasks using your new HP Photosmart printer. Consulte la Guía de usuario para obtener una descripción de las funciones de la impresora, información sobre la solución de problemas y explicaciones sobre cómo realizar tareas concretas de impresión con la nueva impresora HP Photosmart.