Installation and Reference Guide HP AdvanceStack LAN Rover/10A Module by Shiva
HP Customer Support Services How to get the latest software/agent firmware You can download a compressed file containing the latest version of the module software for the LanRover/10A by Shiva: j3230a.exe from the World Wide Web, HP FTP Library Service, CompuServe, and HP BBS. After you download the file, extract the file by typing: filename /x. For example, j3230a.exe /x. World Wide Web http://www.hp.com/go/network_city Select the “Support” section.
HP FIRST Fax Retrieval Service HP FIRST is an automated fax retrieval service that is available 24 hours a day, seven days a week. HP FIRST provides information on the following topics: ■ Product information ■ Troubleshooting instructions ■ Technical reviews and articles ■ Configuration information To access HP FIRST, dial one of the following phone numbers: Location Phone Number U.S. and Canada Only Dial 1 (800) 333-1917 with your fax machine or touch-tone phone and press 1. Outside the U.S.
HP AdvanceStack LanRover/10A Module by Shiva Installation and Reference Guide
© Copyright 1997, Hewlett-Packard Company All Rights Reserved. Reproduction, adaptation, or translation without prior permission is prohibited, except as allowed under the copyright laws. Publication Number J3230-90001 Edition 1 January 1997 Disclaimer The information contained in this document is subject to change without notice.
Contents Verifying Included Parts . . . . . . . . . . . . . . . . . . . . . . . . . . . . . . . . . . . . . . . 2 Installing a LanRover/10A by Shiva Module into a Slot . . . . . . . . . . . . . 3 (Remote 2C Only) Connect Cables From the Remote 2C To the Office LAN . . . . . . . . . . . . . . . . . . . . . . . . . . . . . . . . . . . . . . . . . . . . . . . . . . . . . . . . 6 Self Test . . . . . . . . . . . . . . . . . . . . . . . . . . . . . . . . . . . . . . . . . . . . . . . . . . . .
iv
HP AdvanceStack LanRover/10A Module by Shiva Installation and Reference Guide The HP J3230A AdvanceStack LanRover/10A Module by Shiva is a module that can be inserted into the following products: ■ HP AdvanceStack Switching Hub-12R, 24R, and 24T ■ HP AdvanceStack Remote 2C ■ HP AdvanceStack Switch 208 and 224 The features of the HP J3230A AdvanceStack LanRover/10A Module by Shiva are: ■ Ten asynchronous ports (RS-232, RS-423, to 112 Kbps) ■ Quick Setup Wizard for only a 15-minute configuration of
• Backup phone numbers • Dialback • Timed connections • Virtual connections (RIP, Telnet, and SAP) • Channel aggregation ■ Virtual connections for TCP/IP and IPX (Windows only) ■ BOOTP ■ Security (Authentication method can be combined with an authorization method): ■ • User Authentication: Internal User List, Novell, Shiva User List Server, TACACS, TACACS+, and Radius • Third Party Authentication: SecurID and Digital Pathways Security Server Authorization • HP user list; single databas
Installing a LanRover/10A by Shiva Module into a Slot To install the module into the Remote 2C, HP Switching Hub, or HP Switch, follow these steps: 1. If you are installing the module into the Remote 2C, you do not need to remove power. For other products, such as the HP Switching Hub or HP Switch, verify that the power cord has been removed. 2. Remove the cover plate on a slot: Loosen these screws or Loosen these screws Back of Remote 2C 3. Insert the LanRover/10A by Shiva into a slot.
6. On the front of the switch, hub or Remote 2C, remove the blank label from the appropriate slot: Pull the label out of the appropriate slot. Remote 2C 7.
8. Connect the cables. The module allows for up to ten modems to be connected to the LanRover/10A Module by Shiva. The cable that inserts into the right connector supports up to two modems and the cable that inserts into the left connector supports up to eight modems. Determine how many modems you are connecting and then select one or both cables. Both cables do not need to be connected in order for the LanRover/10A by Shiva to operate correctly.
(Remote 2C Only) Connect Cables From the Remote 2C To the Office LAN The Remote 2C has two RJ-45 ports on the front of the box for connecting each module to your LAN. Follow the illustrations below to connect the Remote 2C to your LAN: Example 1: Remote 2C connected to an Ethernet Switching Hub-12R Remote 2C LED should light if power is connected to both the Remote 2C and hub.
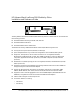
Self Test 10. Plug the power cord into the power cord receptacle and into an AC power source. Plug the power cord into the power cord receptacle for each modem. Self test lasts up to 60 seconds.
Description of LanRover/10A Module by Shiva LEDs The LanRover/10A by Shiva has the following LEDs: LED State Meaning Hardware Status (green) ON The module is inserted correctly and is operating normally. The module failed self test. Flashing The module is not installed. OFF Dial-In WAN Activity (green) ON Indicates that at least one user has dialed in successfully. Flickering The amount of flickering indicates the level of traffic transmitted between the device (e.g.
Where to Go From Here You are now finished installing the module and connecting cables. You need to configure the LanRover/10A using the included software, Quick Setup Wizard which will take you approximately 15 minutes. When you run the Quick Setup Wizard, it asks you to connect your modems and connect to an Ethernet or 100VG network. The Wizard automatically determines if you are running an IP or IPX network, it discovers all of your modems connected and their manufacture type.
Removing A LanRover/10A by Shiva Module The module is removed from the hub, switch or Remote 2C by reversing the installation steps described earlier in this guide. To remove the module, follow these steps: 1. Remove power from the Switching Hub or Switch 208/224 by unplugging the power cord. (If you are removing the module from a Remote 2C, you do not need to remove power.) 1. Disconnect the two cables from the module. 2. Unscrew the two captured screws holding the module. 3.
Troubleshooting Use the following table to determine the problem with your LanRover/10A Module by Shiva. Also consult the LED table on page 8. Problem Solution EITHER: - All LEDs are lit for the LanRover/10A Module by Shiva and remain lit. - The Fault LED is on for the module. One of the modems doesn’t seem to be working. Verify that the LanRover/10A by Shiva is fully inserted, extractor handles down, screws tightened. For the Remote 2C, try another slot.
Specifications Physical Width 15.24 cm (6.00 in) Depth 15.24 cm (6.00 in) Height 4 cm (1.63 in) Weight of LanRover/10A: 0.44 kg (0.88 lb) Weight of 2-port and 8-port cables together: 0.92 kg (2.02 lb) Environmental Operating Temperature Non-Operating Temperature Temperature +0°C to +55°C (32°F to 131°F) -40°C to 70°C (-40°F to 158°F) Relative humidity (non-condensing) 15% to 95%at 40°C (104°F) 15% to 90% at 65°C (149°F) Maximum altitude 4.6 km (15,000 ft) 4.
2-Port Cable Pin-Out Assignments DB25-Female End Signal Port 1 DB25-Male 2 TXD-A 2 Port 2 DB25-Male 3 RXD-A 3 4 RTS-A 4 6 DSR-A 6 8 DCD-A 8 20 DTR-A 20 22 RI-A 22 14 TXD-B 2 16 RXD-B 3 19 RTS-B 4 13 CTS-B 5 18 DSR-B 6 12 DCD-B 8 11 DTR-B 20 25 RI-B 22 7 SIGNAL GND 7 7 1 SHELL GND 1 1 8-Port Cable Pin-Out Assignments At SCSI End At DB25 End (“Port 3”) At SCSI End 1 (shield) At DB25 End (“Port 4”) 1 (shield) 2 2 (txd) 10 2 (txd) 3 3 (rxd) 11 3
8-Port Cable Pin-Out Assignments (continued) At SCSI End At DB25 End (“Port 5”) At SCSI End 1 (shield) At DB25 End (“Port 6”) 1 (shield) 18 2 (txd) 26 2 (txd) 19 3 (rxd) 27 3 (rxd) 20 4 (rts) 28 4 (rts) 21 5 (cts) 29 5 (cts) 22 6 (dsr) 30 6 (dsr) 23 8 (dcd) 31 8 (dcd) 24 20 (dtr) 32 20 (dtr) 25 22 (ri) 33 22 (ri) 34 7 (gnd) 34 7 (gnd) At SCSI End At DB25 End (“Port 7”) At SCSI End At DB25 End (“Port 8”) 1 (shield) 1 (shield) 36 2 (txd) 44 2 (txd) 37 3 (rxd
8-Port Cable Pin-Out Assignments (continued) At SCSI End At DB25 End (“Port 9”) At SCSI End 1 (shield) At DB25 End (“Port 10”) 1 (shield) 52 2 (txd) 60 2 (txd) 53 3 (rxd) 61 3 (rxd) 54 4 (rts) 62 4 (rts) 55 5 (cts) 63 5 (cts) 56 6 (dsr) 64 6 (dsr) 57 8 (dcd) 65 8 (dcd) 58 20 (dtr) 66 20 (dtr) 59 22 (ri) 67 22 (ri) 68 7 (gnd) 68 7 (gnd) Note: Pins 1, 34, 35, and 68 on the SCSI connector connect to ALL pin 7’s on the DB25 ends (e.g.
European Community This equipment complies with ISO/IEC Guide 22 and EN55022 Class A. This is a Class A product. In a domestic environment, this product may cause radio interference, in which case the user may be required to take adequate measures. Canada This product complies with Class A Canadian EMC requirements.
Technical information in this document is subject to change without notice.