
Instruction Manual

IMPORTANT: If you do not present EVA virtual disks to the new primary node, the warm
failover will fail to restore the configuration. You must Quick Restore the node and start over.
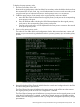
5. Enter m.
The node will then run cable checks and configuration checks. After the checks are complete
the node will reboot automatically. Wait for the node to fully boot.
The new primary node will reboot once more after it has retrieved the old configuration from
the backend storage. Wait until the new primary node boots up with the correct hostname
and configuration.
6. Log into Command View VLS and check:
• VLS identity
• Chassis general information
• General information for the primary node such as name, serial number, memory, Ethernet,
etc.
• Fibre Channel configuration for the primary node (host ports and storage ports)
• Virtual library configuration
• Storage pool general information
• EVA storage LUNs
• Cartridges configured
• Automigration configuration
• Host LUN mapping configuration
7. Power up all secondary nodes. The boot up can take 10 to 20 minutes.
8. Verify all secondary nodes.
At this point, your VLS system is up and in working order. Do not connect the old primary
node to the VLS because its configuration will be out of sync with the system.
9. Repair the old primary node and then Quick Restore it; do not configure the node after the
Quick Restore. Power down the old node and keep it as the cold spare.
NOTE: If your primary node failed within an hour of making a configuration change, your most
recent change may not be reinstated on the spare node. Check your configuration settings and
reconfigure as needed.
180 Disaster Recovery