HP Engage Console User Guide SUMMARY HP Engage Console pushes apps to and configures settings for devices in an enterprise setting.
Legal information © Copyright 2020 HP Development Company, L.P. Apple and the Apple logo are trademarks of Apple Computer, Inc., registered in the U.S. and other countries. macOS is a trademark of Apple Computer, Inc. Bluetooth is a registered trademark owned by its proprietor and used by HP Inc. under license. © 2020 Google LLC All rights reserved. Google and Android are registered trademarks of Google LLC.
Table of contents 1 Getting started...............................................................................................................................................1 Administrators and roles ...................................................................................................................................................1 Adding new administrators ....................................................................................................................................
Initiating a Remote Cast & Control session for Windows devices...................................................................................17 7 Eva Communication Suite .............................................................................................................................. 19 Enabling device-to-device chat ......................................................................................................................................19 Enabling Eva Phone .....................
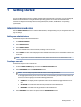
1 Getting started You can use HP Engage Console to remotely configure and manage devices. For instance, you can manage HP Retail Point of Sale devices running the Android® operating system. You can also use this cloud-based software to configure and manage devices running Android, iOS, macOS®, and Windows ® 10 operating systems (OS). Administrators and roles Use the Admins and Roles section to add new administrators, manage existing ones, or change their roles and sign-in settings.
Changing roles for administrators Follow these steps to change an administrator role. 1. Select the Administrators tab, and select the gear icon in front of an existing administrator. Select Edit. 2. When the Edit Admin User window opens, go to the Role section, and choose the role within the dropdown menu. 3. Select Submit. Two-step verification Two-step verification provides an additional layer of security to HP Engage Console dashboard login.
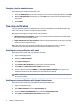
5. Enter your password, and select SUBMIT. 6. Follow the instructions displayed to register for Google authentication: a. A QR code is displayed on the dashboard. Download and install Google Authenticator application on your phone and launch the app. b. Select Scan barcode to launch the device camera. c. Point the device camera to the QR code displayed on the dashboard. The account is added to your authenticator app, and the dashboard displays a success message with back-up codes.
2 Device and user enrollment You can enroll devices and users through the software directly or through a QR code. Enrolling users Follow these steps to add new users. 1. Under the Device & User Enrollment tab, select User Management . 2. Select Add User. 3. Create a user name for the user, enter their email and phone number, and select the number of devices to assign to the user. 4. Select Add to add the user.
● Email—Sends the QR code to your account email. ● Edit—Edits the QR code configuration. Editing does not affect already enrolled devices. ● Deactivate—Deactivates the current QR code configuration. ● Rotate—Generates a new QR code and URL, and deactivates the previous QR Code and URL. Use if you think the current QR code configuration is compromised. Enrolling Windows devices Follow these steps to enroll Windows devices. 1. Under Device & User Enrollment, select QR Code. 2.
3 Devices The Devices tab allows you to see detailed information and perform some actions at the device level on enrolled devices. Device information This section outlines how to view detailed information about individual devices. 1. Select the Devices tab to view a list of enrolled devices. 2. Find the device whose information you want to see, and then select View Details. 3. A device specific page is displayed that contains the following information. 4.
● Factory Reset Device—Resets the device to factory settings. This options works on any device that is enrolled as a corporate device, however, it is not available for user enrolled devices. ● Delete Device—This option removes management for and completely deletes the device. If you want to manage the device in the future, you must re-enroll it to HP Engage Console. ● Change Device Name—This option changes the name of the device. ● Clear Browser Cache—Clears browser cache for the selected device.
4 Device Management options You can use the Device Management options to create device profiles and device groups. Branding Branding allows you to create a set of customized features that you can apply to device profiles and groups. With branding, you can customize the lock-screen wallpaper, lock-screen message, and home-screen wallpaper. You can apply branding only to device groups or profiles, not to individual devices. Creating a brand Follow these steps to create a brand. 1.
With Device Profiles you can create a group of policies and settings to assign to your devices. You can apply the device profile to individual devices or to a device group. Changes made in Device Profiles automatically apply to all the devices assigned to that profile. You can create custom device profiles or choose from the QuickStart options that contain preloaded settings based on the OS of the target device.
● Mobile Network—Allows you to mange the mobile data configuration of your devices. ● Display Settings—Allows you to manage the display attributes of your devices. ● EMM Settings—Additional settings that provide additional security and control for your EMMmanaged devices. You can give your users access to Systems Settings in a controlled fashion. ● VPN Settings—You can select one app from the list of applications and mark it as Always On VPN with an additional flag to lock down the network.
Creating new Windows device profile Follow these steps to create a new Windows device profile. 1. Under Device Management tab, select Device Profile, and select CREATE NEW PROFILE button. 2. Select Create New Profile. 3. In the Create New Profile dialog box, select the Windows tab. Then, enter a name for your profile and select SUBMIT. The Profile Creator wizard launches, and the device profile creation is divided into the following four sections. 4.
The Device Groups feature gives you the following options: ● Group together devices using different operating systems. ● Reboot all devices that belong to a group. ● Refresh all the devices that belong to a group so that you can be sure that device profile policies are actively applied. ● Set or change device profiles for all the devices in a group. ● Create and assign group administrators. Creating a device group Follow the instructions outlined here to create a device group. 1.
2. Select the Whitelist A Website button. 3. In the Whitelist a Website window, the Details tab opens first. Enter the website name and URL here. You can also choose whether you want the site to be visible on the home screen. 4. Select Next. 5. Under the Android Settings tab, choose from the available options. 6. Select Next. 7. Under the Apple Settings tab, choose from the available options. 8. Select Save to whitelist the site.
5 Content Management The Content Management feature allows you to publish content to devices managed by HP Engage Console. Uploading content to the dashboard Follow these steps to upload content to the dashboard. 1. Within the dashboard, select Content Management and then select Content. 2. Select ADD NEW and then select Files. The file upload window opens with two separate tabs: ● Upload from Computer—You can drag and drop files here, or select UPLOAD FILES and select a file to upload.
7. ● Loop Continuously—Select this option to play the presentation in a continuous loop. ● Choose an Interval Time—Select this option to set a time duration to delay between two files. The minimum time is 5 seconds and the maximum time is 1 minute. Select UPDATE to save the presentation.
6 Remote Cast & Control Remote Cast & Control grants you remote access to devices registered to HP Engage Console. This allows you to remotely view, control, and troubleshoot devices. Remote cast supports the following functions: ● Cast device screen—Mirrors the screen of a remote device. ● Remote control—Allows you to control the device screen. NOTE: Not available on iOS devices. Available on most Android devices and all HP Engage devices.
● Start Recording—Select this button to record the session. 3. Select Start Session to start the session. The device user must select Okay and Start Now on the Android device to accept the remote session. 4. Select START NOW to start a remote cast session. During a session, the following options are displayed: ● Control—If supported, allows you to control the screen. ● Back—Select to replicate back key behavior. ● Home—Select to replicate home key behavior.
2. Find the device that you want to start a Remote Cast & Control session with, and select Start Session. The screen casting page displays the following components: ● Session Details—Displays the Windows device name and model. ● Create Ticket—Create a service desk ticket. This option is supported only if you have integrated an IT Management Tool (ITSM). ● Start Session—Select this to send the device user a request to start a Remote Cast & Control session. 3.
7 Eva Communication Suite Eva Communication Suite allows you to communicate with device users through different methods. Eva Communication Suite contains the following features: ● Messenger—This service allows device users to communicate with other users and administrators within their device groups via text or voice. Users can also send and receive files. ● Phone—Use this feature to manage contact lists and incoming and outcoming calls.
3. NOTE: Steps 3 and 4 are instructions on how to add contacts with the Add Contact option. For instructions on uploading multiple contacts at once, go to step 5. 4. ● Select Add Contact and type the contact details. Contact Number—Use this to enter a full contact number including the country code. ● USSD—Use this to enter a USSD number. ● Starts With—Use this option if you want to blacklist or whitelist a group of numbers.
3. Select the attachment icon at the bottom of the chat view. The options open. Select File. 4. Select the file that you want to send. The file sends to the dashboard under Eva Messenger. Eva Channels Eva Channels allows you to create public or closed communication channels. Administrators and users can communicate with other members who are subscribed or visible to the channel.
5. 22 Select the devices and users that you want to add as subscribers to the channel and select NEXT. Then, select administration users to add as a subscriber and select SAVE. Invited users can chat and send images, files, and voice messages to other users within the channel.
8 Enterprise This section outlines the options available under the Enterprise tab. My Apps Use the My Apps feature, located under the Enterprise tab, to upload, update, and publish apps to devices. You can publish apps from several sources, such as those recommended by HP Engage Console or those from the Apple® App Store. You can also upload and update your own custom apps. Play-for-work apps are not supported for HP Engage Console at this time.
Uploading a Windows app Follow the instructions here to upload a Windows app. 1. Under the Enterprise tab, select My Apps. 2. Select Enterprise Store. 3. Select Upload Windows App. 4. The Basic Details tab opens, type the information requested on-screen. Scroll down to see certificate and app size requirements. 5. Select Next to go to the App Bundle tab. 6. Select Upload file to upload an APPX or MSIX bundle from your computer. - or Select Provide URL to copy and paste the .appxbundle or .
Table 8-1 Recommended apps (continued) App Description OS compatibility Brew Survey Use this app to create customized surveys and collect feedback from customers using phones and tablets. Android Brew Survey - Offline This app allows you to create offline surveys. iOS Creating a password policy Follow these steps to create a password policy for device users . 1. Select Enterprise. Then select Passcode Policy. 2. Select the tab of the OS that you want to create a policy for. 3.
Removing a password policy Follow these steps to remove a password policy. 1. In the Enterprise tab, select Passcode Policy. 2. Select the tab of the OS you want to remove the password policy for. 3. Select REMOVE. The Remove Password policy dialog box opens. 4. Select either the Device Profiles tab or the Devices tab to remove the policy from. HP Engage Console attempts to remove the password and will not enforce a future password on the device.
9 Utilities This section outlines the options available in the Utilities tab. APN settings Access Point Name (APN) settings are provided by cellular carriers to allow devices to connect to the internet using cellular data (a SIM card). Here you can enter custom APN settings provided by the carrier to restrict the use of cellular data on corporate-owned devices and devices that use a corporate-owned SIM card. Some APN settings allow for the direct access of corporate devices without the need of a VPN.
2. Select Create New and then select Basic. 3. When a new window opens, type the following information: ● Name—Type a name to identify the configuration. ● SSID—Type a name to identify the Wi-Fi network. ● Security Type—Select an option from the dropdown menu. ● Password—Create a password that must be entered to access the Wi-Fi network. 4. Select Submit to create the configuration. 5.
10 Android Utilities The Android Utilities tab allows you to manage and create a variety of settings for Android devices. Global settings The Global Settings feature, is located under the Android Utilities tab. It allows you to configure app notifications, password settings, and other options for Android devices without a device profile. You can configure the settings listed here: ● Enable/Disable app notifications—Enables or disables app notifications on your devices.
11 Email Utilities The Email Utilities tab allows you to create email exchange settings for devices managed by HP Engage Console. Creating Email Exchange settings This section outlines how to create Email Exchange settings for Android devices. 1. Under the Email Utilities tab, select Exchange Settings. 2. Select Add New. The New Exchange Settings window opens. 3. In the Basics tab, configure the required settings, and then select Next. 4.
12 Workflows The Workflows feature allows you to schedule repeated tasks and assign actions to occur when the tasks are carried out. The scheduled tasks run like scripts. Detailed reports are generated for the scheduled tasks. There are two main types of workflows: ● Scheduled tasks—These tasks act on the apps published to the devices or change the state of the devices. The devices must be online at the scheduled time for the task. Scheduled tasks are based on your selected dashboard time zone.
Managing existing workflows Follow these steps to manage existing workflows. 32 1. Go to the Reports & Workflow tab. 2. Find the workflow that you want under the list of workflows. 3. To edit the workflow, expand the Action tab to find the Edit button.