
HP Integrated Barcode Scanner HP Integrated Barcode Scanner Programming Reference Guide


Programming Reference Guide 9
Chapter 3
Configuration Using Barcodes
This and following sections provide programming barcodes to configure your reader by changing the default
settings. For details about additional methods of programming, see "Configuration Methods" on page 3.
Configuration Parameters
Once the reader is set up, you can change the default parameters to meet your application needs. Refer to
"Standard Defaults" starting on page 215 for initial configuration in order to set the default values and select
the interface for your application.
The following configuration parameters are divided into logical groups, making it easy to find the desired
function based on its reference group.
Interface Configuration:
• "USB-Com Interface" on page 13
• "Keyboard Settings" on page 21
Parameters common to all interface applications:
• "Data Format" on page 31 gives options to control the messages sent to the Host system.
• "Reading Parameters" on page 45 control various operating modes and indicators status functioning.
Symbology-specific parameters:
• "1D Symbologies" on page 61 provides configuration of a personalized mix of 1D codes, code families
and their options.
• "2D Symbologies" on page 153 provides configuration of a personalized mix of 2D codes, code families
and their options.
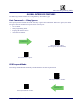
To program features:
1. Scan the ENTER/EXIT PROGRAMMING barcode, available at the top of each programming page,
when applicable.
2. Scan the barcode to set the desired programming feature. You may need to cover unused barcodes on the
page, and possibly the facing page, to ensure that the reader reads only the barcode you intend to scan.
You must first enable your reader to read barcodes in order to use this section. If you have not
done this, go to
Setup, starting on page 5
and complete the appropriate procedure.
You must first enable your reader to read barcodes in order to use this section. If you have not
done this, go to
Setup, starting on page 5
and complete the appropriate procedure.