
HP Notebook PC (Intel) * Models: 15-ay000 - 15-ay099 HP 250 G5 Notebook PC HP 256 G5 Notebook PC - Maintenance and Service Guide

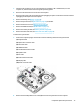

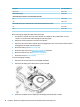
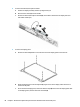


Table Of Contents
- Product description
- HP Notebook PC; Intel 7th generation and Pentium/Celeron processors; non-touch models
- HP Notebook PC; Intel 5th and 6th generation and Pentium/Celeron processors; non-touch models
- HP Notebook PC; Intel 7th generation Core and Pentium/Celeron processors; touch models
- HP Notebook PC; Intel 5th and 6th generation and Pentium/Celeron processors; touch models
- HP 250/256 G5 Notebook PC models
- External component identification
- Illustrated parts catalog
- Removal and replacement procedures preliminary requirements
- Removal and replacement procedures for Customer Self-Repair parts
- Removal and replacement procedures for Authorized Service Provider parts
- Using Setup Utility (BIOS) in Windows 7
- Using Setup Utility (BIOS) in Windows 10
- Backing up, restoring, and recovering in Windows 7
- Backing up, restoring, and recovering in Windows 10
- Using HP PC Hardware Diagnostics (UEFI)
- Specifications
- Statement of memory volatility
- Power cord set requirements
- Recycling
- Index
4. Remove the four Phillips PM2.5×6.5 screws (1) (two from each hinge) and one broadhead Phillips
PM2.0×2.0 screw (2) (on the left hinge) that secures the display assembly to the computer.
5. Separate the display from the computer (3).
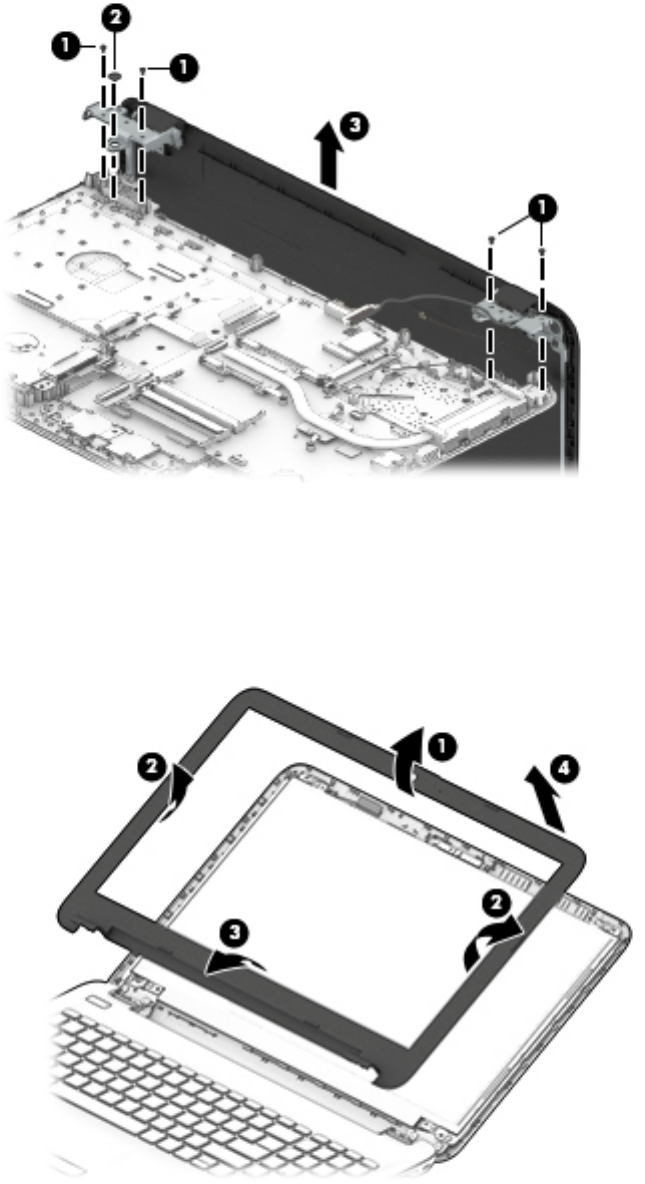
If it is necessary to replace any of the display assembly subcomponents:
1. To remove the display bezel:
a. Flex the inside of the top edge (1), the left and right edges (2), and the bottom edge (3) of the
display bezel until the bezel disengages from the display enclosure.
b. Remove the display bezel (4).
Component replacement procedures 79