
User Guide - Windows 10


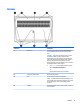


Table Of Contents
- Welcome
- Components
- Network connections
- Screen navigation
- Entertainment features
- Using a webcam (select products only)
- Using audio
- Using video
- Connecting video devices by using a VGA cable (select products only)
- Connecting video devices using an HDMI cable (select products only)
- Connecting a USB Type-C (Thunderbolt-3-enabled) port
- Discovering and connecting wired displays using MultiStream Transport
- Discovering and connecting to Miracast-compatible wireless displays (select products only)
- Discovering and connecting to Intel WiDi certified displays (select Intel products only)
- Power management
- Shutting down (turning off) the computer
- Setting power options
- Using power-saving states
- Using battery power
- Using external AC power
- Security
- Protecting the computer
- Using passwords
- Using antivirus software
- Using firewall software
- Installing critical security updates
- Using HP Client Security (select products only)
- Using HP Touchpoint Manager (select products only)
- Installing an optional security cable (select products only)
- Using a fingerprint reader (select products only)
- Maintenance
- Backup and recovery
- Computer Setup (BIOS), TPM, and HP Sure Start
- Using HP PC Hardware Diagnostics (UEFI)
- Specifications
- Electrostatic Discharge
- Accessibility
- Index
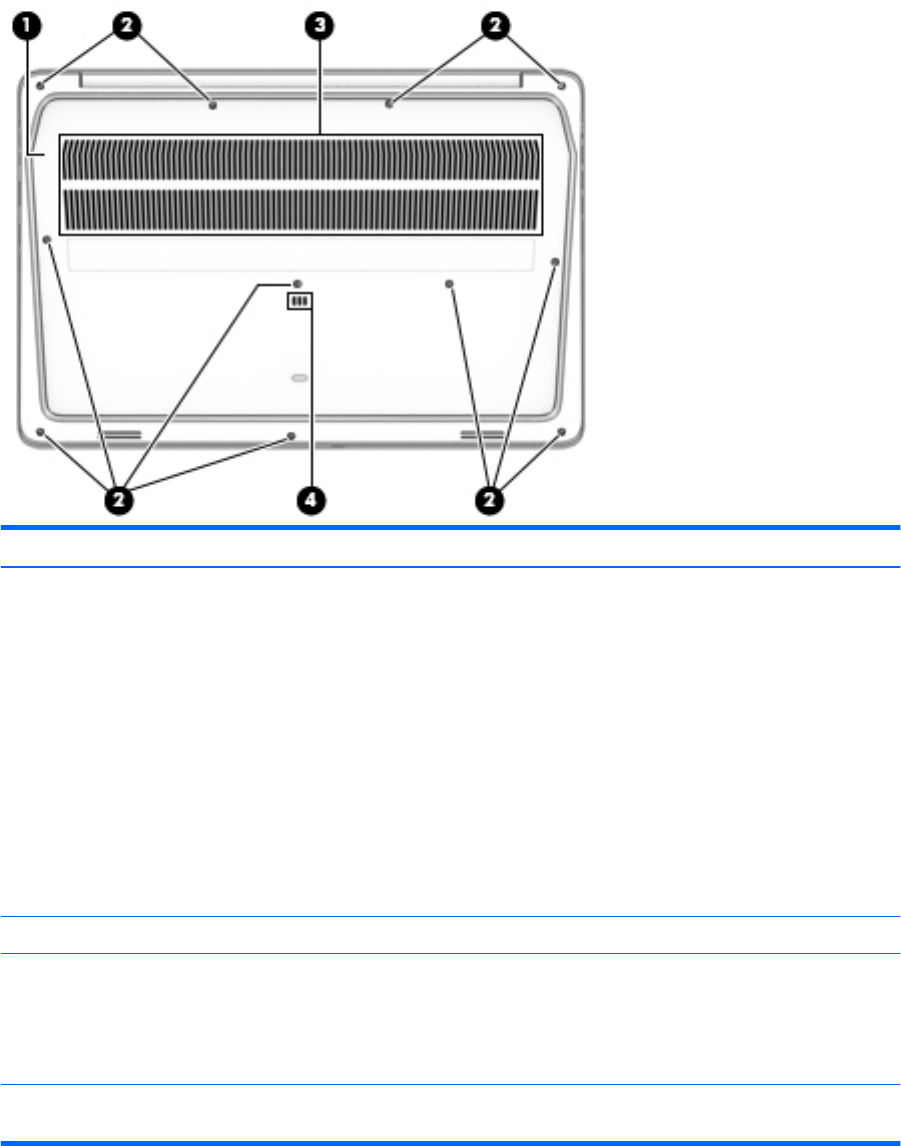
Bottom
Component Description
(1) Service door Provides access to the hard drive bay, the WLAN module
slot, the WWAN module slot, and the memory module
slots.
CAUTION: To prevent an unresponsive system, replace
the wireless module only with a wireless module
authorized for use in the computer by the governmental
agency that regulates wireless devices in your country or
region. If you replace the module and then receive a
warning message, remove the module to restore computer
functionality, and then contact support.
▲
Type support in the taskbar search box, and then
select the HP Support Assistant app.
- or -
Click the question mark icon in the taskbar.
(2) Service door release screws Releases the service door.
(3) Vents Enable airow to cool internal components.
NOTE: The computer fan starts up automatically to cool
internal components and prevent overheating. It is normal
for the internal fan to cycle on and o during routine
operation.
(4) Spill drain Allows spilled liquids, such as sodas or coee, to drain out
of the computer.
Bottom 13