HP company notices THE INFORMATION CONTAINED HEREIN IS SUBJECT TO CHANGE WITHOUT NOTICE. ALL RIGHTS RESERVED. REPRODUCTION, ADAPTATION, OR TRANSLATION OF THIS MATERIAL IS PROHIBITED WITHOUT PRIOR WRITTEN PERMISSION OF HP, EXCEPT AS ALLOWED UNDER THE COPYRIGHT LAWS. THE ONLY WARRANTIES FOR HP PRODUCTS AND SERVICES ARE SET FORTH IN THE EXPRESS WARRANTY STATEMENTS ACCOMPANYING SUCH PRODUCTS AND SERVICES. NOTHING HEREIN SHOULD BE CONSTRUED AS CONSTITUTING AN ADDITIONAL WARRANTY.
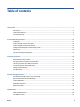
Table of contents 1 Get started .................................................................................................................................................... 1 Printer parts ........................................................................................................................................................... 2 Control panel features .....................................................................................................................................
Remove Web Services .......................................................................................................................................... 51 6 Print ........................................................................................................................................................... 52 Print using the HP Smart app .............................................................................................................................. 53 Print using a computer .
Cartridge warranty information ........................................................................................................................ 146 11 Solve a problem ....................................................................................................................................... 147 Get help from the HP Smart app ....................................................................................................................... 148 Get help from the printer control panel ..
vi ENWW
1 Get started This guide provides details about how to use the printer and how to resolve problems.
Printer parts ● Top and front view ● Printing supplies area ● Back view Top and front view 2 1 Document feeder 2 Document feeder paper-width guides 3 Document feeder tray 4 Document feeder output extension 5 Scanner lid 6 Scanner glass 7 Output tray 8 Output tray extension 9 Input tray 10 Power button 11 Front USB port 12 Front door 13 Control panel display Chapter 1 Get started ENWW
Printing supplies area 1 Cartridge access door 2 Front door 3 Printhead 4 Cartridges 5 PIN code label NOTE: Cartridges should be kept in the printer to prevent possible print quality issues or printhead damage. Avoid removing supplies for extended periods of time. Do not turn the printer off when a cartridge is missing.
3 Rear USB port NOTE: A label is covering the USB port on this printer. Use HP Smart and a network connection to set up your printer and receive the HP+ offer. After setup, you can print using a USB cable connection, if desired, but the printer must also still be connected to the Internet if you have enabled HP+.
Control panel features ● Lift the control panel ● Overview of buttons and lights ● Function buttons ● Dashboard icons ● Change printer settings Lift the control panel You can move the control panel for easier use. ● Push the upper part of the control panel to lift it. NOTE: Return the control panel to its original position by pushing down the bottom until it is back in place.
Overview of buttons and lights 1 7 6 2 3 4 5 Label Name and Description 1 Power light: Indicates whether the printer is turned on. 2 Wireless light: Indicates the status of the printer's wireless connection. ● Solid blue light indicates that wireless connection has been established and you can print. ● Slow blinking light with clear pause indicates that wireless is on, but not configured. To connect your printer, see Set up the printer for wireless communication.
Function button Purpose Scan Scan document or photo to email, USB flash drive, network folder, SharePoint, or computer. Photo Print photo from USB flash drive. Fax Set up fax, send fax, or reprint received fax. Dashboard icons The Dashboard on the printer control panel lets you access the icons on the display, check the status of the printer, or monitor and manage current and scheduled printer tasks.
Change printer settings Use the control panel to change the printer functions and settings, print reports, or get help for the printer. TIP: If the printer is connected to a computer, you can also change the printer settings using the printer management tools in the software. For more information about these tools, see Printer management tools. To change settings for a function The Home screen of the control panel display shows the available functions for the printer.
Turn the printer off Press (the Power button) to turn off the printer. Wait until the power light turns off before unplugging the power cord or turning off a power strip. CAUTION: If you incorrectly turn the printer off, the print carriage might not return to the correct position, causing problems with the cartridges and print quality issues.
2 10 Load media and paper basics ● Load paper ● Load an original on the scanner glass ● Load an original in the document feeder ● Change the default paper size detected by printer ● Paper basics ● Tips for selecting and using paper Chapter 2 Load media and paper basics ENWW
Load paper To load standard paper 1. Pull out the input tray. NOTE: If there is other paper in the input tray, remove the paper before loading a different paper type or size. 2. ENWW Slide the paper-width guides to the edges of the input tray.
3. Insert the paper in portrait orientation and with the side to be printed facing down. Make sure the stack of paper is aligned with the appropriate paper size lines on the front of the tray. Also, make sure the stack of paper does not exceed the stack height marking on the left edge of the tray. NOTE: Do not load paper while the printer is printing. 4. 12 Adjust the paper-width guides until they touch the left and right edges of the stack of paper.
5. Reinsert the input tray into the printer. 6. Pull out the output tray extension as shown. To load legal paper 1. Pull out the input tray. NOTE: If there is other paper in the input tray, remove the paper before loading a different paper type or size.
14 2. Slide the paper-width guides to the edges of the input tray. 3. Press the button near the front left of the tray to extend the input tray.
4. Insert the paper in portrait orientation and with the side to be printed facing down. Make sure the stack of paper is aligned with the appropriate paper size lines on the front of the tray. Also, make sure the stack of paper does not exceed the stack height marking on the left edge of the tray. NOTE: Do not load paper while the printer is printing. 5. ENWW Adjust the paper-width guides until they touch the left and right edges of the stack of paper.
6. Reinsert the input tray into the printer. NOTE: When you insert the input tray, the input tray extension remains outside of the printer. This is the expected result. 7. Pull out the output tray extension as shown. To load an envelope 1. Pull out the input tray. NOTE: If there is other paper in the input tray, remove the paper before loading a different paper type or size.
2. Slide the paper-width guides to the edges of the input tray. 3. Insert the envelope in portrait orientation and with the side to be printed facing down. Make sure the stack of paper is aligned with the appropriate paper size lines on the front of the tray. Also, make sure the stack of paper does not exceed the stack height marking on the left edge of the tray. NOTE: Do not load paper while the printer is printing.
4. Adjust the paper-width guides until they touch the left and right edges of the stack of paper. 5. Reinsert the input tray into the printer. 6. Pull out the output tray extension as shown. To load cards and photo paper 1. Pull out the input tray. NOTE: If there is other paper in the input tray, remove the paper before loading a different paper type or size.
2. ENWW Slide the paper-width guides to the edges of the input tray.
3. Insert the cards or photo paper in portrait orientation and with the side to be printed facing down. Make sure the stack of paper is aligned with the appropriate paper size lines on the front of the tray. Also, make sure the stack of paper does not exceed the stack height marking on the left edge of the tray. NOTE: Do not load paper while the printer is printing. 4. 20 Adjust the paper-width guides until they touch the left and right edges of the stack of paper.
ENWW 5. Reinsert the input tray into the printer. 6. Pull out the output tray extension as shown.
Load an original on the scanner glass You can copy, scan, or fax originals by loading them on the scanner glass. NOTE: The scanner might not work correctly if the scanner glass and lid backing are not clean. For more information, see Maintain the printer. NOTE: Remove all originals from the document feeder tray before lifting the lid on the printer. To load an original on the scanner glass 1. 22 Lift the scanner lid.
2. Load your original print-side down and align it with the marking on the rear left corner of the glass. TIP: For more help on loading an original, refer to the engraved guides along the edge of the scanner glass. 3. ENWW Close the lid.
Load an original in the document feeder You can copy, scan, or fax a document by placing it in the document feeder. CAUTION: Do not load photos in the document feeder, this might cause damage to your photos. Use only paper that is supported by the document feeder. NOTE: Some features, such as the Fit to Page copy feature, do not work when you load your originals in the document feeder. For those features to work, load your originals on the scanner glass. To load an original in the document feeder 1.
Change the default paper size detected by printer The printer can automatically detect whether the input tray has paper loaded and detect whether the loaded paper is large, small, or medium width. You can change the default large, medium, or small paper size detected by the printer. To change the default paper size detected by the printer ENWW 1. Open the embedded web server (EWS). For more information, see Embedded web server. 2. Click the Settings tab. 3.
Paper basics The printer is designed to work well with most types of office paper. It is best to test a variety of print paper types before buying large quantities. Use HP paper for optimum print quality. Visit the HP website at www.hp.com for more information about HP paper. HP recommends plain papers with the ColorLok logo for printing everyday documents.
Tips for selecting and using paper For the best results, observe the following guidelines. ENWW ● Load only one type and one size of paper at a time into a tray or document feeder. ● Make sure the paper is loaded correctly when loading from the input tray or document feeder. ● Do not overload the tray or document feeder.
3 Connect your printer Your printer supports the following connection types for printing: Wi-Fi, Wi-Fi Direct, Ethernet, and USB. Use HP Smart software and a network connection to set up your printer and receive the HP+ offer. After setup, you can print using a USB cable connection or Wi-Fi Direct, if desired, but the printer must also still be connected to the Internet if you have enabled HP+.
Requirements for HP+ printers Keep the printer connected to the Internet HP+ printers are cloud-connected devices that must remain connected to the Internet in order to function. The Internet connection enables the printer to deliver HP+ specific app features and firmware updates. During setup, you must connect the printer to the Internet by Wi-Fi or Ethernet. After setup, you can print using a USB cable connection, if desired, but the printer must also still be connected to the Internet.
Set up the printer for wireless communication This section contains the following topics: ● Before you begin ● Connect using the HP Smart app ● Set up the printer on your wireless network ● Change the connection type ● Test the wireless connection ● Turn on or off the wireless capability of the printer NOTE: If you encounter problems connecting the printer, see Network and connection issues.
Connect using the HP Smart app To set up using the HP Smart app You can use the HP Smart app to set up the printer on your wireless network. The HP Smart app is supported on iOS, Android, Windows, and Mac devices. For information about this app, see Use the HP Smart app to print, scan, and manage. 1. Make sure your computer or mobile device is connected to your wireless network and you know the Wi-Fi password of your wireless network. 2.
Change the connection type After you have installed the HP printer software and connected the printer to your computer or to a network, you can use the software to change the connection type (for example, from a USB connection to a wireless connection). NOTE: Connecting an Ethernet cable turns off the wireless capability of the printer. To change from an Ethernet connection to a wireless connection 1. Remove the Ethernet cable from the printer. 2.
Test the wireless connection Print the wireless test report for information about the printer wireless connection. The wireless test report provides information about the printer status, hardware (MAC) address, and IP address. If there is a problem with the wireless connection or if a wireless connection attempt failed, the wireless test report also provides diagnostic information. If the printer is connected to a network, the test report displays details about the network settings.
Connect your printer to an Ethernet network If your Ethernet network does not have an Internet connection, connect the printer wirelessly to the HP Smart app. See Connect using the HP Smart app. 1. Make sure your computer is connected to the router. 2. Connect your printer and router using an Ethernet cable. (Ethernet cable sold separately.) NOTE: ● The Wi-Fi connection is automatically disabled when you connect the Ethernet cable.
Connect your printer using a USB cable NOTE: ● Do not connect the printer with a USB cable when setting up for the first time. HP+ printer will not work as expected if USB is used for setting up for the first time. ● To set up and use the printer, it must be connected to the Internet at all times. See the requirements listed in Requirements for HP+ printers. 1. If necessary, remove the label covering the USB port at the back of the printer. 2. Connect the printer and computer using a USB cable. 3.
Change network settings From the printer control panel, you can set up and manage your printer's wireless connection and perform a variety of network management tasks. This includes viewing and changing network settings, restoring network defaults, and turning the wireless function on or off. CAUTION: Network settings are provided for your convenience.
ENWW 4. Touch IP Settings. 5. A message appears warning that changing the IP address removes the printer from the network. Touch OK to continue. 6. To change the settings manually, touch Manual (Static), and then enter the appropriate information for the following settings: ● IP Address ● Subnet Mask ● Default Gateway ● DNS Address 7. Enter your changes, and then touch Done. 8. Touch OK.
Use Wi-Fi Direct With Wi-Fi Direct, you can print wirelessly from a computer, smart phone, tablet, or other wireless-capable device—without connecting to an existing wireless network. Guidelines for using Wi-Fi Direct ● Make sure your computer or mobile device has the necessary software. – If you are using a computer, make sure you have installed the HP printer software. If you have not installed the HP printer software on the computer, connect to Wi-Fi Direct first and then install the printer software.
● If Automatic was selected during Wi-Fi Direct setup on the printer, the mobile device automatically connects to the printer. ● If Manual was selected during the Wi-Fi Direct setup on the printer, acknowledge the connection on the printer display or enter the printer PIN on your mobile device. The PIN is provided by the printer when a connection attempt is made.
To print from a wireless-capable computer (Windows) 1. Make sure you have turned on Wi-Fi Direct on the printer. 2. Turn on the computer's Wi-Fi connection. For more information, see the documentation provided with the computer. NOTE: If your computer does not support Wi-Fi, you are not able to use Wi-Fi Direct. 3. From the computer, connect to a new network. Use the process you normally use to connect to a new wireless network or hotspot.
4 ENWW Printer management tools ● Use the HP Smart app to print, scan, and manage ● Open the HP printer software (Windows) ● Toolbox (Windows) ● Embedded web server ● Update the printer 41
Use the HP Smart app to print, scan, and manage The HP Smart app can help you perform many different printer tasks, including the following: ● Set up and connect your printer. ● Print and scan documents and photos. ● Share documents through email and other applications. ● Manage printer settings, check printer status, print reports, and order supplies. HP Smart is supported on mobile devices and computers running on iOS, Android, Windows 10, and macOS 10.13 and later.
Open the HP printer software (Windows) After installing the HP printer software, depending on your operating system, do one of the following: ● Windows 10: From the computer desktop, click Start, select HP from the app list, and then select the icon with the printer name. ● Windows 8.1: Click the down arrow in the lower left corner of the Start screen, and then select the printer name.
Toolbox (Windows) The Toolbox provides maintenance information about the printer. To open the Toolbox 44 1. Open the HP printer software. For more information, see Open the HP printer software (Windows). 2. Click Print, Scan & Fax. 3. Click Maintain Your Printer.
Embedded web server When the printer is connected to a network, you can use the printer's embedded web server (EWS) to view status information, change settings, and manage it from your computer. NOTE: For your security, some settings in the EWS are password-protected. If prompted for a password, enter the PIN from the label on your printer. The PIN label can be found inside the cartridge access area. NOTE: You can open and use the embedded web server without being connected to the Internet.
To open the embedded web server through Wi-Fi Direct 1. From the printer control panel, touch or swipe down the tab at the top of the screen to open the Dashboard, and then touch (Wi-Fi Direct). 2. Touch 3. If the display shows that Wi-Fi Direct is Off, touch Wi-Fi Direct and then switch it on. 4. From your wireless computer, turn wireless on, search for and connect to the Wi-Fi Direct name, for example: DIRECT-**-HP OfficeJet Pro 9020 (where ** are the unique characters to identify your printer).
TIP: If you are using a computer running Windows, you can visit the HP online support website at hp.com/ support. This website provides information and utilities that can help you correct many common printer problems.
Update the printer HP periodically releases firmware updates to enhance product functionality and fix issues. By default, if the printer is connected to the Internet, the printer automatically checks for updates at regular intervals. You can change the default setting for automatic updates or manually check for updates immediately. To update the printer using the printer control panel 1. From the top of the screen, touch or swipe down the tab to open the Dashboard, touch 2. Touch Printer Maintenance. 3.
5 ENWW Web Services ● What are Web Services? ● Set up Web Services ● Remove Web Services 49
What are Web Services? The printer offers innovative, cloud-based solutions, such as Print Anywhere, scan-and-save to cloud, and other services (including supplies auto replenishment). For more information, visit the HP Smart website (www.hpsmart.com). NOTE: To use these cloud-based solutions, the printer must be connected to the Internet. Unless otherwise agreed, HP can modify or cancel these cloud-based solution offerings at its discretion.
5. If prompted, choose to allow the printer to check for and install printer updates. NOTE: When updates are available, they are automatically downloaded and installed, and then the printer restarts. NOTE: If prompted for proxy settings and if your network uses proxy settings, follow the onscreen instructions to set up a proxy server. If you do not have the details, contact your network administrator or the person who set up the network. 6.
6 Print This printer is designed to work with the HP Smart app, a software application that makes it easy to print, scan, and manage your printer from a smartphone, laptop, desktop computer, or other devices. You can print and manage the printer from all of your devices by installing the app on each device. The HP Smart app is compatible with iOS, Android, Windows 10, and Mac.
Print using the HP Smart app This section provides basic instructions for using the HP Smart app to print from your Android, iOS, Windows 10, or Mac device. For more information about using the HP Smart app, go to: ● iOS/Android: www.hp.com/go/hpsmart-help ● Windows: www.hp.com/go/hpsmartwin-help ● macOS: www.hp.com/go/hpsmartmac-help To print from an Android or iOS device 1. Make sure you have loaded paper in the input tray. For more information, see Load paper. 2. Open the HP Smart app. 3.
54 5. Select a different printer or make any changes to the print settings, such as paper size or output quality. 6. Click Print.
Print using a computer ● Print documents ● Print brochures ● Print on envelopes ● Print photos ● Print on special and custom-size paper ● Print on both sides (duplexing) ● Print from a Mac using AirPrint Print documents To print documents (Windows) 1. Load paper in the input tray. For more information, see Load paper. 2. From your software, select Print. 3. Make sure your printer is selected. 4. Click the button that opens the Properties dialog box.
4. To change settings, click the button that opens the Properties dialog box. Depending on your software application, this button might be called Properties, Options, Printer Setup, Printer, or Preferences. NOTE: To set print settings for all print jobs, make the changes in the HP software. For more information on the HP software, see Printer management tools. 5. Select the appropriate options. ● On the Layout tab, select Portrait or Landscape orientation.
NOTE: To set print settings for all print jobs, make the changes in the HP software. For more information on the HP software, see Printer management tools. 5. Select the appropriate options. ● On the Layout tab, select Portrait or Landscape orientation. ● On the Paper/Quality tab, select the appropriate paper type from the Media drop-down list in the Tray Selection area, select the appropriate print quality in the Quality Settings area, and then select the appropriate color in the Color area.
NOTE: If you change the paper size, be sure to load the correct paper in the input tray and set the paper size on the printer control panel. If you want to change other print settings, click the other tabs. For more printing tips, see Printer settings tips . 6. Click OK to close the Properties dialog box. 7. Click Print or OK to begin printing. NOTE: After the printing is finished, remove unused photo paper from the input tray.
NOTE: To set print settings for all print jobs, make the changes in the HP software. For more information on the HP software, see Printer management tools. 5. On the Layout tab or Paper/Quality tab, click the Advanced button. 6. In the Paper/Output area, select the custom size from the Paper Size drop-down list. NOTE: If you change the paper size, be sure to load the correct paper in the input tray and set the paper size on the printer control panel. 7.
Print from a Mac using AirPrint The printer is compatible with Mac computers running macOS or OS X 10.7 and later and Apple AirPrint. Follow the instructions in this section to enable printing from a Mac computer using AirPrint. NOTE: Use the HP Smart app to monitor ink levels and printer alerts. If you have not set up the printer and connected it to your network, first go to 123.hp.com to install the necessary software and complete setup.
Print from mobile devices You can print documents and photos directly from your mobile devices, including iOS, Android, Chromebook, and Amazon Kindle. NOTE: You can also use the HP Smart app to print from mobile devices. For more information, see Print using the HP Smart app. 1. Make sure your printer is connected to the same network as your mobile device. 2. Enable printing on your mobile device: ● iOS: Use the Print option from the Share menu or . NOTE: Devices running iOS 4.
Tips for successful printing To print successfully, the HP cartridges should be functioning properly with sufficient ink, the paper should be loaded correctly, and the printer should have the appropriate settings. ● Ink tips ● Paper loading tips ● Printer settings tips Ink tips Following are the ink tips for successful printing: ● If the print quality is not acceptable, see Printing issues for more information. ● Use Original HP cartridges.
Printer settings tips Software settings selected in the print driver only apply to printing, they do not apply to copying or scanning. You can print your document on both sides of the paper. For more information, see Print on both sides (duplexing). Printer settings tips (Windows) ● To change default print settings, open the HP printer software, click Print, Scan & Fax, and then click Set Preferences. For information how to open the printer software, see Open the HP printer software (Windows).
7 Copy and scan You can scan documents, photos, and other paper types, and send them to a variety of destinations, such as a computer or an email recipient. When scanning documents with the HP printer software, you can scan to a format that can be searched and edited. When scanning a borderless original, use the scanner glass and not the document feeder. NOTE: TIP: 64 Some scan functions are only available after you have installed the HP printer software.
Copy and scan using the HP Smart ● Copy and scan from an Android or iOS device ● Scan from a Windows 10 device ● Copy and scan from a Mac You can use the HP Smart app to copy and scan documents or photos using your device camera. HP Smart includes editing tools that allow you to adjust the scanned image before saving, sharing, or printing. You can print, save your scans locally or in cloud storage, and share them via email, SMS, Facebook, Instagram, etc.
3. Select Camera Scan to scan your document or photo using your device's built-in camera, or select Printer Scan to scan with the printer scanner. 4. Specify the scan settings, and then tap Scan. 5. When you have finished adjusting the scanned document or photo, save, share, or print it. Scan from a Windows 10 device To scan a document or photo using the device camera If your device has a camera, you can use the HP Smart app to scan a printed document or photo with the device camera.
Copy and scan from a Mac To copy from a Mac 1. Open the HP Smart app. 2. Tap the Plus icon ( ) or the Add Printer option if you need to change to a different printer or add a new printer. If needed, swipe right/left on the top of the home screen to find the Add Printer option. 3. Click Copy. The built-in camera will open. 4.
Copy from the printer To copy document or ID card 1. Make sure you have paper loaded in the input tray. For more information, see Load paper. 2. Place your original print-side down on the scanner glass or print-side up in the document feeder. 3. From the printer control panel display, touch Copy. 4. Select Document or ID Card. 5. Enter the number of copies by using the keypad or make changes to other settings.
Scan using HP printer software (Windows 7) ● Scan to a computer ● Scan to email ● Set up scan to SharePoint (Windows) ● Scanning documents as editable text ● Create a new scan shortcut (Windows) ● Change scan settings (Windows) Scan to a computer Before scanning to a computer, make sure you have already installed the HP recommended printer software. The printer and computer must be connected and turned on. In addition, on Windows computers, the printer software must be running prior to scanning.
4. Click Scan a Document or Photo. 5. Select the type of scan you want and then click Scan. ● Choose Save as PDF to save the document (or photo) as a PDF file. ● Choose Save as JPEG to save the photo (or document) as an image file. NOTE: The initial screen allows you to review and modify basic settings. Click the More link at the top right corner of the Scan dialog box to review and modify detailed settings. For more information, see Change scan settings (Windows).
7. Touch Send. 8. Touch Finish when the scan completes. Or touch Add Page to add another page. Set up scan to SharePoint (Windows) Learn how to set up the Scan to SharePoint feature in the Embedded Web Server (EWS) so you can scan and save files to a SharePoint site from the printer. Step 1: Set Up a SharePoint destination To scan to SharePoint, first you need to set up a SharePoint destination in the HP Embedded Web Server (EWS). 1. Open the embedded web server. a.
3. Enter the PIN, if necessary. 4. Place your document on the scanner glass or load it into the document feeder. 5. On the control panel, make sure that the Save As and File Name fields are correct, and then touch Send. Scanning documents as editable text When scanning documents, you can use the HP software to scan documents into a format that you can search, copy, paste, and edit. This allows you to edit letters, newspaper clippings, and many other documents.
To successfully convert the document to editable text, the original must be clear and of high quality. The following conditions can cause the software to not convert the document successfully: ● – The text on the original is faint or wrinkled. – The text is too small. – The structure of the document is too complex. – The text is tightly spaced. For example, if the text that the software converts has missing or combined characters, "rn" might appear as "m." – The text is on a colored background.
Change scan settings (Windows) You can modify any of the scan settings either for a singular use or save the changes to use permanently. These settings include options such as page size and orientation, scan resolution, contrast, and the folder location for saved scans. 1. Load your original print-side down on the scanner glass or print-side up in the document feeder. 2. Open the HP printer software. For more information, see Open the HP printer software (Windows). 3.
Scan using Webscan Webscan is a feature of the embedded web server that lets you scan photos and documents from your printer to your computer using a web browser. This feature is available even if you did not install the printer software on your computer. For more information, see Embedded web server. NOTE: By default, Webscan is off. You can enable this feature from the EWS. If you are unable to open Webscan in the EWS, your network administrator might have turned it off.
Scan to a memory device You can scan directly to a USB flash drive from the printer control panel without using a computer or the HP printer software. CAUTION: Do not remove the flash drive from the printer USB port while it is being accessed by the printer. This can damage the files on the USB flash drive. You can safely remove a USB flash drive only when the USB port light is not blinking. NOTE: The printer does not support encrypted USB flash drives.
Tips for copy and scan success Use the following tips to copy and scan successfully: ENWW ● Keep the glass and the back of the lid clean. The scanner interprets anything it detects on the glass as part of the image. ● Load your original print-side down on the scanner glass and align it with the marking on the rear left corner of the glass.
8 Fax You can use the printer to send and receive faxes, including color faxes. You can schedule faxes to be sent at a later time within 24 hours and set up phone book contacts to send faxes quickly and easily to frequently used numbers. From the printer control panel, you can also set a number of fax options, such as resolution and the contrast between lightness and darkness on the faxes you send. NOTE: Before you begin faxing, make sure you have set up the printer correctly for faxing.
Send a fax You can send a fax in a variety of ways, depending on your situation or need. ● Send a standard fax ● Send a standard fax from the computer ● Send a fax from a phone ● Send a fax using monitor dialing ● Send a fax using printer memory ● Send a fax to multiple recipients ● Send a fax in Error Correction Mode Send a standard fax You can send a single-page fax, multiple-page fax, black-and-white fax or color fax by using the printer control panel.
To use this feature, make sure you have installed the HP printer software on your computer, the printer is connected to a working telephone line, and the fax function is set up and functioning correctly. To send a standard fax from the computer (Windows) 1. Open the document on your computer that you want to fax. 2. On the File menu in your software application, click Print. 3. From the Name list, select the printer that has “fax” in the name. 4.
TIP: If you are using a calling card and do not enter your PIN fast enough, the printer might start sending fax tones too soon and cause your PIN not to be recognized by the calling card service. If this is the case, create a phone book contact to store the PIN for your calling card. NOTE: Make sure the volume is turned on to hear a dial tone. To send a fax using monitor dialing from the printer control panel 1.
5. Enter the fax number by using the keypad. Or touch (Phone Book), and then touch Local Phone Book or Call History to select a number or group to dial. 6. Touch Send. The printer scans the originals into memory and sends the fax when the receiving fax machine is available. Send a fax to multiple recipients You can send a fax to multiple recipients by creating a group phone book contact made up of two or more individual recipients. To send a fax to multiple recipients using group phone book 1.
To change the ECM setting from the control panel ENWW 1. From the printer control panel display, touch Fax. 2. Touch Setup. 3. Touch Preferences. 4. Scroll to Error Correction Mode to touch to turn the feature on or off.
Receive a fax You can receive faxes automatically or manually. If you turn off the Auto Answer option, you must receive faxes manually. If you turn on the Auto Answer option (the default setting), the printer automatically answers incoming calls and receives faxes after the number of rings that are specified by the Rings to Answer setting. (The default Rings to Answer setting is five rings.
Set up backup fax Depending on your preference and security requirements, you can set up the printer to store all the faxes it receives, only the faxes it receives while the printer is in an error condition, or none of the faxes it receives. To set backup fax from the printer control panel 1. From the printer control panel display, touch Fax. 2. Touch Setup. 3. Touch Preferences. 4. Touch Backup Fax Reception. 5. Touch the required setting. On The default setting.
3. Touch Reprint. The faxes are printed in the reverse order from which they were received with the most recently received fax printed first, and so on. 4. Touch to select a fax, and then touch Print. If you want to stop reprinting the faxes in memory, touch (Cancel). Forward faxes to another number You can set up the printer to forward your faxes to another fax number. All faxes are forwarded in black and white, regardless of how they were originally sent.
3. Touch Preferences. 4. Scroll to Automatic Reduction and touch to turn the feature on or off. Block unwanted fax numbers If you subscribe to a caller ID service through your phone provider, you can block specific fax numbers so the printer does not receive faxes received from those numbers. When an incoming fax call is received, the printer compares the number to the list of junk fax numbers to determine if the call should be blocked.
To print a junk fax list 1. From the printer control panel display, touch Fax. 2. Touch Setup, and then touch Reports. 3. Touch Print Fax Reports. 4. Touch Junk Fax Report. 5. Touch Print to begin printing. Receive faxes using HP Digital Fax You can use HP Digitial Fax to automatically receive faxes and save them directly to your computer. This saves paper and ink. Received faxes are saved as TIFF (Tagged Image File Format) or PDF (Portable Document Format).
Set up phone book contacts You can set up frequently used fax numbers as phone book contacts. This lets you quickly dial those numbers using the printer control panel. TIP: In addition to creating and managing phone book contacts from the printer control panel, you can also use tools available on your computer, such as the HP printer software and the printer EWS. For more information, see Printer management tools.
To set up group phone book contacts NOTE: Before you can create a group phone book contact, you must have already created at least one phone book contact. 1. From the printer control panel display, touch Fax. 2. Touch Phone Book, then touch 3. Touch 4. Touch Name, and then enter the name of the group, and then touch Done. 5. Touch Number of Members, select the phone book contacts you want to include in this group, and then touch Select. 6. Touch Create.
ENWW 3. Touch the name of the phone book contact you want to delete. 4. Touch Delete. 5. Touch Yes to confirm.
Change fax settings After completing the steps in the Reference Guide that came with the printer, use the following steps to change the initial settings or to configure other options for faxing.
TIP: You may also access this feature by pressing (the Fax Status button) on the Dashboard. Set the number of rings before answering If you turn on the Auto Answer setting, you can specify how many rings occur before incoming calls are automatically answered. The Rings to Answer setting is important if you have an answering machine on the same phone line as the printer, because you want the answering machine to answer the phone before the printer does.
4. Touch Distinctive Ring. 5. Touch one ring pattern and then follow the onscreen instruction. NOTE: If you are using a PBX phone system that has different ring patterns for internal and external calls, you must call the fax number from an external number. Set the dial type Use this procedure to set tone-dialing or pulse-dialing mode. The factory-set default is Tone. Do not change the setting unless you know that your phone line cannot use tone dialing.
● An Internet phone service ● A PBX (private branch exchange) system ● Fax on Voice over Internet Protocol (VoIP) ● An integrated services digital network (ISDN) service If you experience problems sending and receiving faxes, try using a slower Speed. The following table provides the available fax speed settings. Fax speed setting Fax speed Fast v.34 (33600 bps) Medium v.17 (14400 bps) Slow v.29 (9600 bps) To set the fax speed 1. From the printer control panel display, touch Fax. 2.
Fax and digital phone services Many telephone companies provide their customers with digital phone services, such as the following: ● DSL: A Digital subscriber line (DSL) service through your telephone company. (DSL might be called ADSL in your country/region.) ● PBX: A private branch exchange (PBX) phone system. ● ISDN: An integrated services digital network (ISDN) system. ● VoIP: A low-cost phone service that allows you to send and receive faxes with your printer by using the Internet.
Fax on Voice over Internet Protocol You might be able to subscribe to a low cost phone service that allows you to send and receive faxes with your printer by using the Internet. This method is called Fax on Voice over Internet Protocol (VoIP). The following are indications you probably use a VoIP service: ● Dial a special access code along with the fax number. ● Have an IP converter box that connects to the Internet and provides analog phone ports for the fax connection.
Use reports You can set up the printer to print error reports and confirmation reports automatically for each fax you send and receive. You can also manually print system reports as required; these reports provide useful system information about the printer. By default, the printer is set to print a report only if there is a problem sending or receiving a fax. A confirmation message that indicates whether a fax was successfully sent appears briefly on the control panel display after each transaction.
On (Fax Send and Fax Receive) Prints a fax confirmation report for every fax you send and receive. Off Does not print a fax confirmation report when you send and receive faxes successfully. This is the default setting. To include an image of the fax on the report 1. From the printer control panel display, touch Fax. 2. Touch Setup. 3. Touch Reports and touch Fax Confirmation. 4. Touch On (Fax Send) or On (Fax Send and Fax Receive). 5. Touch Fax confirmation with image.
Clear the fax log Clearing the fax log also deletes all faxes stored in memory. To clear the fax log 1. From the printer control panel display, touch Fax. 2. Touch Setup, and then touch Tools. 3. Touch Clear Fax Logs/Memory. Print the details of the last fax transaction The Last Fax Transaction report prints the details of the last fax transaction to occur. Details include the fax number, number of pages, and the fax status. To print the Last Fax Transaction report 1.
ENWW 3. Touch (Phone Book). 4. Touch Call History.
Additional fax setup After completing all the steps in the Getting Started Guide, use the instructions in this section to complete your fax setup. Keep your Getting Started Guide for later use. In this section, you learn how to set up the printer so that faxing works successfully with equipment and services you might already have on the same phone line.
If you are unsure which kind of telephone system you have (serial or parallel), check with your telephone company.
3. – Do you send and receive faxes directly to and from your computer software applications through a dial-up connection? – Do you send and receive email messages on your computer through a dial-up connection? – Do you access the Internet from your computer through a dial-up connection? ● Answering machine: An answering machine that answers voice calls at the same phone number you use for fax calls on the printer.
Case A: Separate fax line (no voice calls received) If you have a separate phone line on which you receive no voice calls, and you have no other equipment connected on this phone line, set up the printer as described in this section. Figure 8-1 Back view of the printer 1 Telephone wall jack. 2 Use a minimum 26 AWG phone cord to connect to the port on the printer. You might need to connect the phone cord to your country/region adapter. To set up the printer with a separate fax line 1.
NOTE: If you have a DSL line and you do not connect the DSL filter, you cannot send and receive faxes with the printer. Figure 8-2 Back view of the printer 1 Telephone wall jack. 2 DSL (or ADSL) filter and cord supplied by your DSL provider. 3 Use a minimum 26 AWG phone cord to connect to the port on the printer. You might need to connect the phone cord to your country/region adapter. To set up the printer with DSL 1. Obtain a DSL filter from your DSL provider. 2.
Case C: Set up the printer with a PBX phone system or an ISDN line If you are using either a PBX phone system or an ISDN converter/terminal adapter, make sure you do the following: ● If you are using either a PBX or an ISDN converter/terminal adaptor, connect the printer to the port that is designated for fax and phone use. Also, make sure that the terminal adapter is set to the correct switch type for your country/region, if possible.
1 Telephone wall jack. 2 Use a minimum 26 AWG phone cord to connect to the port on the printer. You might need to connect the phone cord to your country/region adapter. To set up the printer with a distinctive ring service 1. Connect one end of the phone cord to your telephone wall jack, then connect the other end to the port labeled on the back of the printer. NOTE: You might need to connect the phone cord to your country/region adapter. 2. Turn on the Auto Answer setting. 3.
Figure 8-4 Back view of the printer 1 Telephone wall jack. 2 Use a minimum 26 AWG phone cord to connect to the port on the printer. You might need to connect the phone cord to your country/region adapter. 3 Telephone (optional). To set up the printer with a shared voice/fax line 1. Connect one end of the phone cord to your telephone wall jack, then connect the other end to the port labeled on the back of the printer. NOTE: 2. 3. 4.
If you pick up the phone before the printer answers the call and hear fax tones from a sending fax machine, you need to answer the fax call manually. If you encounter problems setting up the printer with optional equipment, contact your local service provider or vendor for further assistance.
If you encounter problems setting up the printer with optional equipment, contact your local service provider or vendor for further assistance. Case G: Fax line shared with computer modem (no voice calls received) If you have a fax line on which you receive no voice calls, and you also have a computer modem connected on this line, set up the printer as described in this section. NOTE: If you have a computer dial-up modem, your computer dial-up modem shares the phone line with the printer.
To set up the printer with a computer dial-up modem 1. Remove the white plug from the port labeled 2. Find the phone cord that connects from the back of your computer (your computer dial-up modem) to a telephone wall jack. Disconnect the cord from the telephone wall jack and plug it into the port labeled on the back of the printer. 3. Connect one end of the phone cord to your telephone wall jack, then connect the other end to the port labeled on the back of the printer. NOTE: 4.
1 Telephone wall jack. 2 Parallel splitter. 3 DSL/ADSL filter. Connect one end of the phone cord to the port labeled other end of the cord to the DSL/ADSL filter. on the back of the printer. Connect the You might need to connect the phone cord to your country/region adapter. 4 Computer. 5 Computer DSL/ADSL modem. NOTE: You need to purchase a parallel splitter. A parallel splitter has one RJ-11 port on the front and two RJ-11 ports on the back.
Shared voice/fax with computer dial-up modem If you use your phone line for both fax and telephone calls, use these instructions to set up your fax. There are two different ways to set up the printer with your computer based on the number of phone ports on your computer. Before you begin, check your computer to see if it has one or two phone ports. NOTE: If your computer has only one phone port, you need to purchase a parallel splitter (also called a coupler), as shown in the illustration.
To set up the printer on the same phone line as a computer with two phone ports 1. Remove the white plug from the port labeled 2. Find the phone cord that connects from the back of your computer (your computer dial-up modem) to a telephone wall jack. Disconnect the cord from the telephone wall jack and plug it into the port labeled on the back of the printer. 3. Connect a phone to the "OUT" port on the back of your computer dial-up modem. 4.
1 Telephone wall jack. 2 Parallel splitter. 3 DSL/ADSL filter. 4 Use a minimum 26 AWG phone cord to connect to the port on the printer. You might need to connect the phone cord to your country/region adapter. 5 DSL/ADSL modem. 6 Computer. 7 Telephone. NOTE: You need to purchase a parallel splitter. A parallel splitter has one RJ-11 port on the front and two RJ-11 ports on the back.
NOTE: Phones in other parts of the home/office sharing the same phone number with DSL service need to be connected to additional DSL filters to avoid noise when making voice calls. 2. Connect one end of the phone cord to the DSL filter, and then connect the other end to the port labeled on the back of the printer. NOTE: You might need to connect the phone cord to your country/region adapter. 3.
3 Answering machine. 4 Telephone (optional). To set up the printer with a shared voice/fax line with answering machine 1. Remove the white plug from the port labeled on the back of the printer. 2. Unplug your answering machine from the telephone wall jack, and connect it to the port labeled the back of the printer.
Shared voice/fax line with computer dial-up modem and answering machine There are two different ways to set up the printer with your computer based on the number of phone ports on your computer. Before you begin, check your computer to see if it has one or two phone ports. NOTE: If your computer has only one phone port, you need to purchase a parallel splitter (also called a coupler), as shown in the illustration. (A parallel splitter has one RJ-11 port on the front and two RJ-11 ports on the back.
To set up the printer on the same phone line as a computer with two phone ports 1. Remove the white plug from the port labeled 2. Find the phone cord that connects from the back of your computer (your computer dial-up modem) to a telephone wall jack. Disconnect the cord from the telephone wall jack and plug it into the port labeled on the back of the printer. 3.
Shared voice/fax line with computer DSL/ADSL modem and answering machine 1 Telephone wall jack. 2 Parallel splitter. 3 DSL/ADSL filter. 4 Use a minimum 26 AWG phone cord to connect to the port on the printer. You might need to connect the phone cord to your country/region adapter. 5 DSL/ADSL modem. 6 Computer. 7 Answering machine. 8 Telephone (optional). NOTE: You need to purchase a parallel splitter. A parallel splitter has one RJ-11 port on the front and two RJ-11 ports on the back.
NOTE: Phones in other parts of the home/office sharing the same phone number with DSL/ADSL service need to be connected to additional DSL/ADSL filters, to avoid noise when making voice calls. 2. Connect one end of the phone cord to the DSL/ADSL filter, and then connect the other end to the port labeled on the back of the printer. NOTE: You might need to connect the phone cord to your country/region adapter. 3. Connect the DSL/ADSL filter to the splitter. 4.
There are two different ways to set up the printer with your computer based on the number of phone ports on your computer. Before you begin, check your computer to see if it has one or two phone ports. ● If your computer has only one phone port, you need to purchase a parallel splitter (also called a coupler), as shown in the illustration. (A parallel splitter has one RJ-11 port on the front and two RJ-11 ports on the back.
4. Connect one end of the phone cord to your telephone wall jack, then connect the other end to the port labeled on the back of the printer. NOTE: You might need to connect the phone cord to your country/region adapter. 5. If your modem software is set to receive faxes to your computer automatically, turn off that setting. NOTE: If you do not turn off the automatic fax reception setting in your modem software, the printer cannot receive faxes. 6. Turn off the Auto Answer setting. 7. Run a fax test.
ENWW ● If the test passes and you are still having problems faxing, check the fax settings listed in the report to verify the settings are correct. A blank or incorrect fax setting can cause problems faxing. ● If the test fails, review the report for more information on how to fix any problems found.
9 HP Digital Solutions (Windows 7) The printer includes a collection of digital solutions that can help you simplify and streamline your work.
What are HP Digital Solutions? HP Digital Solutions are a set of tools provided with this printer that can help improve your office productivity. This section contains the following topics: ● HP Digital Filing ● HP Digital Fax HP Digital Filing HP Digital Filing provides robust, general-office scanning—as well as basic, versatile, documentmanagement capabilities—for multiple users over a network.
Requirements Before you set up the HP Digital Solutions, make sure you have the following: For all HP Digital Solutions ● A network connection Connect the printer using either a wireless connection or an Ethernet cable. NOTE: If the printer is connected using a USB cable, you scan documents to a computer or attach scans to an email message using the HP software. For more information, see Scan using HP printer software (Windows 7) . You can receive faxes to your computer using HP Digital Fax.
● Microsoft Outlook 2007–2016 (Windows 7, Windows 8/8.1, and Windows 10) However, if your email application is not listed above, you can still set up and use Scan to Email and Fax to Email if your email application meets the requirements listed in this section.
Set up HP Digital Solutions You can set up HP Digital Solutions using software wizards that you can open from the HP printer software (Windows). TIP: You can also use the printer's embedded web server (EWS) to set up the HP Digital Solutions. For more information about using the EWS, see Embedded web server. NOTE: If you are using the printer in an IPv6-only network environment, you must set up the digital solutions using the EWS.
To set up Scan to Network Folder from embedded web server (EWS) 1. Open the embedded web server (EWS). For more information, see Open the embedded web server. 2. On the Home tab, click Scan to Network Folder. 3. Click , and then follow the onscreen instructions. NOTE: You can customize the scan settings for each destination folder. 4. After you have entered the required information about the network folder, click Save and Test to make sure the link to the network folder is working correctly.
NOTE: After you have set the Outgoing Email Profile, you can use the printer’s embedded web server (EWS) to add more Outgoing Email Profiles, add email addresses to the Address Book, and configure other email options. To open the EWS automatically, select the Launch embedded web server when finished checkbox on the last screen of the Scan to Email Wizard. When you click Finish, the EWS is displayed in your computer’s default web browser. For more information about EWS, see Embedded web server.
Received faxes are saved as TIFF (Tagged Image File Format) or PDF files. NOTE: HP Digital Fax supports receiving black-and-white faxes only. Color faxes are printed instead of being saved. To set up HP Digital Fax from the printer software (Windows) 1. Open the HP printer software. For more information, see Open the HP printer software (Windows). 2. Click Print, Scan & Fax, and then click Fax. 3. Click Digital Fax Setup Wizard. 4. Follow the onscreen instructions.
Use the HP Digital Solutions To use the HP Digital Solutions available with the printer, follow the appropriate instructions. Use HP Scan to Network Folder 1. Load your original print-side down on the scanner glass or print-side up in the document feeder. For more information, see Load an original on the scanner glass or Load an original in the document feeder. 2. Touch Scan, and then touch Network Folder. 3. On the control panel display, select the name that corresponds to the folder you want to use.
ENWW ● If you are using Fax to Network Folder, this process happens in the background. HP Digital Fax does not notify you when faxes are saved to the network folder. ● If you are using Fax to Email and if your email application is set to notify you when new email messages arrive in your inbox, you can see when new faxes arrive.
10 Manage cartridges To ensure the best print quality from the printer, you need to perform some simple maintenance procedures. TIP: If you have problems copying documents, see Printing issues.
Information on cartridges and the printhead The following tips help maintain HP cartridges and ensure consistent print quality. ● The instructions in this guide are for replacing cartridges, and are not intended for first time installation. ● Keep all cartridges in the original sealed packages until they are needed. ● Be sure to turn off the printer properly. For more information, see Turn the printer off . ● Store cartridges at room temperature (15-35° C or 59-95° F).
Some color ink is used even when printing with black cartridge only Ink is used in a number of ways throughout the inkjet printing process. In general, ink in a cartridge is used for printing documents, photographs and other such materials. Some ink, however, must be used to maintain the health of the printhead; some ink is residual; and some ink evaporates. For more information on ink usage, visit www.hp.com/go/learnaboutsupplies and click HP Ink.
Check the estimated ink levels You can check the estimated ink levels from the printer software or from the printer control panel. To check the estimated ink levels from the printer control panel ▲ From the printer control panel, touch or swipe down the tab at the top of the screen to open the Dashboard, and then touch (Ink) to check the estimated ink levels. NOTE: Ink level alerts and indicators provide estimates for planning purposes only.
Replace the cartridges NOTE: For information on recycling used ink supplies, see HP inkjet supplies recycling program. If you do not already have replacement cartridges for the printer, see Order cartridges. NOTE: At this time, some portions of the HP web site are available in English only. NOTE: Not all cartridges are available in all countries/regions.
4. Press the front of the cartridge to release it, and then remove it from the slot. 5. Remove the new cartridge from its packaging. 6. Using the color-coded letters for help, slide the cartridge into the empty slot until it is securely installed in the slot. Make sure that the color-coded letter on the cartridge matches that on the slot. 7. ENWW Repeat steps 3 through 5 for each cartridge you are replacing.
8. Close the cartridge access door. 9. Close the front door.
Order cartridges To order cartridges, go to www.hp.com. (At this time, some portions of the HP website are available in English only.) Ordering cartridges online is not supported in all countries/regions. However, many countries have information on ordering by telephone, locating a local store and printing a shopping list. In addition, you can visit the www.hp.com/buy/supplies page to obtain information about purchasing HP products in your country.
Store printing supplies Cartridges can be left in the printer for extended periods of time. However, to assure optimal cartridge health, be sure to turn off the printer properly when the printer is not in use. For more information, see Turn the printer off .
Anonymous usage information storage The HP cartridges used with this printer contain a memory chip that assists in the operation of the printer. In addition, this memory chip stores a limited set of anonymous information about the usage of the printer, which might include: the number of pages printed using the cartridge, the page coverage, frequency of printing, and the printing modes used. This information helps HP design future printers to meet our customers' printing needs.
Cartridge warranty information The HP cartridge warranty is applicable when the cartridge is used in its designated HP printing device. This warranty does not cover HP ink cartridges that have been refilled, remanufactured, refurbished, misused, or tampered with. During the warranty period the cartridge is covered as long as the HP ink is not depleted and the end of warranty date has not been reached.
11 Solve a problem The information in this section suggests solutions to common problems. If your printer is not operating correctly and these suggestions did not solve your problem, try using one of the support services listed in HP support to obtain assistance.
Get help from the HP Smart app The HP Smart app provides alerts for printer issues (jams and other problems), links to help content, and options to contact support for additional assistance. Get help from the printer control panel You can use the printer’s help topics to learn more about the printer, and some help topics include animations that guide you through procedures, such as loading papers. To access the Help menu from the Home screen or contextual help for a screen, touch panel.
ENWW 2. Remove the input tray by pulling it all the way out of the printer. 3. Check the input tray area underneath the printer. Removed the jammed paper. 4. Insert the input tray back until it snaps into place.
5. Insert the output tray back into the printer. To clear a paper jam from print zone 1. Open the front door. 2. Open the cartridge access door.
ENWW 3. If the print carriage is not obstructed, move the print carriage to the far left of the printer and remove the jammed paper. 4. If need, move the carriage to the far right of the printer, and remove any jammed or torn pieces of paper. 5. Lift the handle of the paper path cover and remove the cover.
6. Locate any jammed paper inside the printer, grasp it with both hands and pull it towards you. CAUTION: If the paper tears when you are removing it from the rollers, check the rollers and wheels for torn pieces of paper that might be remaining inside the printer. If you do not remove all the pieces of paper from the printer, more paper jams are likely to occur. 7. Reinsert the paper path cover until it snaps into place. 8. Close the cartridge access door.
9. Close the front door. To clear a paper jam from the document feeder ENWW 1. Lift the cover of the document feeder. 2. Pull any jammed paper out of the rollers.
3. Lift the document feeder tab from the side. 4. Pull any jammed paper out under the rollers. 5. Close the document feeder tab.
ENWW 6. Close the cover of the document feeder until it snaps into space. 7. Lift up the document feeder tray. 8. Remove any jammed paper under the tray. 9. Put down the document feeder tray.
Clear a print carriage jam Remove any objects, such as paper, that are blocking the print carriage. NOTE: Do not use any tools or other devices to remove jammed paper. Always use caution when removing jammed paper from inside the printer. Learn how to avoid paper jams To help avoid paper jams, follow these guidelines. ● Remove printed papers from the output tray frequently. ● Make sure that you are printing with paper that is not wrinkled, folded, or damaged.
● ● – Ensure that the stack of paper is aligned with the appropriate paper size lines on the bottom of the input tray, and does not exceed the stack height indicated by one or more label on the side or paper-width guide of the input tray. – Make sure paper in the tray is not curled. Uncurl paper by bending it in the opposite direction of the curl. Pages are skewing – Make sure the paper loaded in the input tray is aligned to the paper-width guides.
Fix problems with page not printing (unable to print) To resolve print issues Make sure that the printer is turned on and that there is paper in the tray. If you are still unable to print, try the following in order: 1. Check for error messages on the printer display and your device screen and resolve them by following the onscreen instructions. 2. If you have an HP+ printer, verify that the printer is connected to the Internet and Original HP cartridges are installed.
b. ● Windows 7: From the Windows Start menu, click Devices and Printers. ● macOS: Select System Preferences from the Apple menu, and then click Printers & Scanners. Make sure the correct printer is set as the default printer. The default printer has a check mark in a black or green circle next to it. 6. c. If the wrong printer is set as the default printer, right-click the correct printer and select Set as Default Printer. d. Try using your printer again.
b. iv. On the General tab, next to Startup type, make sure that Automatic is selected. v. If the service is not already running, under Service status, click Start, and then click OK. Make sure the correct printer is set as the default printer. The default printer has a check mark in a black or green circle next to it. c. If the wrong printer is set as the default printer, right-click the correct printer and select Set as Default Printer. d. Try using your printer again. 7. Restart the computer.
1 Power connection to the printer 2 Connection to a power outlet 2. Look at the Power button located on the printer. If it is not lit, the printer is turned off. Press the Power button to turn on the printer. NOTE: If the printer is not receiving electrical power, connect it to another power outlet. 3. With the printer turned on, disconnect the power cord from the back of the printer. 4. Unplug the power cord from the wall outlet. 5. Wait at least 15 seconds. 6.
3. Check the estimated ink levels to determine if the cartridges are low on ink. For more information, see Check the estimated ink levels. If the cartridges are low on ink, consider replacing them. 4. Align the printhead. To align the printhead from the printer software NOTE: Aligning the printhead ensures the high-quality output. The printhead does not have to be realigned when cartridges are replaced. 5. a. Load letter or A4 unused plain white paper into the input tray. b.
3. Check the estimated ink levels to determine if the cartridges are low on ink. For more information, see Check the estimated ink levels. If the cartridges are low on ink, consider replacing them. 4. Align the printhead. To align the printhead from the printer display 5. a. Load Letter, A4, or Legal unused plain white paper into the input tray. b. From the printer control panel, touch or swipe down the tab at the top of the screen to open the Dashboard, and then touch (Setup). c.
Fax issues Run the fax test report first to see if there is a problem with your fax setup. If the test passes and you are still having problems faxing, check the fax settings listed in the report to verify that the settings are correct. Run the fax test You can test your fax setup to check the status of the printer and to make sure it is set up correctly for faxing. Perform this test only after you have completed fax setup on the printer.
● If you are running the test from the Fax Setup Wizard (Windows), make sure the printer is not busy completing another task, such as receiving a fax or making a copy. Check the display for a message indicating that the printer is busy. If it is busy, wait until it is finished and in the idle state before running the test. ● If you are using a phone splitter, this can cause faxing problems. (A splitter is a two-cord connector that plugs into a telephone wall jack.
Figure 11-1 Back view of the printer 1 Telephone wall jack. 2 Use a minimum 26 AWG phone cord to connect to the port on the printer. 2. After you have connected the phone cord to the port labeled passes and the printer is ready for faxing. 3. Try to send or receive a test fax.
The "Using Correct Type of Phone Cord with Fax" test failed ● Connect one end of the phone cord to your telephone wall jack, then connect the other end to the port labeled on the back of the printer. 1 Telephone wall jack. 2 Use a minimum 26 AWG phone cord to connect to the port on the printer. ● Check the connection between the telephone wall jack and the printer to make sure the phone cord is secure. ● If you are using a phone splitter, this can cause faxing problems.
● Check to make sure the country/region setting is set appropriately for your country/region. If the country/region setting is not set or is set incorrectly, the test might fail and you might have problems sending and receiving faxes. ● Make sure you connect the printer to an analog phone line or you cannot send or receive faxes. To check if your phone line is digital, connect a regular analog phone to the line and listen for a dial tone.
● The computer cannot receive faxes (HP Digital Fax) The display always shows Phone Off Hook ● HP recommends using a 2-wire phone cord. ● Other equipment that uses the same phone line as the printer might be in use. Make sure extension phones (phones on the same phone line, but not connected to the printer) or other equipment are not in use or off the hook.
● Other equipment, which uses the same phone line as the printer, might be in use. For example, you cannot use the printer for faxing if an extension phone is off the hook, or if you are using a computer dial-up modem to send an email or access the Internet. ● Check to see if another process has caused an error. Check the display or your computer for an error message providing information about the problem and how to solve it.
● If you have an answering machine on the same phone line with the printer, you might have one of the following problems: – Your answering machine might not be set up correctly with the printer. – Your outgoing message might be too long or too loud to allow the printer to detect fax tones, and the sending fax machine might disconnect. – Your answering machine might not have enough quiet time after your outgoing message to allow the printer to detect fax tones.
you cannot hear fax tones, the receiving fax machine might not be turned on or connected, or a voice mail service could be interfering with the recipient's phone line. You can also ask the recipient to check the receiving fax machine for any problems. Fax tones are recorded on my answering machine ● When you have an answering machine on the same phone line you use for fax calls, try connecting the answering machine directly to the printer.
● ○ See the DIAGNOSTICS RESULTS section for all tests that were performed, to determine whether or not your printer passed. ○ From the CURRENT CONFIGURATION section, find out the Network Name (SSID) to which your printer is currently connected. Make sure that the printer is connected to the same network as your computer or mobile devices. Use an HP online troubleshooting tool to solve your printer issues. Fix Wi-Fi Direct connection 1.
Printhead alignment fails ● If the alignment process fails, make sure you have loaded unused, plain white paper into the input tray. If you have colored paper loaded in the input tray when you align the printhead, the alignment fails. ● If the alignment process fails repeatedly, you may need to clean the printhead, or you might have a defective sensor. To clean the printhead, see Maintain the printhead and cartridges. ● If cleaning the printhead does not solve the problem, contact HP support. Go to hp.
Understand printer reports You can print the following reports to help troubleshoot problems with the printer. ● Printer status report ● Network configuration page ● Print quality report ● Wireless test report ● Web access test report To print a printer report 1. From the printer control panel, touch or swipe down the tab at the top of the screen to open the Dashboard, touch (Setup). 2. Touch Reports. 3. Select a printer report to print.
Wireless test report When you print the Wireless Test Report, a number of tests are run to check various conditions of the printer wireless connection. The report shows the results of the tests. If an issue is discovered, the issue along with a message how to fix it is provided on the report. Some key wireless configuration details are provided at the bottom section of the report. Web access test report Print the web access report to help identify internet connectivity issues which can affect Web Services.
Solve Web Services problems If you are having problems using Web Services, check the following: ● Make sure the printer is connected to the Internet using an Ethernet or wireless connection. NOTE: You cannot use these web features if the printer is connected using a USB cable. ● Make sure the latest product updates have been installed on the printer. ● Make sure Web Services is enabled on the printer. For more information, see Open the embedded web server.
Maintain the printer What do you want to do? ● Clean the scanner glass ● Clean the exterior ● Clean the document feeder ● Maintain the printhead and cartridges Clean the scanner glass Dust or dirt on the scanner glass, scanner lid backing, or scanner frame can slow down performance, degrade the quality of scans, and affect the accuracy of special features such as fitting copies to a certain page size.
2. Clean the scanner glass and lid backing by using a soft, lint-free cloth that has been sprayed with a mild glass cleaner. CAUTION: Use only glass cleaner to clean the scanner glass. Avoid cleaners that contain abrasives, acetone, benzene, and carbon tetrachloride, all of which can damage the scanner glass. Avoid isopropyl alcohol because it can leave streaks on the scanner glass. CAUTION: Do not spray the glass cleaner directly on the scanner glass.
2. Lift the document feeder cover. This provides easy access to the rollers (1) and separator pad (2). 1 Rollers 2 Separator pad 3. Lightly dampen a clean lint-free cloth with distilled water, then squeeze any excess liquid from the cloth. 4. Use the damp cloth to wipe any residue off the rollers or separator pad. NOTE: 5. If the residue does not come off using distilled water, try using isopropyl (rubbing) alcohol. Close the cover of the document feeder.
There are three stages of cleaning. Each stage lasts about two minutes, uses one sheet of paper, and uses an increasing amount of ink. After each stage, review the quality of the printed page. You should only initiate the next phase of cleaning if the print quality is poor. If print quality still seems poor after you complete all stages of cleaning, try aligning the printhead. If print quality problems persist after cleaning and aligning, contact HP support. For more information, see HP support.
Restore original factory defaults and settings If you disable some functions or change some settings and want to change them back, you can restore the printer to the original factory settings or network settings. To restore the selected printer functions to the original factory settings 1. From the printer control panel, touch or swipe down the tab at the top of the screen to open the Dashboard, and then touch (Setup). 2. Touch Printer Maintenance. 3. Touch Restore. 4. Touch Restore Settings. 5.
3. Touch Restore Network Settings. A message appears stating that the network defaults will be restored. 4. Touch Yes. 5. Print the network configuration page and verify that the network settings have been reset. NOTE: When you reset the printer network settings, previously configured wireless and Ethernet settings (such as the link speed or IP address) are removed. The IP address is set back to the Automatic mode. TIP: You can visit the HP online support website at hp.
HP support For the latest product updates and support information, visit the product support website at hp.com/support. HP online support provides a variety of options for help with your printer: View video tutorials: Learn how to set up the printer and perform common tasks. Get troubleshooting assistance: Find information for resolving paper jams, network connection issues, print quality issues, printer errors, and more.
Register printer By taking just a few minutes to register, you can enjoy quicker service, more efficient support, and product support alerts. If you did not register your printer while installing the software, you can register now at http://www.register.hp.com. Additional warranty options Extended service plans are available for the printer at additional costs. Go to hp.com/support, select your country/region and language, then explore the service plan options available for your printer.
12 HP EcoSolutions (HP and the Environment) HP is committed to helping you optimize your environmental footprint and empowering you to print responsibly—at home or in the office. For more detailed information about environmental guidelines that HP follows during the manufacturing process, see Environmental product stewardship program. For more information about HP's environmental initiatives, visit www.hp.com/ecosolutions.
Manage power Use Sleep Mode, Auto-Off and Schedule On/Off to conserve electricity. Sleep mode Power usage is reduced while in Sleep mode. After initial setup of printer, the printer will enter Sleep mode after five minutes of inactivity. Use the following instructions to change the period of inactivity before the printer sleeps. 1. From the printer control panel, touch or swipe down the tab at the top of the screen to open the Dashboard, touch . 2. Touch Sleep Mode, and then touch the desired option.
Quiet Mode Quiet Mode slows down printing to reduce overall noise without affecting print quality. It only works when printing on plain paper. Additionally, Quiet Mode is disabled if you are printing using the best or presentation print quality. To reduce printing noise, turn on Quiet Mode. To print at normal speed, turn Quiet Mode off. Quiet Mode is off by default. NOTE: Quiet Mode does not work if you print photos or envelopes.
To turn Quiet Mode on or off from the Embedded Web Server (EWS) ENWW 1. Open the EWS. For more information, see Open the embedded web server. 2. Click the Settings tab. 3. In the Preferences section, select Quiet Mode, and then select On or Off. 4. Click Apply.
Optimize Printing Supplies To optimize printing supplies such as ink and paper, try the following: ● Recycle used original HP ink cartridges through HP Planet Partners. For more information, visit www.hp.com/recycle. ● Optimize paper usage by printing on both sides of the paper. ● Change the print quality in the printer driver to a draft setting. The draft setting uses less ink. ● Do not clean the printhead unnecessarily. Doing so wastes ink and shortens the life of the cartridges.
A ENWW Technical information ● Specifications ● Regulatory notices ● Environmental product stewardship program 191
Specifications For more information, visit hp.com/support. Select your country or region. Click Product Support & Troubleshooting. Enter the name shown on the front of the printer, and then select Search. Click Product information, and then click Product specifications. System requirements ● For information about software and system requirements or future operating system releases and support, visit the HP online support website at hp.com/support.
Print specifications ● Print speeds vary according to the complexity of the document and printer model ● Method: drop-on-demand thermal inkjet ● Language: PCL3 GUI ● Print resolution: For a list of supported print resolutions, visit the printer support website at hp.com/support. ● Print margins: For margin settings of different media, visit the printer support website at hp.com/support.
● Ring detect with automatic fax/answering machine switching. ● Fax resolution: ● Photo (dpi) Very Fine (dpi) Fine (dpi) Standard (dpi) Black 205 x 196 (8-bit grayscale) 308 x 300 205 x 196 205 x 98 Color 205 x 200 205 x 200 205 x 200 205 x 200 Fax to PC specifications – Supported file types: Uncompressed TIFF – Supported fax types: black-and-white faxes Cartridge yield ● Visit www.hp.com/go/learnaboutsupplies for more information on estimated cartridge yields.
Regulatory notices The printer meets product requirements from regulatory agencies in your country/region.
● Connect the equipment into an outlet on a circuit different from that to which the receiver is connected. ● Consult the dealer or an experienced radio/TV technician for help. NOTE: If the product has an Ethernet / LAN port with metallic casing then use of a shielded interface cable is required to comply with the Class B limits of Part 15 of FCC rules. Modifications (part 15.
European Union and United Kingdom Regulatory Notice Products bearing the CE marking and UK marking comply to applicable EU Directives and the equivalent UK Statutory Instruments and can operate in at least one EU Member State and in Great Britain. The full EU and UK Declaration of Conformity can be found at the following website: www.hp.eu/certificates (Search with the product model name or its Regulatory Model Number (RMN), which may be found on the regulatory label.
The telephone company may make changes in its facilities, equipment, operations, or procedures that could affect the operation of the equipment. If this happens, the telephone company will provide advance notice in order for you to make the necessary modifications in order to maintain uninterrupted service. If trouble is experienced with this equipment, please contact the manufacturer, or look elsewhere in this manual, for repair and (or) warranty information.
This equipment meets the applicable Innovation, Science and Economic Development Canada Terminal Equipment Technical Specifications. This is confirmed by the registration number. The abbreviation ISED before the registration number signifies that registration was performed based on a Declaration of Conformity indicating that Innovation, Science and Economic Development Canada technical specifications were met. It does not imply that Innovation, Science and Economic Development Canada approved the equipment.
Exposure to radio frequency radiation CAUTION: The radiated output power of this device is far below the FCC radio frequency exposure limits. Nevertheless, the device shall be used in such a manner that the potential for human contact during normal operation is minimized. This product and any attached external antenna, if supported, shall be placed in such a manner to minimize the potential for human contact during normal operation.
Notice to users in Canada Under Innovation, Science and Economic Development Canada regulations, this radio transmitter may only operate using an antenna of a type and maximum (or lesser) gain approved for the transmitter by Innovation, Science and Economic Development Canada. To reduce potential radio interference to other users, the antenna type and its gain should be so chosen that the equivalent isotropically radiated power (e.i.r.p.) is not more than that necessary for successful communication.
Notice to users in Japan この機器は技術基準適合証明又は工事設計認証を受けた無線設備を搭載しています。 202 Appendix A Technical information ENWW
Environmental product stewardship program HP is committed to providing quality products in an environmentally sound manner. Design for recycling has been incorporated into this product. The number of materials has been kept to a minimum while ensuring proper functionality and reliability. Dissimilar materials have been designed to separate easily. Fasteners and other connections are easy to locate, access, and remove using common tools.
HP tips for reducing environmental impact ● Choose from a wide variety of HP papers with FSC® or PEFCTM certification, which indicates that the paper pulp came from a reputable and well-managed source.1 ● Conserve resources-look for paper made with recycled content. ● Recycle your Original HP cartridges-it's easy and free with the HP Planet Partners program, available in 47 countries and territories worldwide.2 ● Save paper by printing on both sides of the page.
Chemical substances HP is committed to providing our customers with information about the chemical substances in our products as needed to comply with legal requirements such as REACH (Regulation EC No 1907/2006 of the European Parliament and the Council). A chemical information report for this product can be found at: www.hp.com/go/ reach. EPEAT Most HP products are designed to meet EPEAT. EPEAT is a comprehensive environmental rating that helps identify greener electronics equipment.
California Perchlorate Material Notice Perchlorate material - special handling may apply. See: www.dtsc.ca.gov/hazardouswaste/perchlorate This product's real-time clock battery or coin cell battery may contain perchlorate and may require special handling when recycled or disposed of in California. European Union Battery Directive This product contains a battery that is used to maintain data integrity of real time clock or product settings and is designed to last the life of the product.
喷墨打印机 – 操作模式功率 睡眠状态的能耗按照 GB 21521 的标准来衡量和计算。该数据以瓦特 (W) 表示。 – 待机功率 待机状态是产品连接到电网电源上功率最低的状态。该状态可以延续无限长时间,且使用者无 法改变此状态下产品的功率。对于“成像设备”产品,“待机”状态通常相当于“关闭”状态,但也可 能相当于“准备”状态或者“睡眠”状态。该数据以瓦特 (W) 表示。 – 睡眠状态预设延迟时间 出厂前由制造商设置的时间决定了该产品在完成主功能后进入低耗模式(例如睡眠、自动关 机)的时间。该数据以分钟表示。 – 附加功能功率因子之和 网络接口和内存等附加功能的功率因子之和。该数据以瓦特 (W) 表示。 标识上显示的能耗数据是根据典型配置测量得出的数据,此类配置包含登记备案的打印机依据复印机、 打印机和传真机能源效率标识实施规则所选的所有配置。因此,该特定产品型号的实际能耗可能与标识 上显示的数据有所不同。 要了解规范的更多详情,请参考最新版的 GB 21521 标准。 Disposal of waste equipment by users This symbol means do not
The Table of Hazardous Substances/Elements and their Content (China) 产品中有害物质或元素的名称及含量 根据中国《电器电子产品有害物质限制使用管理办法》 有害物质 铅 汞 镉 六价铬 多溴联苯 多溴二苯醚 (Pb) (Hg) (Cd) (Cr(VI)) (PBB) (PBDE) 外壳和托盘 ◯ ◯ ◯ ◯ ◯ ◯ 电线 ◯ ◯ ◯ ◯ ◯ ◯ 印刷电路板 X ◯ ◯ ◯ ◯ ◯ 打印系统 X ◯ ◯ ◯ ◯ ◯ 显示器 X ◯ ◯ ◯ ◯ ◯ 喷墨打印机墨盒 ◯ ◯ ◯ ◯ ◯ ◯ 驱动光盘 X ◯ ◯ ◯ ◯ ◯ 扫描仪 X ◯ ◯ ◯ ◯ ◯ 网络配件 X ◯ ◯ ◯ ◯ ◯ 电池板 X ◯ ◯ ◯ ◯ ◯ 自动双面打印系统 ◯ ◯ ◯ ◯ ◯ ◯ 外部电源 X ◯ ◯ ◯ ◯ ◯ 部件名称 本表格依据 SJ/T 11364 的规定编制。 ◯:
Declaration of the Presence Condition of the Restricted Substances Marking (Taiwan) 台灣 限用物質含有情況標示聲明書 Taiwan Declaration of the Presence Condition of the Restricted Substances Marking 若要存取產品的最新使用指南或手冊,請前往 hp.com/support。選取搜尋您的產品,然後依照 畫面上的 指示繼續執行。 To access the latest user guides or manuals for your product, go to hp.com/support. Select Find your product, and then follow the onscreen instructions.
Index A ADSL, fax setup with parallel phone systems 105 align printhead 180 answer ring pattern change 93 parallel phone systems 107 answering machine fax tones recorded 172 set up with fax (parallel phone systems) 117 set up with fax and modem 118 automatic fax reduction 86 B backup fax 85 baud rate 94 black and white pages fax 78 blocked fax numbers set up 87 both sides, print on 59 broadcast faxing send 82 buttons, control panel 5, 6 C carriage clear carriage jams 156 cartridge access door, locating 3 C
answering machine and modem, shared with (parallel phone systems) 118 answering machine troubleshoot 172 answering machine, set up (parallel phone systems) 117 auto answer 92 backup fax 85 blocking numbers 87 confirmation reports 98 dial tone test, failed 167 dial type, setting 94 distinctive ringing setup (parallel phone systems) 107 distinctive ringing, change pattern 93 DSL, set up (parallel phone systems) 105 error correction mode 82 error reports 99 forwarding 86 header 92 Internet Protocol, over 97 IS
settings, change 36 view and print settings 36 wireless communication setup 30 wireless settings 175 notices CE mark 197 EU 197 O OCR edit scanned documents 72 operating systems supported 192 output tray locating 2 P paper clear jams 148 load tray 11 selecting 27 skewed pages 157 specifications 192 troubleshoot feeding 156 paper-feed problems, troubleshoot 156 parallel phone systems answering machine setup 117 countries/regions with 102 distinctive ringing setup 107 DSL setup 105 ISDN setup 107 modem and an
answering machine and modem (parallel phone systems) 118 computer modem (parallel phone systems) 111 computer modem and answering machine (parallel phone systems) 118 computer modem and voice line (parallel phone systems) 113 computer modem and voice mail (parallel phone systems) 122 distinctive ringing 93 distinctive ringing (parallel phone systems) 107 DSL (parallel phone systems) 105 fax scenarios 103 fax, with parallel phone systems 102 ISDN line (parallel phone systems) 107 PBX system (parallel phone s