
User's Manual


Auto-navigation for clearing paper jams
The auto-navigation feature assists in clearing jams by providing step-by-step instructions on the control panel.
When you complete a step, the printer displays instructions for the next step until you have completed all steps
in the procedure.
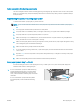
Experiencing frequent or recurring paper jams?
To reduce the number of paper jams, try these solutions.
NOTE: To see a video that demonstrates how to load paper in a way that reduces the number of paper jams,
click here.
1. Use only paper that meets HP specications for this printer.
2. Use paper that is not wrinkled, folded, or damaged. If necessary, use paper from a dierent package.
3. Use paper that has not previously been printed or copied on.
4. Make sure the tray is not overlled. If it is, remove the entire stack of paper from the tray, straighten the
stack, and then return some of the paper to the tray.
5. Make sure the paper guides in the tray are adjusted correctly for the size of paper. Adjust the guides so they
are touching the paper stack without bending it.
6. Make sure that the tray is fully inserted in the printer.
7. If you are printing on heavy, embossed, or perforated paper, use the manual feed feature and feed sheets
one at a time.
8. Open the Trays menu on the printer control panel. Verify that the tray is congured correctly for the paper
type and size.
9. Make sure the printing environment is within recommended specications.
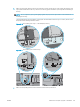
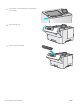
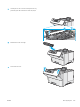
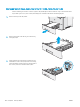
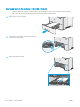
Clear paper jams in tray 1—13.A1
Use the following procedure to clear paper jams in Tray 1. When a jam occurs, the control panel displays an
animation that assists in clearing the jam.
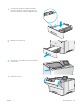
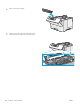
1. If most of the sheet of paper is visible in the tray,
slowly pull the jammed paper out of the printer.
Make sure that the entire sheet is removed. If it
tears, continue with the following steps to nd the
remnants.
If most of the sheet of paper has been pulled
inside the printer, continue with the following
steps.
ENWW Clear paper jams 103