HP Easy Shell Administrator Guide SUMMARY HP Easy Shell allows you to configure connections, websites, and applications for kiosk-style deployments of HP thin clients based on Windows® operating systems.
Copyright information © Copyright 2014–2020 HP Development Company, L.P. Citrix, ICA, and StoreFront are trademarks of Citrix Systems, Inc. and/or one more of its subsidiaries, and may be registered in the United States Patent and Trademark Office and in other countries. Microsoft and Windows are either registered trademarks or trademarks of Microsoft Corporation in the United States and/or other countries. VMware and Horizon View are registered trademarks or trademarks of VMware, Inc.
User input syntax key Text that you must enter into a user interface is indicated by fixed-width font.
Table of contents 1 Getting started.......................................................................................................................................................................1 Supported operating systems, connection types, and applications ................................................................................1 Obtaining and opening HP Easy Shell...............................................................................................................................
1 Getting started HP Easy Shell allows you to configure connections, websites, and applications for kiosk-style deployments of HP thin clients based on Windows® operating systems. You can also customize the kiosk interface that is presented to standard users and enable or disable user access to specific Control Panel settings. The configured environment can be deployed to multiple thin clients using HP Device Manager (HPDM).
Obtaining and opening HP Easy Shell HP Easy Shell is typically preinstalled on HP thin clients. It can also be downloaded or updated via HP ThinUpdate. NOTE: For more information, see the administrator guide for HP ThinUpdate. HP Easy Shell contains the following two components: ● HP Easy Shell—This is the tile-based, kiosk-style user interface that allows standard users to launch applications, connections, and websites as configured by the administrator.
1. Open the HP Easy Shell Configuration utility (see Obtaining and opening HP Easy Shell on page 2 for more information). 2. Enable Kiosk mode, and configure the environment for standard users (see Creating an HP Easy Shell configuration on page 4 for more information) and be sure to select Apply to apply the configuration. 3. If you are configuring HP Easy Shell from an administrator account, log off, and then log on as a standard user.
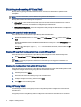
2 Configuration This chapter outlines configuration settings for HP Easy Shell. Creating an HP Easy Shell configuration The following table describes the settings available in each panel in the HP Easy Shell Configuration utility. Table 2-1 Configuration options Panel Description Settings Allows you to do the following: ● Create custom Easy Shell profiles for specific users and domains (see Adding a custom Easy Shell profile on page 12).
Table 2-2 User interface options Setting Description Display tiles button If set to On, the Tiles button is displayed in the top-right corner of the user interface, allowing users to access the configured applications, connections, and websites. NOTE: If the Tiles button is disabled, users cannot access the configured applications, connections, or websites. If no applications, connections, or websites are configured, the Tiles button is not displayed even if this setting is enabled.
Table 2-2 User interface options (continued) Setting Description Display device name and IP address If set to On, the computer name and IP address are displayed in the lower-left corner of the user interface. Display MAC address If set to On, the MAC (Media Access Control) address for the computer is displayed in the lower-left corner of the user interface.
Table 2-2 User interface options (continued) Setting Description Select theme This button opens a dialog box that allows you to customize the color theme for the user interface. NOTE: Select Apply to apply the changes and add the settings to the registry. For information on exporting an HP Easy Shell configuration, see Exporting and deploying an HP Easy Shell configuration on page 14. Display settings To manage monitor shortcut settings, use the keyboard shortcut Win+P.
Table 2-3 Application editor settings (continued) Setting Description Auto-launch When enabled, the application launches automatically when the user logs on to Windows. Maximized When enabled, the application maximizes automatically when opened. Persistent When enabled, the application reopens automatically when closed. NOTE: This setting can be set only if Exit action is set to None. Admin only When enabled, the application is available only for administrators.
1. In the Connections panel, select the connection profile, and then drag it onto one of your previously created connections. 2. Select Apply to save your changes. NOTE: A failover connnection inherits the primary connection's settings for the Exit action, Persistent, and Auto-launch settings if the primary connection was launched. If the failover connection was launched manually, it follows its own settings for those settings.
2. Specify the RDP file path. Adding a Citrix StoreFront connection Follow the instructions outlined here to add a Citrix StoreFront connection. NOTE: On the devices that connect to the StoreFront server, you must install the SSL certificates for your StoreFront server. If no certificates exist, HP Easy Shell might fail to communicate with the server. 1. In the StoreFront panel, select the StoreFront tile. 2. Select the Select store button to use the wizard.
Table 2-5 Citrix StoreFront connection settings (continued) Panel Setting Description StoreFront Store URL Specifies the StoreFront URL. StoreFront Launch delay Sets the delay, in seconds, for an auto-launched application. StoreFront Exit action Sets the action to take when the connection is ended (None, Log off, Restart, Shut down). StoreFront Logon method Allows you to select Username and password, Smart card, or Single sign-on.
1. In the Websites panel, select the Website tile. 2. Configure settings in the website editor as necessary. NOTE: See the following table for a list of settings. 3. Select OK to finish adding the website. 4. Select Apply to save your changes. A website can be set as the home site (the default site, which is automatically launched when the program starts), edited, or deleted by selecting the corresponding button on that website tile.
In most deployments, using only the default Easy Shell profile will suffice. However, you can create custom Easy Shell profiles, if you need to assign different settings to different users and domains. The default profile is used for any users or domains not specifically assigned to a custom Easy Shell profile. To add a custom Easy Shell profile: 1. In the Settings panel, select the profile tile under Global Settings. 2. Type a name for the profile, and then select Add. 3.
3 Deployment This chapter discusses the various methods that can deploy HP Easy Shell to multiple thin clients. The best method depends on your use case and environment. NOTE: All of the following methods discuss using HPDM for deployment. For more specifics on HPDM, see the HP Device Manager Administrator Guide. Deploying a preconfigured thin client image You can deploy HP Easy Shell by configuring it on a thin client image that will be captured and deployed to other thin clients.
hpeasyshell.exe /export ".reg" You can import the registry file into a _File and Registry template in HPDM. The template can then be used to deploy the configuration to the target thin clients. You can also deploy the exported registry file to other thin clients in either of the following ways: ● Copy the registry file to another thin client, and then double-click the registry file to apply the settings. ● Use Group Policy to propagate the registry settings to certain domain users.
4 Tips and best practices Consider the information outlined here when using HP Easy Shell. ● Some applications might require a launch delay to function properly. ● When setting Internet Explorer as an auto-started application, be sure to launch the version that best matches the operating system (32-bit or 64-bit); otherwise, the end-of-session action might not be triggered. ● HP Easy Shell does not filter the built-in web browser content. Keep this in mind when selecting the websites.
A Customizing through the registry You can further customize the behavior and settings of HP Easy Shell through the registry. Display user name Follow the instuctions outlined here to display the user name of the user. To display the user name of the user: ▲ In the registry, create the following string key-value: HKEY_LOCAL_MACHINE\SOFTWARE\HP\HP Easy Shell\UI. DisplayUsername=True Customizing title category names Categories can be renamed through the registry.
Accepted values are 0 or 1. Delay browser embed If the embedded browser window does not resize properly, create the following string key-value to delay the browser window embedding. [HKEY_LOCAL_MACHINE\SOFTWARE\HP\HP Easy Shell\Sites] EmbedDelay=2 Accepted value: 2 or higher. By default, the value is 2. Increase the value to delay the embedding. Creating custom connection error messages Follow the instructions outlined here to create custom connection error messages.