
HP ThinPro 7.0 - Administrator Guide
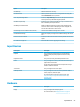

Option Description
Join the thin client to the domain As explained in the chapter on Active Directory Integration, this option lets you formally add
the thin client to the Active Directory’s databases.
Organizational Unit (OU) The thin client is usually added to the “Computers” OU of the database, but you can
manually enter a dierent value here if your database schema demands it.
Dynamic DNS If enabled, the thin client will try to update the DNS server whenever its IP-address/
hostname association changes.
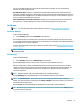
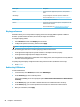
Options tab
Option Description
Enable single sign-on If enabled, a password supplied at login is encrypted and saved on the system. When a
connection starts with SSO credentials congured, it can decrypt the password and pass it
to the connection so that it can be used for remote login.
Domain login group If enabled, login is restricted to users in the listed domain group.
Domain admin group If enabled, escalation to administrator mode and screen-lock override is limited to members
of the listed domain group.
Enable cached domain login If enabled, a hash of the user’s password is saved on the system and can be used for login
even when the Active Directory server is inaccessible.
Retain user preferences at logout If this option is enabled, any setting changes made by a domain user are stored in a place
where those settings are applied only to that user. If this option is disabled, any such user-
specic changes are discarded when the user logs out.
Allow domain password changes If enabled, expired passwords result in a prompt that allows the user to update their
password, and they can manually update their password using the user icon on the taskbar.
HP ThinState
HP ThinState allows you to capture and deploy an HP ThinPro image or conguration (prole) to another thin
client of compatible model and hardware.
Managing an HP ThinPro image
Capturing an HP ThinPro image to an FTP server
To capture an HP ThinPro image to an FTP server:
IMPORTANT: The directory on the FTP server where you intend to save the captured image must already
exist before initiating the capture.
1. Select Management > ThinState in Control Panel.
2. Select the HP ThinPro image, and then select Next.
3. Select make a copy of the HP ThinPro image, and then select Next.
4. Select a FTP server, and then select Next.
5. Enter the FTP server information in the elds.
NOTE: The name of the image le is set by default to be the thin client’s hostname.
Manageability 53