Administrator Guide HP ThinPro PC Converter Deployment Tool
© Copyright 2019 HP Development Company, L.P. Windows is either a registered trademark or trademark of Microsoft Corporation in the United States and/or other countries. Confidential computer software. Valid license from HP required for possession, use or copying. Consistent with FAR 12.211 and 12.212, Commercial Computer Software, Computer Software Documentation, and Technical Data for Commercial Items are licensed to the U.S. Government under vendor's standard commercial license.
User input syntax key Text that you must enter into a user interface is indicated by fixed-width font.
iv User input syntax key
Table of contents 1 Getting started ............................................................................................................................................. 1 Installation ............................................................................................................................................................. 1 Updating HP ThinPro PC Converter Deployment Tool ...........................................................................................
vi
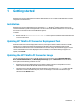
1 Getting started HP ThinPro PC Converter Deployment Tool allows administrators to run or install an HP ThinPro PC Converter image onto most modern PCs. Installation HP ThinPro PC Converter Deployment Tool is provided as a .msi Windows® installer package that you can install onto Windows systems running Windows 7 or later versions with .NET Framework 4.5. It is a 32-bit app that can be run on either 32-bit or 64-bit Windows systems. To install: ▲ Double-click the HPThinProPCConvertorDT.
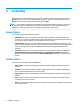
2 Licensing When HP ThinPro PC Converter Deployment Tool opens, the welcome screen collects the license files. The License box of the welcome screen shows available license files. To search for additional licenses select Browse. Once the necessary licenses have been found, select Next. NOTE: Licenses that you specify here are bundled into the deployment images in later steps.
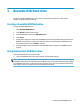
3 Bootable USB flash drive This option reimages a USB flash drive you can use to run HP ThinPro PC Converter on most modern computers while retaining the existing OS. Creating a bootable USB flash drive To create a bootable USB flash drive: 1. Select Bootable USB Flash Drive. 2. Select Browse to find the ThinPro image. 3. Select the USB flash drive from the USB Flash Drive list. 4. Select Create. 5. A dialog box is displayed to confirm that the USB flash drive will be formatted.
4 Installer USB flash drive This option creates an image on the USB flash drive you can use in a 1:1 deployment model to install HP ThinPro PC Converter onto most modern computers. The installer key operates similar to the bootable USB flash drive key with the addition of the ability to install the image onto the target system. Creating an installer USB flash drive To create an installer USB flash drive: 1. Select Installer USB flash drive. 2.
5 Mass deployment image This option creates an installer executable that can be deployed by a management tool to convert the operating system to HP ThinPro. Creating a mass deployment image To create the mass deployment image: 1. Select Mass Deployment Installer. 2. Select the Browse button to find the HP ThinPro PC Converter image file. 3. In the Destination File box, choose the folder path where the mass deployment image executable will be saved by selecting the Browse button 4. Select Create.
Command line for mass deployment NOTE: For syntax help, see User input syntax key on page iii Command line arguments must be used in order for the HP ThinPro PC Converter Image to write to the system running that installer. The following table describes the valid command-line options. Table 5-1 Command-line arguments and their descriptions Option Description -f Force install: ThinPro installation runs on next system boot.
6 Clean USB flash drive This option removes the HP ThinPro PC Converter image from a USB flash drive and restores it back into a basic data storage device. Cleaning and USB flash drive To format a USB flash drive: 1. Select Clean USB Flash Drive. 2. Select an option from the File System Type list. The available choices are FAT32 and NTFS. FAT32 is the default and is also the file system used on most USB flash drives. 3. Select an available drive from the USB Flash Drive list. 4. Select Create. 5.