
HP ThinUpdate - Administrator Guide


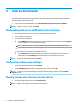
Table Of Contents

3 Image Capture
NOTE: This feature is available on Windows-based HP thin clients only. You cannot capture an HP ThinPro
image using HP ThinUpdate. See the administrator guide for HP ThinPro for information about capturing an
HP ThinPro image.
The Image Capture feature lets you capture an image from an HP thin client and save it to a USB drive, which
can be used to deploy the image to other thin clients.
To open the Image Capture screen:
▲ In the main menu of HP ThinUpdate, select Capture this thin client's image and save it to a USB drive.
NOTE: To return to the main menu, select Back.
Capturing an image and saving it to a USB drive
CAUTION: This process formats the USB drive and deletes any existing data on the drive.
1. On the Image Capture screen, select the post-deployment write lter state.
2. Select a local USB drive from the list.
3. Select Capture, and then follow the on-screen instructions.
NOTE: Windows detects the formatted USB drive as a 1 GB drive that uses the FAT32 le system. This is
because the USB drive is formatted with two partitions. The FAT32 partition contains the boot instructions. A
second partition, which uses the NTFS le system, contains the image. The second partition is not visible on
versions of Windows prior to Windows 10, version 1703.
Capturing an image and saving it to a USB drive 3