
HP Velocity - Administrator Guide


7
Administrator Guide for Thin Clients | HP Velocity
Installing HP Velocity Server Side
HP Velocity Server Side can be installed as a network driver on the following platforms:
•Virtual desktop
• Host operating system of Remote Desktop Services or Terminal Services (depending on the Windows Server version)
• Microsoft® Hyper-V Server
Note: During installation, HP Velocity resets the system’s network interfaces, briefly interrupting network connections. If
HP Velocity is installed over a remote connection, network connectivity might be disrupted.
HP Remote Graphics Software (RGS) versions 6.0 and newer include HP Velocity as a built-in feature that is integrated
into the HP RGS user interface on both the server side (RGS Sender) and client side (RGS Receiver). If you want to utilize
HP Velocity solely for HP RGS, you do not need to install any standalone HP Velocity software components. For more
information about using HP Velocity in HP RGS, see the User Guide for your version of HP RGS. HP RGS versions prior to
6.0 are not compatible with and do not include HP Velocity.
If you want to utilize HP Velocity for any of the other supported protocols, you must install HP Velocity Server Side as
described in the following procedure. If RGS Sender version 6.x is already installed on the system when you attempt the
installation, a message will display stating that another version of HP Velocity is already installed. To circumvent this,
uninstall RGS Sender, install HP Velocity Server Side, and then reinstall RGS Sender. This is not required for RGS Sender
versions 7.0 and newer.
1. Log on to the system where HP Velocity Server Side will be installed.
Note: Only users with Windows administrator privileges can install HP Velocity Server Side.
2. Download the required installation package for the operating system and architecture, and start the installer.
Important: See the Release Notes to ensure that the correct installation package is available and selected for
installation.
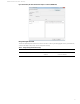
The License Agreement appears.
3. Read the end-user license agreement, and click I Agree.
Note: Selecting Cancel ends the installation.
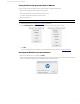
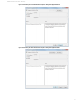
4. Navigate to the location to install HP Velocity to, or accept the default location.
5. Click Next to begin the installation.
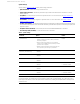
The following message might appear during the installation:
Do you want to allow the following program from an unknown publisher to make
changes to your system?
If this message appears, select the option to allow the changes to take place.
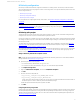
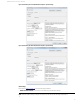
The Completing HP Velocity Setup screen appears when the installation is successful.
6. Click Finish.
The HP Velocity icon appears on the taskbar (see HP Velocity operational modes
on page 8).