
User Guide


3. After Windows opens, right-click on an open area of the desktop and select Properties
(Windows XP, 98/Me) or Personalize (Windows Vista).
4. In Windows Vista, Scroll down and click Display Properties.
In Windows XP, 98, or Me, click the Settings tab.
5. In Windows Vista, select the native display resolution size using the Resolution slider.
Set Colors to Highest (32 bit).
In Windows XP, select the native display resolution size using the Screen resolution
slider. Set Color Quality to Highest (32 bit).
In Windows 98 or Me, select the native display resolution size using the Screen Area
slider. Set Colors to True Color.
6. Click Apply after you have made your adjustment.
The screen should blank out temporarily and come back.
7. If you are satisfied with the new display settings, click Yes on the Monitor Settings
windows. If you are not satisfied or if the screen just goes black, wait: Windows sets the
screen back to the way it was before. Try another setting until you find a display
configuration that is compatible with the monitor and meets your needs.
note:
If the native resolution is not available, download and install updated video driver
software for your computer. Updating the video driver software can add more
resolutions (graphics modes).
8. Restart the computer. The monitor should now display a full screen image in high
quality. You are done.
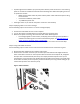
Step 4: Connecting the monitor to a different computer
Using a different cable, connect the monitor to another computer that has video. Turn on the monitor
and the newly connected computer. What happens?
If the monitor works, the video hardware on the original computer is likely to be the source of
the problems. You can try connecting the original computer to another monitor that works to
update its video drivers.
If the monitor remains blank, repair or replace the monitor.
HP Flat Panel Monitors - Troubleshooting Sound Problems
with Monitor Speakers