
User's Manual


3. Connect the desired signal sources. Refer to the drawings in (Rear Components on page 7) to
identify the connectors on your monitor. For each one, plug in one end of the appropriate cable.
Attach the other end to your computer or other video source.
The ZR2440w model supports audio output from the HDMI and DisplayPort inputs. Use the RCA
jack for digital output and the 3.5 mm mini-jack for analog 2.0 Sound.
NOTE: It is not necessary to connect all the connectors to video sources.
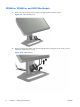
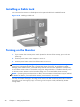
4. If you will be using USB devices (such as a digital camera, USB keyboard, or USB mouse),
connect one end of the provided USB cable to the USB hub connector on the rear panel of the
computer, and the other end to the upstream USB connector on the monitor. The four downstream
USB ports (two on the rear and two on the side) are now available for your devices.
Figure 3-11 Connecting USB Cables
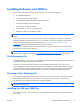
5. Connect one end of the power cable to the AC power connector on the back of the monitor, and
the other end to an electrical wall outlet.
WARNING! To reduce the risk of electric shock or damage to the equipment:
Do not disable the power cord grounding plug. The grounding plug is an important safety feature.
Plug the power cord into a grounded (earthed) electrical outlet that is easily accessible at all times.
Disconnect power from the equipment by unplugging the power cord from the electrical outlet.
For your safety, do not place anything on power cords or cables. Arrange them so that no one may
accidentally step on or trip over them. Do not pull on a cord or cable. When unplugging from the
electrical outlet, grasp the cord by the plug.
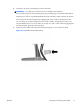
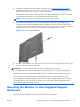
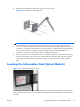
Mounting the Monitor to User-Supplied Support
Hardware
The monitor can be installed to any support that meets the VESA standards.
ENWW
Mounting the Monitor to User-Supplied Support Hardware
15