
Hardware Reference Guide
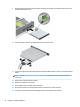
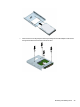

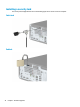

9. Slide the optical drive through the front bezel all the way into the bay (1) so that the latch on the rear of
the drive locks into place (2).
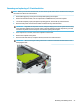
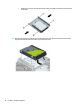
10. Connect the power cable (1) and data cable (2) to the rear of the drive.
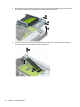
11. Connect the opposite end of the data cable to the light blue SATA connector on the system board labeled
SATA1.
NOTE: Refer to System board connections on page 13 for an illustration of the system board drive
connectors.
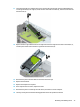
12. Replace the front bezel if it was removed.
13. Replace the computer access panel.
14. If the computer was on a stand, replace the stand.
15. Reconnect the power cord and any external devices, and then turn on the computer.
16. Lock any security devices that were disengaged when the access panel was removed.
26 Chapter 2 Hardware upgrades