
User's Manual


Installing Recovery Manager
To install HP 3PAR Recovery Manager Software on Windows:
CAUTION: Do not install Recovery Manager on a clustered drive. If you do so, Recovery Manager
allows you to proceed with the installation, but after the install is complete, the process hangs and
evicts the clustered disk.
1. Log on as the system administrator to the Microsoft SQL Server host computer.
NOTE: You can perform the installation from a remote desktop connection, but HP
recommends that you install the application directly from the system console.
2. Insert the Recovery Manager CD.
3. Open a Windows Explorer window and click the CD-ROM drive to expand the files.
4. Select the corresponding package for your OS version.
Table 1 Operating System Packages
PackageOperating System
RMS_W2K3_x86.msiWin2003 32-bit
RMS_W2K3_x64.msiWin2003 64-bit
RMS_W2K8_x86.msiWin2008 32-bit
RMS_W2K8_x64.msiWin2008 64-bit
RMS_W2K8_x64.msiWin2008 R2 64-bit
5. In the 3PAR Recovery Manager for SQL Server Setup wizard, click Next.
6. After the license agreement appears, select I Agree and click Next.
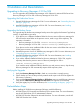
7. Select the type of server on which you are installing Recovery Manager:
• Recovery Manager Backup Server - Select this option if this server is your backup server.
This option installs the Recovery Manager GUI on this server; you can use this GUI to
manage your SQL production servers.
NOTE: You must install the SQL Server client utilities on the host on which the Recovery
Manager Backup Server is installed.
• Recovery Manager Agent for SQL Server - Select this option if this server is one of your
SQL production servers running Microsoft SQL Server.
• All of above - Select this option if this server is both your backup server and your SQL
production server. This option installs the Recovery Manger GUI and all of the Recovery
Manager Agent components on this server.
8. Specify the installation directory for Recovery Manager.
NOTE: To check whether the server has enough space for Recovery Manager, click the Disk
Cost button. The wizard analyzes the amount of available storage space and compares it to
the amount required for the Recovery Manager installation.
9. Click Next to confirm the installation destination.
10. After installation is complete, click Close.
11. Recovery Manager for SQL runs a utility to scan for possible configuration errors.
12. After this utility completes, the results are automatically displayed in a Notepad file.
Carefully review the information displayed in the Notepad file. Pay special attention to any
WARNING or ERROR messages and correct them before running Recovery Manager for SQL.
16 Installation and Deinstallation