
Reference Guide
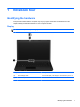
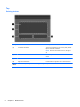

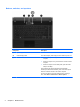
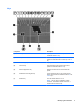
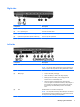
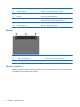
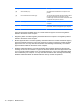
Table Of Contents
- Notebook tour
- HP Write Filters
- Configuration
- Applications
- Pointing devices and keyboard
- Using pointing devices
- Using the keyboard
- Using hotkeys
- Displaying system information
- Decreasing screen brightness
- Increasing screen brightness
- Switching the screen image
- Muting speaker sound
- Decreasing speaker sound
- Increasing speaker sound
- Playing the previous track or section of an audio CD or a DVD
- Playing, pausing, or resuming an audio CD or a DVD
- Playing the next track or section of an audio CD or a DVD
- Using hotkeys
- Using the keypads
- Power
- Power control and light locations
- Shutting down the computer
- Setting power options
- Using battery power
- Using external AC power
- Multimedia
- Wireless
- Modem and LAN
- Security
- Connecting hardware
- Using Media Card Reader cards
- Using ExpressCards
- Hardware upgrades
- MultiBoot
- Computer Setup
- Routine care
- Index
Right side
Component Description
(1) USB 2.0 ports (2) Connect optional USB devices.
(2) RJ-11 (modem) jack Connects a modem cable.
(3) Optical drive light (select models only) Blinking: The optical drive is being accessed.
(4) Optical drive eject button (select models only) Press to eject the optical disc.
(5) Optical drive (select models only) Reads optical discs.
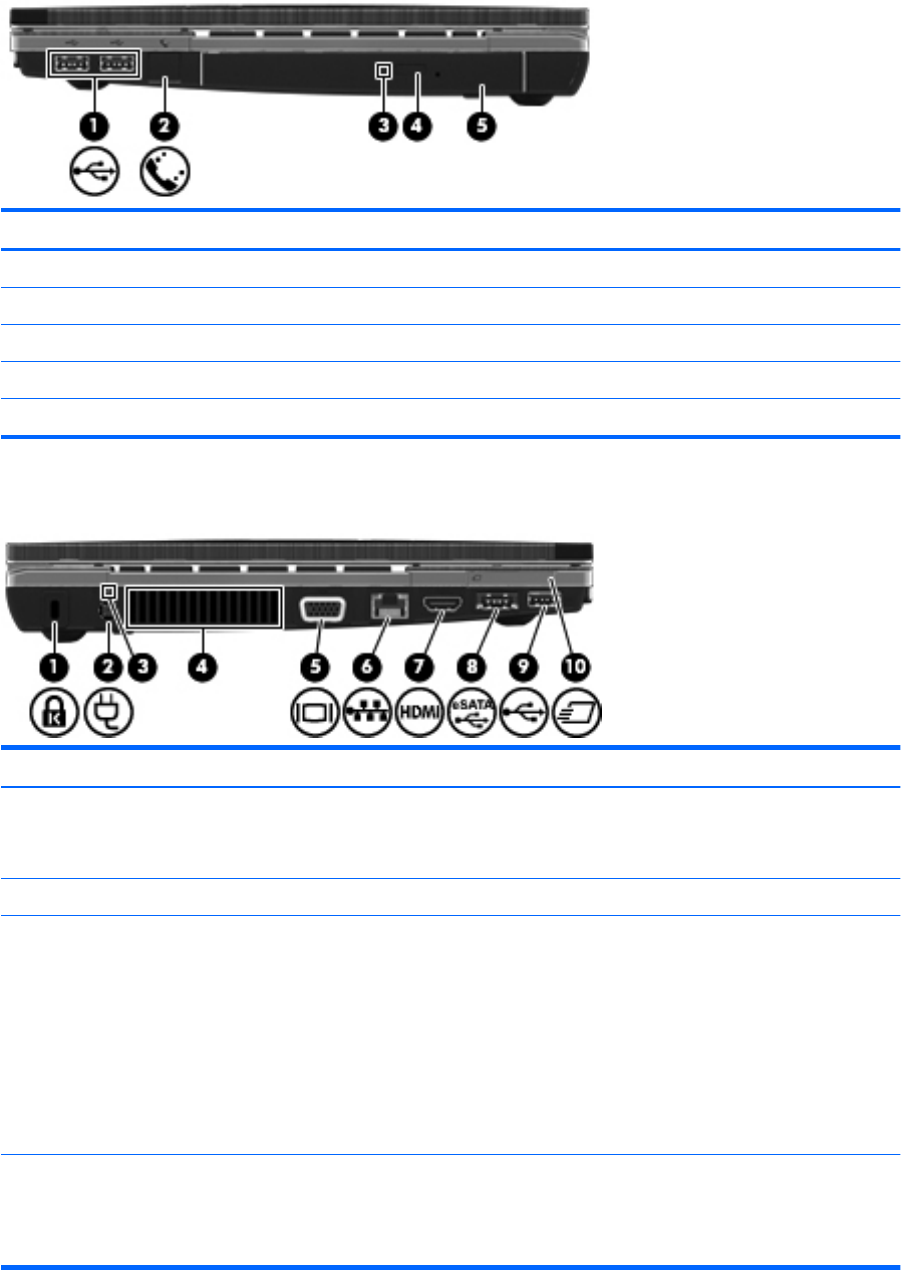
Left side
Component Description
(1) Security cable slot Attaches an optional security cable to the computer.
NOTE: The security cable is designed to act as a deterrent, but
it may not prevent the computer from being mishandled or stolen.
(2) Power connector Connects an AC adapter.
(3) Battery light ● Amber: The battery is charging.
●
White: The battery is close to full charge capacity.
●
Blinking amber: The battery is not charging and has
reached a low or critical battery level.
● Off: If the computer is plugged into an external power
source, the light turns off when the battery is fully charged. If
the computer is not plugged into an external power source,
the light stays off until the battery reaches a low battery
level.
(4) Vent Enables airflow to cool internal components.
NOTE: The computer fan starts up automatically to cool internal
components and prevent overheating. It is normal for the internal
fan to cycle on and off during routine operation.
Identifying the hardware 7