
Reference Guide

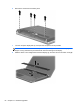
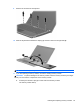
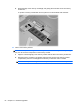
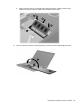
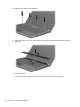
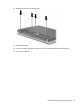
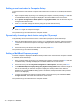
Table Of Contents
- Notebook tour
- HP Write Filters
- Configuration
- Applications
- Pointing devices and keyboard
- Using pointing devices
- Using the keyboard
- Using hotkeys
- Displaying system information
- Decreasing screen brightness
- Increasing screen brightness
- Switching the screen image
- Muting speaker sound
- Decreasing speaker sound
- Increasing speaker sound
- Playing the previous track or section of an audio CD or a DVD
- Playing, pausing, or resuming an audio CD or a DVD
- Playing the next track or section of an audio CD or a DVD
- Using hotkeys
- Using the keypads
- Power
- Power control and light locations
- Shutting down the computer
- Setting power options
- Using battery power
- Using external AC power
- Multimedia
- Wireless
- Modem and LAN
- Security
- Connecting hardware
- Using Media Card Reader cards
- Using ExpressCards
- Hardware upgrades
- MultiBoot
- Computer Setup
- Routine care
- Index
9. Remove the screws from the keyboard.
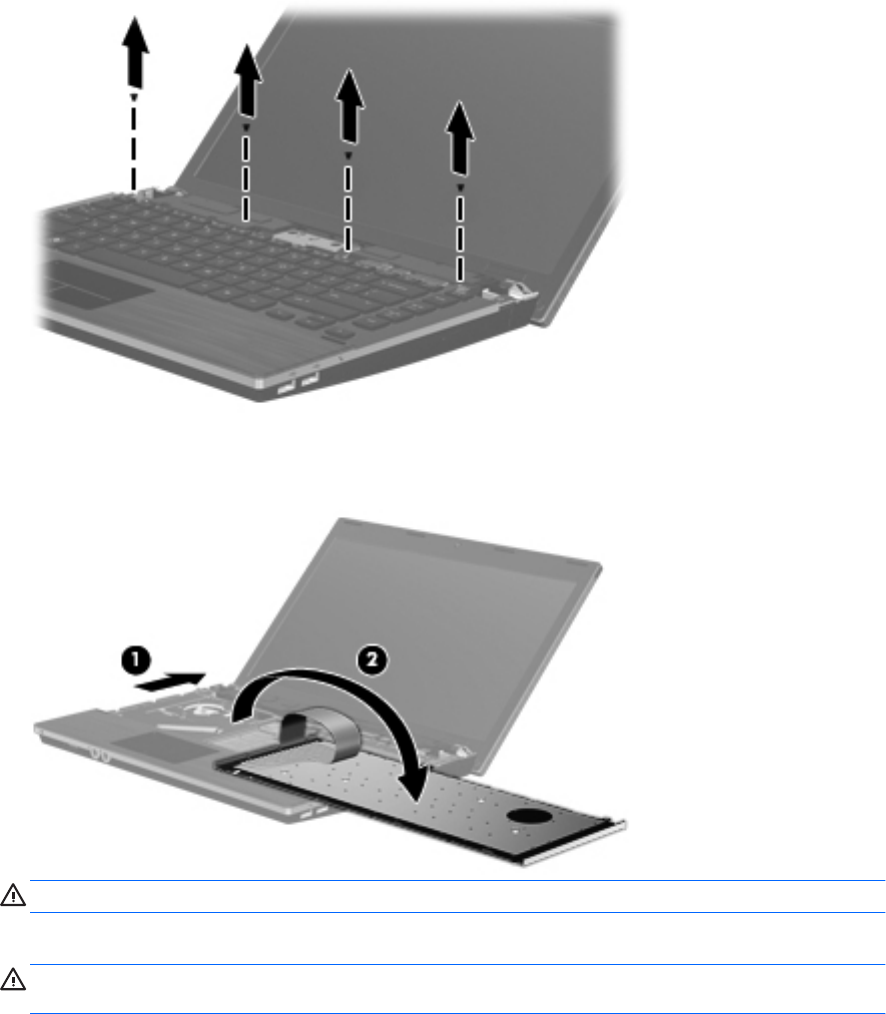
10. Slide the keyboard back toward the display (1), and then rotate it to the right side (2).
CAUTION: Do not rip the keyboard cable.
11. If you are replacing a memory module, remove the existing memory module:
CAUTION: To prevent damage to the memory module, hold the memory module by the edges
only. Do not touch the components on the memory module.
a. Pull away the retention clips (1) on each side of the memory module.
The memory module tilts up.
Inserting and replacing memory modules 63