
User Guide


Page 1-29
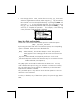
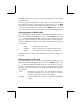
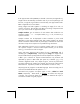
For the example of the integral
∫
∞
−
0
dXe
X
, presented above, selecting the
_Small Stack Disp in the EQW line of the DISPLAY MODES input form
produces the following display:
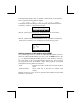
Selecting the size of the header
First, press the H button to activate the CALCULATOR MODES input form.
Within the CALCULATOR MODES input form, press the @@DISP@ soft menu key
(D) to display the DISPLAY MODES input form. Press the down arrow key,
˜, four times, to get to the Header line. The value 2 is assigned to the
Header field by default. This means that the top part of the display will
contain two lines, one showing the current settings of the calculator, and a
second one showing the current sub directory within the calculator’s memory
(These lines were described earlier in the manual). The user can select to
change this setting to 1 or 0 to reduce the number of header lines in the
display.
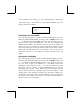
Selecting the clock display
First, press the H button to activate the CALCULATOR MODES input form.
Within the CALCULATOR MODES input form, press the @@DISP@ soft menu key
(D) to display the DISPLAY MODES input form. Press the down arrow key,
˜, four times, to get to the Header line. The Header field will be
highlighted. Use the right arrow key (™) to select the underline in front of
the options _Clock or _Analog. Toggle the soft menu key until the
desired setting is achieved. If the _Clock option is selected, the time of the
day and date will be shown in the upper right corner of the display. If the
_Analog option is also selected, an analog clock, rather than a digital clock,
will be shown in the upper right corner of the display. If the _Clock option is
not selected, or the header is not present, or too small, the date and time of
day will not be shown in the display.
@CHK@