The HP DeskJet 720C Series Printer User’s Guide English ®
The HP DeskJet 720C Series Printer User’s Guide English ®
Acknowledgments Microsoft® and MS-DOS® are U.S. registered trademarks and Windows™ is a trademark of Microsoft Corporation. TrueType™ is a U.S. trademark of Apple Computer, Inc. Arial® and Times New Roman® are U.S. registered trademarks of The Monotype Corporaion. Snowdrift™ is a trademark of Agfa Division of Bayer Corporation. Creepy™ is a trademark of the Monotype Corporation which may be registered in certain juristictions. Kodak is a trademark of the Eastman Kodak Company.
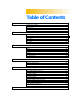
Table of Contents CHAPTER 1 CHAPTER 2 CHAPTER 3 CHAPTER 4 CHAPTER 5 INDEX PRINTING BASICS 1 How to Choose Paper How to Put Paper in the Printer How to Print Printer Software: Your Printer’s Remote Control 2 3 5 8 BEYOND THE BASICS 13 How to Print on Different Paper Sizes How to Print on Both Sides of the Paper How to Flip a Document About Color About Pictures About Text 14 16 18 19 21 23 WHAT YOU CAN PRINT 25 Envelopes Labels Transparencies Photographs Cards Banners Iron-On Transfers 26 29
CHAPTER 1 Printing Basics A How to Choose Paper lthough your printer can do some pretty fancy stuff, most of the time you’ll be printing words and pictures on paper. The process is simple: First choose the paper you want to use; load the paper in your printer; choose your print How to Put Paper in the Printer 1 settings from the printer software; and then print from the computer software program you’re using. 2 3 How to Print If you want to know more about the printing basics, read on.
HOW Paper Pointers TO CHOOSE PAPER Most plain photocopy paper works fine in your printer, particularly paper that is marked for use in inkjet printers. To get the best results, use one of the Hewlett-Packard papers, which were developed especially for HP inks and your printer. GET THE RIGHT PAPER Use HP paper for vivid color and the sharpest text. Here are some of your choices: • HP Premium Inkjet Paper.
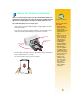
HOW TO PUT PAPER IN THE PRINTER Take a second to load the paper correctly in the IN drawer. Make sure all the paper in the drawer is the same size and type, and that the paper adjusters rest snugly against the paper. The printer will do the rest. Paper Pointers Let’s walk through the process step by step: PAPER THAT MIGHT 1 • Highly textured stock such as linen might not print evenly; the ink could bleed into these papers.
3 Put the paper in the IN drawer, print side down. Push the paper in toward the back of the paper drawer until it stops. Paper Pointers PRINTSIDE DOWN IN drawer Most paper prints better on one side than on the other. This is especially true for coated or specially treated paper. The print side is usually indicated on the paper package. 4 PRINTING ZONE Your printer can’t print right to the edge of the paper.
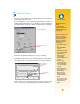
1 HOW 2 TO PRINT 3 1 Check your print settings in the HP print settings box. (See page 9 to find out how to get to the box.) If you’re printing one copy, on plain paper with portrait orientation, the default settings will work fine for you. (Chapters 2 and 3 explain why you might want to change the settings for different types of printing.) HP print settings box Handy Hints PRINTING FROM DOS For information about printing from DOS programs, turn to page 50.
While You’re Printing What If THE PRINTOUTS ARE SPLOTCHY AND UNEVEN First check the print cartridges—they might be dirty or running out of ink. To find out how to clean or replace them, open the HP Toolbox (see page 11) and click the Printer Services tab for cleaning or the How Do I? tab for replacing cartridges. YOU CAN’T FIND THE JAMMED PAPER If you can’t see the paper causing the jams, check to see if a label has come unglued from a label sheet while going through the printer.
Troubleshooting If a problem occurs during printing, you’ll see a message on your screen telling you what’s wrong and how to fix it. If you don’t get a message but you notice that something is wrong or you don’t like how the printout looks, click the Troubleshooting tab in the HP Toolbox and follow the instructions on the screen. (See page 11 to find out how to get to the HP Toolbox.) Click the Troubleshooting tab.
Printer Software: Your Printer’s Remote Control Although your printer has a couple of buttons on it, you really control the printer remotely, through your software program and through the printer software you installed on your computer. Instead of pushing buttons on a remote control, you make your selections in the HP print settings box and the HP Toolbox. (But, just like a remote control, sometimes these two boxes are hard to find.
THE HP PRINT SETTINGS BOX: HOW TO FIND IT You can select settings such as the paper type, paper size, orientation and print quality in this box. How you find the box differs depending on which software program and which operating system you’re using. Try these strategies from the File menu of your document, and you’re sure to get there. TRY THIS 1 Click File and then click Print. File New... Ctrl+N Open... Ctrl+O 2 Then click whichever button you see— Properties, Setup, or Printer.
THE HP PRINT SETTINGS BOX: WHAT IT CAN DO FOR YOU CLICK A TAB AND THEN CLICK A SETTING. Select the appropriate settings. Choose the right paper size and type for the job. Show your finished work at its best. Click Best print Save time and ink. Click EconoFast print quality. quality. Save money and trees. Print on both sides of the paper (when available). Save time and color ink. Click here to print drafts of color documents in shades of gray. Print clearly.
THE HP TOOLBOX: HOW TO FIND IT The HP Toolbox tells you how to print and how to troubleshoot your printing problems. It even allows you to align and clean your print cartridges. For each Windows system, here are a couple of places to find the HP Toolbox. Windows 95 and Windows NT 4.0 Double-click the HP Toolbox shortcut icon. This shortcut is on your desktop. If you’ve removed the HP Toolbox icon, click Start, point to Programs, point to HP DeskJet Utilities, and then click HP DeskJet 720C Toolbox.
THE HP TOOLBOX: WHAT IT CAN DO FOR YOU How Do I? Follow the steps to print what you want. Troubleshooting Find your way to a solution when things go wrong. (See page 40 for more information.) Printer Services Keep your printer in working order.
CHAPTER 2 Beyond the Basics W 1 2 3 How to Print on Different Paper Sizes ith the printing basics down, you’re ready to learn more about what your printer can do for you and how you can get the most out of your printer.
1 2 3 Paper Pointers PREPRINTED PAPER You can buy preprinted checks or business forms (such as invoices and statements) that are designed for inkjet printers. When you print on these forms, just remember to load the printed side face down, with the top of the page going into the printer first.
2 Type the dimensions of the paper in the Custom Paper Size box, and then click OK. Paper Pointers CHANGE THE SHAPE 3 Load the paper in the printer and print as you would for normal paper sizes. For small paper sizes, you might need to push the small green sliding adjuster in further to hold the paper snugly lengthwise, as described on page 28. AFTER PRINTING Change the Paper Size back to Letter or A4, or to whatever paper size you’ll be printing on next.
1 Paper Pointers 2 HOW TO PRINT ON BOTH SIDES OF THE PAPER The easiest way to save paper is to print on both sides of it. Just put the paper through the printer twice: Select a two-sided printing option and follow the directions on your screen. PAPER THAT WON’T SHOW THROUGH Look for any paper in which pictures and text printed on one side don’t show through on the other. Collect sample sheets that are 24-pound (90 gsm) or heavier, and test them to make sure they do the job.
5 Put the printed pages back in the IN drawer of the printer. The following illustrations show how to put the paper back in the printer for the Book option and the Tablet option. What If Book option BOTH PAGES PRINTED ON ONE SIDE OF THE PAPER Odd-numbered pages print first. Reload to print even-numbered pages. You put the paper print side down when you replaced it in the printer. Print your document again, paying special attention to the instructions on your screen.
HOW Handy Hints TO FLIP A DOCUMENT When you print a flipped document, the text and pictures are flipped horizontally (mirrored) from what you see on your computer screen. WHY FLIP A DOCUMENT? You’ll want to flip a document when you use an iron-on transfer (see page 39); the image you’re transferring is flipped back to its original orientation when it’s ironed onto the cloth.
ABOUT COLOR One of the simplest ways to make your documents clearer and visually interesting is to print in color. The printer combines the four colors in the two print cartridges—black, cyan, yellow, and magenta—to match the colors of the text and pictures (even photographs) on your screen. What If THE PRINTED COLORS DON’T MATCH THE SCREEN COLORS Black Cyan Yellow Magenta Turning Off Color The color text and pictures that you create in your documents will automatically print in color.
Adjusting the Color Handy Hints COLORSMART II Like a full-featured camera, your printer can “autofocus,” using HP’s ColorSmart technology to automatically make adjustments that will give you the best quality color printing. But if you prefer, you can manipulate the settings yourself to produce the effect you want: 1 TECHNOLOGY Your printer is especially smart about printing color.
ABOUT PICTURES Pictures, graphics, and art are some generic terms used to describe the elements in your documents that aren’t text (such as charts, illustrations, decorative elements, and photographs). Handy Hints NEED A PICTURE? 100,000 80,000 60,000 40,000 20,000 0 1992 1994 1996 2000 Charts and graphs Illustrations Decorative elements Photographs To put a picture in a document you want to print, you first need to get it into an electronic form (a computer file).
■ Get your photos scanned at your local camera shop. For a small fee, you can have an entire roll of pictures put on a CD-ROM disk. Be sure to ask your camera shop to also put a CD-viewing application on the disk with your pictures. ■ Take a digital picture. A digital camera bypasses film entirely and makes the picture into a computer file. Call a full-service copy shop or a camera supply store about renting one. What If PICTURES TAKE LONGER THAN YOU EXPECT TO PRINT Be patient.
ABOUT TEXT The words on the page look the way they do because of the fonts you use when you type the text in your software program. Fonts are sets of characters (uppercase and lowercase letters, numerals, and punctuation marks) with a particular design or look to them. Each font has a name, such as Times New Roman or Creepy.
Using Fonts Handy Hints Many software programs include a Font command that lists the available fonts. Usually you’ll select the text and apply the font (or include the font as part of a style definition). See the user’s guide for the program you’re using to find out how to select fonts for your text. SEEING FONTS Times New Roman CLOSE UP Most software programs give you just a peek at the look of a font. But if you’re working in Windows 95, it’s easy to print a sample page of each font.
CHAPTER 3 Envelopes What You Can Print W ith the printing basics down, you’re ready for some results. Here are some ideas of what your printer can print on different media types: Labels ■ One envelope at a time or a stack of envelopes. ■ Labels—label your file folders or get those monthly mass mailings out the door. ■ Transparencies for important presentations. ■ Photographs—make personalized buttons or name tags. ■ Business cards, recipe cards, or invitations to opening night.
CHAPTER 4 Getting Help When Things Go Wrong W hen problems occur, the quickest way to find a solution is to use the online troubleshooting feature. With a few clicks of the mouse button, you’ll find your specific problem and details on how to fix it. CLICK If the print cartridge light continues to blink after you install new cartridges, check the part numbers on the cartridges. Black: 51645A Color: C1823A YOUR WAY TO A SOLUTION 1 Double-click the Toolbox shortcut (or icon) on your desktop first.
2 Click the Toubleshooting Tab. 3 Click the appropriate category. (The following pages include an overview of common problems in each category.) 4 What seems to be the problem? 5 Explore the possibilities.
WHAT IF? No page came out of the printer Be patient. Complex documents, such as color photographs, take awhile to print. Check the Power light; if it’s blinking, the printer is processing information. Power. Make sure the printer is on (the Power light on the front of your printer should be on) and that all connections are firm. Cover. Make sure the top cover of the printer is closed. Paper. Make sure you put paper in the IN drawer correctly. Communications.
The print quality is poor Banner switch. Make sure the banner switch is down, unless you’re printing banners. Paper. If the printing is faded or the colors are dull or bleeding into each other, make sure you’re using paper intended for inkjet printers, that the correct paper setting is chosen in the software, and that you’ve loaded the paper print side down. Ink. You can control the amount of ink on the page by changing the print quality (on the Setup tab of the HP print settings box). ■ ■ Cartridges.
PRINTER COMMUNICATIONS Your printer does not include a printer cable. The HP IEEE-1284 Compliant Parallel Interface Cable is best for your printer. Make sure the cable is bidirectional—that is, that it allows two-way communication between your printer and the computer. This type of cable allows you access to all your printer’s features.
CUSTOMER SUPPORT If you have questions, either general ones regarding how your printer works or specific ones regarding a problem you’re having, you have several possibilities for getting the answers. Handy Hints Troubleshooting Using the Toolbox USER FORUMS If you have a specific problem, the quickest way to find a solution might be right at your fingertips. Check the online troubleshooting feature, located in the HP Toolbox. (See page 11 to find out how to get to the Toolbox.
FREE SUPPORT FOR NINETY DAYS Within 90 days from the time of your purchase, telephone support is provided to you free of charge.
ENVELOPES Your printer provides two methods for printing envelopes: Handy Hints FOLLOW YOUR SOFTWARE If your software program includes an envelope printing feature, follow those instructions instead of the procedure provided here. ■ If you’re printing a single envelope, you can use the single-envelope slot and leave your paper in the IN drawer. This allows you to print the envelope and then a letter. ■ If you’re printing a stack of envelopes, use the IN drawer.
How to Print a Stack of Envelopes 1 In the HP print settings box, click the Setup tab, then select an envelope size in the Paper Size box. (See page 9 for how to get to the HP print settings box.) Select an envelope. What If THE PRINTER WON’T PICK UP THE ENVELOPE 2 If you’re printing a single envelope using the singleenvelope slot, you might not have pushed the envelope far enough into the printer. If you’re printing a stack of envelopes, you might have included too many in the stack.
4 Slide the paper adjusters so that they fit snugly against the edges of the envelope. Paper Pointers MAKE A MATCH If you want to print your cards, or invitations on predesigned paper, don’t stop there. You can buy envelopes designed to match the paper. Try HP Greeting Card Paper. Small Envelopes WRAP A LETTER If you’re printing on small envelopes such as A2 or C6, you’ll need to push the sliding adjuster in until it fits snugly against the edge of the envelopes.
LABELS You can use your HP DeskJet 720C Series printer to print sheets of labels. We recommend Avery Inkjet Labels, which are designed for your inkjet printer. 1 Click the Setup tab in the HP print settings box. Then select Plain Paper as the paper type and Normal as the print quality. (See page 9 for how to get to the HP print settings box.) Select Plain Paper. Click Normal. Paper Pointers LABELS THAT WORK Use only U.S. Letter or A4-sized sheets of labels.
3 Remove all paper from the IN drawer and insert up to 20 label sheets. Paper Pointers LABEL IT When you’re thinking about labels, why stop at envelopes or file folders? You can organize your media library by printing labels for videotapes, audio cassettes, and computer diskettes. SAVE ON LABELS To save on label sheets, print a test on ordinary paper first. Then hold the paper up to the light on top of the labels to check the spacing and to see how the text aligns on the label. Make adjustments as needed.
TRANSPARENCIES For best results when printing your overhead presentation, use HP Premium Transparency Film or transparencies specifically designed for inkjet printers. 1 In the HP print settings box, click the Setup tab. Select HP Transparency or HP Transparency (Pause Control) as the paper type, and click Best as the print quality. (See page 9 for how to get to the HP print settings box.) See the Paper Pointer on this page for information on using Pause Control.
2 Put the transparencies in your printer with the rough side down and the adhesive strip forward. (You can peel off the adhesive strip after printing.) What If THE INK NEVER DRIES OR THERE ARE CRACKS IN THE SOLID BLOCKS OF COLOR • You might have printed on the wrong side of the transparency. Make sure to put it into the printer rough side down. • You might be trying to print on a transparency that wasn’t meant for an inkjet printer.
PHOTOGRAPHS For the best results, use HP Deluxe Photo Paper or HP Premium Photo Paper for exceptional quality photo images. 1 Click the Setup tab in the HP print settings box. Then select HP Deluxe Photo Paper or HP Premium Photo Paper as the paper type. The print quality automatically changes to Best. (See page 9 for how to get to the HP print settings box.) Select HP Deluxe Photo Paper or HP Premium Photo Paper. 2 Load the paper as you would for normal printing.
CARDS Paper Pointers PRINTING NONSTANDARD CARDS Use your printer to print on index cards, recipe cards, postcards, business cards—any card size included in the Paper Size list on the Setup tab shown below. (You can print on other-sized cards, too, as described on page 14.) 1 If the dimensions of your card aren’t listed in the Paper Size box, print it as for nonstandard paper sizes (page 14). In the HP print settings box, click the Setup tab, then select a card size in the Paper Size box.
4 Slide the green paper adjusters in so that they fit snugly against the cards. Slide the paper-width adjuster to the right so that it holds the card stack snugly against the right edge of the IN drawer. If the cards are too small to be held securely by the paper-length adjuster, push the green sliding adjuster in until it fits snugly against the edge of the stack. Paper Pointers IF YOU WANT YOUR CARDS TO PRINT SIDEWAYS Make sure the orientation of the page is Landscape in your software program.
BANNERS Handy Hints FOLLOW YOUR We encourage you to use HP Banner Paper for the very best results. However, if you use computer or z-fold paper for your banners, we recommend that you use 20-pound or 75 gsm paper. Always do a good job of fanning the paper before loading it. SOFTWARE The software program you’re using might require special settings before it’ll print banners correctly on your printer.
4 5 Get the banner paper ready for the printer: ■ From the stack of banner paper, tear off the number of sheets you need to print the banner. (You must have at least five sheets in the stack.) ■ Tear off the perforated strips, if there are any. ■ Fan the stack so that the pages don’t stick together in the printer. Put the paper in the IN drawer so that the unattached edge is at the top of the stack. Insert the stack edge first into the IN drawer until it stops.
9 After your banner is printed, if the Resume light is blinking, press the Resume button as many times as needed until all the banner paper is out of the printer. What If YOU GET A MESSAGE THAT SAYS YOU’RE OUT OF PAPER, BUT YOU’RE NOT You might not have pushed the paperlength adjuster in all the way. Make sure it’s snug against the paper, and try printing again. Resume AFTER PRINTING ■ Click Cut-Sheet in the HP print settings box. ■ Flip the banner switch down so that the light goes off.
IRON-ON TRANSFERS When it comes to printing images, you don’t need to stop with paper. Use transfer paper to get the images from the computer document onto cloth. You’ll need: Paper Pointers ■ the t-shirt or other cloth you want to transfer an image onto ■ the document containing the picture or text you want to print BEYOND T-SHIRTS ■ iron-on transfer paper, which you can buy at a computer or office supply store.
CHAPTER 5 More About Your Printer U ntil now, we’ve been talking about the what, where, and how of your printer. If you’re ready for some simple facts about the printer and printer supplies, here they are. SYSTEM REQUIREMENTS ■ ■ ■ ■ ■ Microsoft Windows 3.1x, Windows 95, or Windows NT 4.0 Minimum System Requirements: Windows NT 4.0 Windows 3.1x and Windows 95 • 80486/66 MHz CPU • 80486/66 MHz CPU • 8 MB of RAM • 16 MB of RAM Recommended System Requirements: Windows NT 4.0 Windows 3.
MINIMUM PRINTING MARGINS The printer cannot print outside a certain area of the page, so you must make sure the contents of your document fall within the printable area—that is, within the top, bottom, left, and right margins available for the specific size paper on which you are printing. When you use nonstandard paper sizes and select the Custom Paper Size setting in the HP print settings box, the paper width must be between 3 and 8.
SPECIFICATIONS Media Size Custom size: Print Technology Width: Length: Drop-on-demand thermal inkjet printing Black Print Speed ✼ EconoFast: Normal mode: Best mode: 8 pages per minute 5 pages per minute 4 pages per minute Color Print Speed (mixed text and graphics)✼ EconoFast: Normal mode: Best mode: 4 pages per minute 1.5 pages per minute 0.5 pages per minute Color Print Speed (full page color) ✼ EconoFast: Normal mode: Best mode: 1.5 pages per minute 0.4 pages per minute 0.
Power Requirements Power Adapter (universal input) Input Voltage: 100 to 240 VAC (±10%) Input Frequency: 50 to 60 Hz (±3 Hz) Automatically accommodates the world-wide range of AC line voltages and frequencies. There is no on/off switch on the power adapter.
ADDITIONAL SYMBOL SETS Arabic Symbol Sets: AND FONTS Additional symbol sets and fonts may have been included with your printer on separate DOS Character Set Installation disks. Installing a special symbol set or font on your computer 1 First install the printer software as described in the setup guide. 2 Put the first installation disk into your com- puter’s floppy disk drive. Fonts: Proportional Spaced Ryadh Fixed Space Naskh Naskh Koufi then click Run. If you’re running Windows 3.
ORDERING SUPPLIES AND ACCESSORIES Parts/ Supplies/Accessories Parts/ Supplies/Accessories HP IEEE-1284 Compliant Parallel Interface Cable (with one 1284-A connector for the computer port and one 1284-B connector for the printer port) 2-meter length C2950A 3-meter length C2951A HP Reorder Number Print Cartridge Black print cartridge Color print cartridge Paper ✼ HP Banner Paper U.S. letter, 100 sheets 210 x 297 mm, 100 sheets HP Premium Inkjet Transparency Film U.S. letter, 50 sheets U.S.
ORDERING INFORMATION To order printer supplies or accessories, call your nearest HP dealer or call HP DIRECT at the following numbers for fast shipping service. ■ Argentina: (54 1) 787-7100 ■ ■ ■ ■ ■ ■ ■ ■ ■ ■ ■ Fax: (54 1) 787-7213 Hewlett-Packard Argentina, Montañeses 2150 1428 Buenos Aires, Argentina Australia/New Zealand: (03) 895-2895 China Resources Bldg. 26 Harbour Road Wanchai, Hong Kong Belgique-Belgie: 02/778 3092 (or 3090, 3091) Fax: 02/778 3076 Hewlett-Packard Belgium SA/NV 100 bd.
REGULATORY NOTICES FCC Statement (USA) The United State Federal Communications Commission (in 47CFR 15.105) has specified that the following notice be brought to the attention of users of this product: This equipment has been tested and found to comply with the limits for a Class B digital device, pursuant to part 15 of the FCC rules. These limits are designed to provide reasonable protection against harmful interference in a residential installation.
LIMITED WARRANTY STATEMENT HP Product Duration of Limited Warranty Software Print cartridges Printer 90 Days 90 Days 1 Year A. Extent of Limited Warranty 1. Hewlett-Packard (HP) warrants to the end-user customer that HP products will be free from defects in materials and workmanship, for a specified time after the date of purchase by the customer. The duration of this limited warranty is stated above.
Declaration of Conformity according to ISO/IEC Guide 22 and EN 45014 Manufacturer’s Name: Hewlett-Packard Company Manufacturer’s Address: Hewlett-Packard Co. Vancouver Division 18110 S.E. 34th Street Vancouver, WA 98683 Hewlett-Packard Singapore (PTE) Ltd. Asia Hardcopy Manufacturing Operation 20 Gul Way Singapore 629196 Hewlett-Packard Espanola, S.A.
Index Symbols (Resume button) 6, 31,38, 44 button Power 42 Resume 6, 31, 38 (Power button) 42, 44 (Print cartridge light) 40, 44 A accessories, ordering 52 addresses for ordering 53 adjusters, paper 3, 4 aligning print cartridges 10, 42 America Online 45 art, printing 21–22 B Banner light 36 banner switch 36, 43 banners choosing paper for 36, 49 loading problems 43 margin problems 43 paper jams 37, 43 paper types to avoid 36 preparing paper for 37 print settings 36 printing 36–38 problems 38, 43 Best mo
choosing 26, 49 creating 28 multiple 27 print settings 26, 27 printing 26–28 problems with 27 rotating 27 single-envelope slot 26 sizes 27 types to avoid 26 environment, operating 47, 50 error messages 7 F FAQs 45 faxes 42 FCC statement 54 files, electronic 21–22 Flip Horizontal iron-on transfers 39 print setting 18 flipped printing 18 fonts 23 buying 24 choosing 23 installing additional 51 previewing 24 sans serif 23 serif 23 special-purpose 23 TrueType 24 Type 1 24 using 24 forms, multi-part 3 fuzzy prin
O online troubleshooting 40 online user forums 45 opacity of paper 2 operating environment 47, 50 Options, color See also print settings ordered printing 47 ordering addresses for 53 manuals 52 supplies and accessories 52 orientation, paper 42 origami 15 Out of Paper message 6 OUT tray 3, 49 P paper brightness of 2 choosing 2, 43 coated 2 condition of 3 for inkjet printers 3 for photocopies 2 for photographs 2 for pictures 2 Hewlett-Packard 2 loading 3–4 opacity of 2 orientation 42 preprinted 14 printside
Resume button 6, 31, 38 S scanning pictures 21 serif fonts 23 settings, print See print settings single envelopes 26 single-envelope slot 26 size media 49 paper 2 specifications 49 smeared ink 17, 43 smoothness of paper 2 software printer 8, 45 software compatibility 47, 49 special-purpose fonts 23 specifications 49–50 speed, printing 31, 42, 49 splotchy printouts 6, 43 statements, business 14 stuck paper See paper jams supplies and accessories ordering 52 support customer 45 switch, banner 36, 43 symbol s
REDUCE, REUSE, RECYCLE Protecting the Environment Hewlett-Packard continuously improves the design and production processes of HP DeskJet printer to minimize the negative impact on the office environment and on the communities where the printers are manufactured, shipped, and used. Hewlett-Packard has also developed processes to minimize the negative impact of the disposal of the printers at the end of printing life. Energy Consumption The HP DeskJet printer uses only 4.
Get more from your printer Look inside for detailed illustrated steps that tell you how to print just about anything, from letters, to labels, to photographs, to banners, and much more… SEE SNAPSHOTS IN COLOR Print any picture you take with your own camera, whether it’s an Instamatic or a Nikon. See page 19 for details. HANDY PRINTING HINTS Browse the book for ideas — from how to print a t-shirt to how to print a postcard.