HP LaserJet MFP M42623 HP LaserJet MFP M42625 User Guide www.hp.com/videos/laserjet www.hp.com/support/ljM42623MFP www.hp.
HP LaserJet MFP M42623, M42625
Copyright and License Trademark Credits © Copyright 2019 HP Development Company, L.P. Adobe®, Adobe Photoshop®, Acrobat®, and PostScript® are trademarks of Adobe Systems Incorporated. Reproduction, adaptation, or translation without prior written permission is prohibited, except as allowed under the copyright laws. The information contained herein is subject to change without notice.
Table of contents 1 Introduction ............................................................................................................................................................................................... 1 Features by model .................................................................................................................................................................... 2 About this user’s guide ...........................................................................
Setting the paper size and type ........................................................................................................................................... 36 Loading the original ............................................................................................................................................................... 37 Introduction ............................................................................................................................................
Installing a WSD Printer Driver .................................................................................................... 66 Scanning using the WSD feature ................................................................................................ 67 Sending scanned images to different destinations .......................................................................................................... 68 Setting up an email account ..........................................................
10 Useful Settings ................................................................................................................................................................................... 109 Machine’s initial set up ........................................................................................................................................................ 110 Machine’s basic settings ......................................................................................................
1 Introduction This chapter provides information you need to know before using the machine.
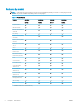
Features by model NOTE: Some features and optional goods may not be available depending on model or country/region. Some models may not be available depending on the country/region. Table 1-1 Variety features Features M42623n M42623dn M42625n M42625dn 8AF49A 8AF50A 8AF51A 8AF52A Hi-Speed USB 2.
Table 1-2 Software Software Windows XP, Vista, Server 2003 Windows 7, 8, 8.1, 10 PS (Postscript) PCL6 printer driver Printer Manager Scan application Windows Software Installer/Uninstaller Status Monitor Scanning Software Scan to PC Setup a ENWW You can download the software from the website and install it: (www.hp.com/support/ljM42623MFP, www.hp.com/support/ ljM42625MFP drivers, software & firmware). Before installing, check whether your computer’s OS supports the software.
About this user’s guide This user's guide provides information for your basic understanding of the machine as well as detailed steps to explain machine usage. 4 ● Read the safety information before using the machine. ● If you have a problem using the machine, refer to the troubleshooting chapter. ● All illustrations in this user’s guide may differ from your machine depending on its options or model you purchased.
Safety information These warnings and precautions are included to prevent injury to you and others, and to prevent any potential damage to your machine. Be sure to read and understand all of these instructions before using the machine. After reading this section, keep it in a safe place for future reference. Table 1-3 Important safety symbols Warning Hazards or unsafe practices that may result in personal injury.
Table 1-4 Operating environment (continued) If the machine has been dropped, or if the cabinet appears damaged, unplug the machine from all interface connections and request assistance from qualified service personnel. If the machine does not operate properly after these instructions have been followed, unplug the machine from all interface connections and request assistance from qualified service personnel. If the plug does not easily enter the electrical outlet, do not attempt to force it in.
Table 1-6 Installation/Moving (continued) Before moving the machine, turn the power off and disconnect all cords. If you have a medical condition that prevents you from lifting, do not lift the machine. Ask for help, and always use the appropriate amount of people to lift the device safely. Choose a flat surface with enough space for ventilation to place the machine. Also consider the space required to open the cover and trays. Do not place the machine on an unstable surface.
Table 1-8 Supply usage (continued) Using recycled consumables, such as toner, can cause damage to the machine. When toner gets on your clothing, do not use hot water to wash it. Use cold water.
Machine overview This illustration may differ from your machine depending on your model. There are various types of machines. Some features and optional goods may not be available depending on model or country/region. Components Machine Imaging unit Power cord Quick installation guide Toner cartridgea Misc. accessoriesa a ENWW Miscellaneous accessories included with your machine may vary by country/region of purchase and specific model.
Front view 11 1 2 3 10 12 4 9 5 8 7 13 14 6 15 a 10 1 Automatic document feeder covera 2 Automatic document feeder width guidea 3 Automatic document feeder input traya 4 Automatic document feeder output traya 5 Control panel 6 Multi-purpose tray 7 Tray 2 8 Front cover 9 Output tray 10 Automatic document feedera 11 Scanner lid 12 Scanner glass 13 Imaging unit 14 Toner cartridge 15 Paper width guides on a multipurpose tray This is an optional feature.
Rear view 2 3 1 ENWW 1 Power receptacle 2 USB 2.
Control panel overview The following figure and table describe the location and provide a brief description of the control panel elements. NOTE: This control panel may differ from your machine depending on its model. There are various types of control panels. Some features and optional goods may not be available depending on model or country/region. Some buttons may not work depending on the mode (copy or scan).
ENWW 16 Status LED Indicates the status of your machine. 17 Paper Select Select the tray you want from the display screen. 18 Darkness Adjusts the brightness level to make a copy for easier reading, when the original contains faint markings and dark images.
14 Chapter 1 Introduction ENWW
2 Menu Overview This chapter provides information about the overall menu structure.
Accessing the menus Some menus may not appear on the display depending on the options selected, the product model, or your country/region of residence. If so, it is not applicable to your machine. 1. Select the Copy or Scan button on the control panel depending on the feature to be used. 2. Select the Menu 3. Press the arrows until the needed menu item appears and press OK. 4. If the setting item has sub menus, repeat step 3. 5. Press OK to save the selection. 6. Select the Back 7.
Menu overview Copy feature menu Some menus may not appear on the display depending on the options selected, the product model, or your country/region of residence. If so, it is not applicable to your machine.
Table 2-1 Copy Feature (continued) Menu Sub-menu Map Image Rotationb On/Off Collation On/Off Layout Normal ID Copy N-Up Book Copy Adjust Background Off Auto Enhance Lev.1 Enhance Lev.2 Erase Lev.1- Erase Lev.4 a b Reduce/Enlarge means specifically to print a specific paper size onto another specific paper size. The % and specific sizes listed are based on the default paper size. Some menus may not appear on the display depending on options or models. If so, it is not applicable to your machine.
Table 2-3 Copy Setup Menu a Menu Sub-menu Change Defaulta Copies Auto Tray On/Off This menu selection allows you to change the default copy selections for the Copy Feature menu, except for Layout and Background. Print Setup Menu Some menus may not appear on the display depending on the options selected, the product model, or your country/region of residence. If so, it is not applicable to your machine.
System Setup Menu Some menus may not appear on the display depending on the options selected, the product model, or your country/region of residence. If so, it is not applicable to your machine.
Table 2-5 System Setup (continued) Menu Sub-menu Sub-menu Sub-menu Sub-menu Sub-menu Top Margin -20 - +20 mm Cleaning Time (1– 5) minutes (1– 5) minutes Auto Tray Switch On/Off Paper Substitution On/Off Tray Protection Tray 1 Off On Tray 2 Off On Tray 3 (a) Off On Eco Settings Default Mode On/Off Select Template Default Eco Custom Eco Paper Setup Paper Size MP Tray 1 Tray 2 Tray 3a Default Paper Size A4 Letter Paper Type MP Tray 1 Tray 2 Tray 3a, Paper Select Copy Tray 1 Tray
Table 2-5 System Setup (continued) Menu Sub-menu Tray Confirmation Sub-menu Tray 1 Sub-menu Sub-menu Sub-menu Side 2 Left Margin -20 - +20 mm Off On Tray 2 Off On Tray 3 (a) Off On Report Configuration Demo Page Network Configuration Email Sent Supplies Information Usage Counter Job Accounting PCL Font PS Font Maintenance Supplies Life Supplies Information Total ADF Scan Platen Scan Developer Fuser Transfer Roller Tray 1 Roller Tray 1 Friction Pad Tray 2 Roller Tray 2 Friction Pad Tray 3
Table 2-5 System Setup (continued) Menu Sub-menu Sub-menu Toner Low Alert On/Off OPC Unit Low Alert On/Off Sub-menu Sub-menu Print Density -10 - +10 Sub-menu Serial Number Paper Stacking a b c On/Off Some menus may not appear on the display depending on options or models. If so, it is not applicable to your machine. Default: 5 minutes. Start this operation right now after finishing current job. Default: 12:00:00 AM. Start this operation based on exceeding page count.
Table 2-7 Secured Job Menu Menu Sub-menu Sub-menu User Name List a Password Print Delete a If a user sends multiple confidential jobs, the user name is only listed one time on the printer. The maximum number of confidential print jobs is 100. If the machine has 100 jobs stored in the printer, a new job will be stored after removing the oldest print job. Scan Menu Some menus may not appear on the display depending on the options selected, the product model, or your country/region of residence.
Table 2-8 Scan Menu (continued) Menu Sub-menu Duplex Darkness Server Confirmation Scan to FTP Original Size Original Type Resolution Color Mode File Format Duplex Darkness Server Confirmation ENWW Menu overview 25
26 Chapter 2 Menu Overview ENWW
3 Media and Tray This chapter provides information on how to load print media into your machine.
Tray overview To change the size, you need to adjust the paper guides.
Loading paper in the tray Introduction The following topics describe how to prepare and load paper in Tray 2, optional Tray 3, and Multi-purpose Tray 1. ● Preparing paper ● Tray 2 / optional tray ● Multi-purpose Tray 1 Preparing paper ● Use only print media that meets the specifications required by the machine.
Tray 2 / optional tray 1. Pull out the paper tray. 2. Squeeze and slide the paper width guide and paper length lever to locate them in the correct paper size slot marked at the bottom of the tray to adjust to the size. 2 3 1 3. 30 Flex or fan the edge of the paper stack to separate the pages before loading papers.
4. After inserting paper into the tray, squeeze and slide the paper width guides and paper length guide. ● Do not push the paper width guide too far causing the media to warp. ● If you do not adjust the paper width guide, it may cause paper jams. 3 2 1 ● Do not use a paper with a leading-edge curl, it may cause a paper jam or the paper can be wrinkled. 5. Insert the tray back into the machine. 6. When you print a document, set the paper type and size for Tray 2/ optional tray.
Multi-purpose Tray 1 The multi-purpose tray can hold special sizes and types of print material, such as postcards and note cards. 32 1. Hold the handle of multi-purpose tray and pull it down to open and pull out the multi-purpose tray paper extension. 2. Load the paper.
3. Squeeze the multi-purpose tray paper width guides and adjust them to the width of the paper. Do not force them too much, or the paper will bent resulting in a paper jam or skew. 4. When you print a document, set the paper type and size for the multipurpose tray. CAUTION: To avoid paper jams, always press down the Tray 1 feed plate when reloading paper.
Printing on special media The paper setting in the machine and driver should match to print without a paper mismatch error. Or if your machine supports a display screen, you can set it using the Menu button on the control panel. Then, set the paper type from the Printing preferences window > Paper tab > Paper Type. NOTE: ● When using special media, we recommend you feed one sheet at a time. ● Illustrations on this user’s guide may differ from your machine depending on its options or models.
Preprinted paper When loading preprinted paper, the printed side should be facing up with an uncurled edge at the front. If you experience problems with paper feeding, turn the paper around. Note that print quality is not guaranteed. ENWW ● Must be printed with heat-resistant ink that will not melt, vaporize, or release hazardous emissions when subjected to the machine’s fusing temperature for 0.1 second (about 170°C (338°F)).
Setting the paper size and type The paper setting in the machine and driver should match to print without a paper mismatch error. From the print driver or application, set the paper type from the Print Options window > Properties > Paper tab > Type. NOTE: It may be necessary to press OK to navigate to lower-level menus for some models. After loading paper in the paper tray, set the paper size and type using the control panel buttons. 1.
Loading the original Introduction The following topics describe how to prepare originals for copying and how to load originals on the scanner glass or in the document feeder. ● Preparing originals ● Loading originals Preparing originals ENWW ● Do not load documents that are smaller than 125 x 101.6mm (4.92 x 4 inches) or larger than 297 x 914 mm (11.6 x 36 inches).
Loading originals You can use the scanner glass or the document feeder to load an original for copying and scanning. NOTE: Illustrations on this user’s guide may differ from your machine depending on its options or models. Check your machine type. On the scanner glass Using the scanner glass, you can copy or scan originals. You can get the best scan quality, especially for colored or gray-scaled images. Make sure that no originals are in the document feeder.
2. Place the original face down on the scanner glass. Align it with the registration guide at the top left corner of the glass. 3. Close the scanner lid. NOTE: ● Leaving the scanner lid open while copying may affect copy quality and toner consumption. ● Dust on the scanner glass may cause black spots on the printout. Always keep it clean. ● If you are copying a page from a book or magazine, lift the scanner lid until its hinges are caught by the stopper and then close the lid.
In the document feeder Using the automatic document feeder (ADF), you can load up to 100 sheets of paper (80 g/m2, 21 lbs bond) for one job. 1. Flex or fan the edge of the paper stack to separate the pages before loading originals. 2. Load the original face up into the document feeder input tray. Make sure that the bottom of the original stack matches the paper size marked on the document input tray. 3. Adjust the document feeder width guides to the paper size.
Print media specifications The following table describes the attributes of the print media supported by the printer. Attributes include media type, size, dimensions, weight, and tray capacity for the specified media. Type Plain paper ENWW Size Dimensions Print media weight/Capacitya Tray 2 / Tray 3 Multi-purpose Tray 1 71 to 85 g/m2 (19 to 22.5 lbs bond) Letter 216 x 279 mm (8.5 x 11 inches) 71 to 85 g/m2 (19 to 22.5 lbs bond) 11 x 17 279 x 432 mm (11 x 17 inches) ● Legal 216 x 356 mm (8.
Type Size c d 42 Tray 2 / Tray 3 Multi-purpose Tray 1 Refer to the Plain paper section Refer to the Plain paper section 75 to 90 g/m2 (20 to 24lbs bond) 75 to 90 g/m2 (20 to 24lbs bond) Recycled paper Refer to the Plain paper section Refer to the Plain paper section 60 to 90 g/m2 (16 to 24lbs bond) 60 to 90 g/m2 (16 to 24lbs bond) Bond paperb Refer to the Plain paper section Refer to the Plain paper section Not available in Tray 2/ Tray 3.
4 ENWW Printer installation ● Printer hardware setup and software installation ● Software installation instructions 43
Printer hardware setup and software installation For basic setup instructions, see the Quick Installation Guide that came with the printer. For additional instructions, go to HP support on the Web. Go to www.hp.com/support/ljM42623MFP, www.hp.com/support/ljM42625MFP for HP's all-inclusive help for the printer.
Software installation instructions The full software install is available for the following operating systems: ● Windows XP 32–bit and 64–bit ● Windows Vista 32–bit and 64–bit ● Windows 7 32–bit and 64–bit ● Windows 8 32–bit and 64–bit ● Windows 8.1 32–bit and 64–bit ● Windows 10 32–bit and 64–bit Server operating system platforms support the installation of the HP LaserJet MFP M42623, M42625 print driver only using the Add Printer Wizard.
46 Chapter 4 Printer installation ENWW
5 Printing This chapter explains common printing tasks. ● Print setup on the control panel ● Overview of print jobs when using a Universal Print Driver (UPD) and Discrete Host Printer Driver ● Print secure documents from the control panel NOTE: Supported optional devices and features may differ according to your model. For additional print driver information, go to www.hp.com/support/ljM42623MFP, www.hp.
Print setup on the control panel The following information describes the printer setup functions available from the control panel. These functions control the appearance of the printed pages. NOTE: Some menus may not appear in the display depending on options or models. If so, it is not applicable to your machine. To change the menu options: Press Menu > Print Setup on the control panel. Item Description Orientation Selects the direction in which information is printed on a page.
Overview of print jobs when using a Universal Print Driver (UPD) and Discrete Host Printer Driver The below table provides a brief description of the print jobs when using an HP UPD and the discrete printer driver.
Print secure documents from the control panel PIN printing (Confidential printing by RAM disk) is a simple method of safeguarding print jobs at the printer until the end user enters the proper PIN to retrieve the private job. This method works with the Job Storage feature enabled in the printer driver and the private print jobs are stored in the RAM disk. Each print job is given a job name, user name, and a PIN number.
6 Copying This chapter explains common copying tasks.
Copy features on the control panel Copy feature The following topics describe how to use the Copy and Copy Setup features on the control panel. These features control the appearance of the generated copies. NOTE: Some menus may not appear in the display depending on options or models. If so, it is not applicable to your machine. To change the menu options: Press Copy Or Menu > Menu > Copy Feature on the control panel. > Copy Feature on the control panel.
Table 6-1 Copy feature (continued) ENWW Item Description Duplex You can set the machine to print copies on both sides of paper. NOTE: Available only on models equipped with an automatic duplexer. ● 1 ->1 Sided: Scans one side of an original and prints it on one side of the paper.
Table 6-1 Copy feature (continued) 54 Item Description Darkness Adjusts the brightness level to make a copy that is easier to read, when the original contains faint markings and dark images. Original Type Improves the copy quality by selecting the document type for the current copy job. Image Rotation Allows you to rotate the image in the originals. Collation Set the machine to sort the copy job.
Copy Setup NOTE: Some menus may not appear in the display depending on options or models. If so, it is not applicable to your machine. To change the menu options: Press Copy Or Menu > Menu > Copy Setup on the control panel. > Copy Setup on the control panel. Table 6-2 Copy Setup Item Description Change Default The copy options can be set to those most frequently used. Auto Tray This is the option to set if the machine is to continue printing or not when any tray becomes empty. Basic copying 1.
Changing the settings for each copy Your machine provides default settings for copying so that you can quickly and easily make a copy. NOTE: ● If you press the Stop/Clear button twice while setting the copy options, all of the options you have set for the current copy job will be canceled and returned to their default status. Or, they will automatically return to their default status after the machine completes the copy in progress. ● Accessing menus may differ from model to model.
Reduced or enlarged copy You can reduce or enlarge the size of a copied image from 25% to 400% from the document feeder or scanner glass. NOTE: ● This feature may not be available depending on model or optional goods. ● If the machine set to Eco mode, reduce and enlarge features are not available. To select from the predefined copy sizes 1. Select Copy > Menu Or select Menu > Copy Feature > Reduce/Enlarge on the control panel. > Copy Feature > Reduce/Enlarge 2.
ID card copying Your machine can print 2-sided originals on one sheet. The machine prints one side of the original on the upper half of the paper and the other side on the lower half without reducing the size of the original. This feature is helpful for copying a small-sized item such as business card. NOTE: ● The original must be placed on the scanner glass to use this feature. ● If the machine set to Eco mode, this feature is not available. Depending on the model, the operating procedure may differ.
5. Turn the original over and place it on the scanner glass where arrows indicate as shown. Then, close the scanner lid. 6. Press the Start button. Figure 6-1 Front and back of the ID card NOTE: ENWW ● If you do not press the Start button, only the front side will be copied. ● If the original is larger than the printable area, some portions may not be printed.
60 Chapter 6 Copying ENWW
7 Scanning This chapter explains the normal and usual procedure for scanning originals. NOTE: ENWW A scan job cannot run concurrently with a print job.
Scanning from the machine Introduction The following topics describe how to set up the Scan menu options from the control panel and then scan a document. Scan feature NOTE: Some menus may not appear in the display depending on options or models. If so, it is not applicable to your machine. NOTE: In order for the Scan To button to function, you must install the HP Scan Software on the PC. To change the menu options: Press Scan > Scan To PC on the control panel.
Item Description Duplex Selects if the machine scans one side of the paper (1 Sided), both sides of the paper (2 Sided), or both sides of the paper (2 Sided Rotated). ● 1 Sided: For originals that are printed on one side only. ● 2 Sided, Book: For originals that are printed on both sides. ● 2 Sided, Calendar: For originals that are printed on both sides, but the back is rotated 180 degrees.
Scanning from a computer Introduction The following topics describe several methods for scanning a document from the scanner to a computer. NOTE: The maximum resolution that can be achieved depends upon various factors, including computer speed, available disk space, memory, the size of the image being scanned, and bit depth settings. Thus, depending on your system and what you are scanning, you may not be able to scan at certain resolutions, especially using enhanced dpi.
Save Location File Format Action After Saving 3. Click the OK button to save the settings. 1. Place a single document face down on the document glass, or load the documents face up into the document feeder. 2. Touch Scan to PC on the control panel. 3. Select your registered computer ID, and enter the Password if necessary. 4. Select the option you want and then touch OK. 5. Scanning begins. Scan to PC NOTE: Scanned images are saved in C:\Users\users name\My Documents.
Scanning using the WIA driver Your machine supports the Windows Image Acquisition (WIA) driver for scanning images. WIA is one of the standard components provided by Microsoft Windows and works with digital cameras and scanners. Unlike the TWAIN driver, the WIA driver allows you to scan and easily adjust images without using additional software: 1. Make sure that the machine is connected to your computer and powered on. 2.
NOTE: 4. ● The IP address for WSD printer is http://IP address/ws/ (example: http:// 111.111.111.111/ws/). ● If no WSD printer is displayed in the list, click The printer that I want isn't listed > Add a printer using a TCP/IP address or hostname and select Web Services Device from Device type. Then enter the printer's IP address. Follow the instructions in the installation window. Scanning using the WSD feature 1. Make sure that the machine is connected to your computer and powered on. 2.
Sending scanned images to different destinations The following topics provide information to set up and send scanned images using email or an FTP/SMB server. ● Setting up an email account ● Scanning and sending an email ● Setting up an FTP/SMB server ● Scanning and sending to FTP/SMB server Setting up an email account 1. Open a web browser and type in your printer’s IP address in the browser window to access the Embedded Web Server (EWS).
Scanning and sending to FTP/SMB server ENWW 1. Make sure your machine is connected to a network. 2. Place a single document face down on the document glass, or load the documents face up into the document feeder. 3. Select Scan 4. Select a server, the desired scan settings, and press OK. 5. Press Start 6. The machine begins scanning and then sends the scanned image to the specified server. > Scan To FTP or Scan To SMB on the control panel. .
70 Chapter 7 Scanning ENWW
8 ENWW System and Other Settings ● Machine setup ● Paper setup ● Report ● Maintenance ● Network setup ● Accessing settings using the Embedded Web Server (EWS) 71
Machine setup NOTE: Some menus may not appear in the display depending on options or models. If so, it is not applicable to your machine. To change the menu options: Press Menu > System Setup > Machine Setup on the control panel. Item Description Date & Time Sets the date and time. Clock Mode Selects the format for displaying time between 12 hr. and 24 hr. Language Sets the language of the text that appears on the control panel display.
Item Description Auto Continue Determine whether or not the machine continues printing when it detects the paper does not match the paper settings. Auto Tray Switch ● 0 Sec: This option allows you to continue printing when the paper size you have set is mismatched with the paper in the tray. ● 30 Sec: If a paper mismatch occurs, an error message will display. The machine waits for about 30 second, then automatically clears the message and continue printing.
Paper setup NOTE: Some menus may not appear in the display depending on options or models. If so, it is not applicable to your machine. To change the menu options: Press Menu > System Setup > Paper Setup on the control panel. Item Description Paper Size Choose the paper size for each tray. It must match the size of paper that is in the tray. Paper Type Choose the type of the paper for each tray. Paper Select Select the default paper tray for Copy and Print.
Maintenance NOTE: Some menus may not appear in the display depending on options or models. If so, it is not applicable to your machine. To change the menu options: Press Menu ENWW > System Setup > Maintenance on the control panel. Item Description Supplies Life Shows the supply life indicators. Image Mar. Allows you to adjust the color setting such as color registration, color density, etc. Toner Low Alert Turn on/off Toner Low Alert. OPC Unit Low Alert Turn on/off OPC Unit Low Alert.
Network setup NOTE: Some menus may not appear in the display depending on options or models. If so, it is not applicable to your machine. To change the menu options: Press Menu > Network on the control panel. Option Description TCP/IP (IPv4) Selects the appropriate protocol and configure parameters to use the network environment. NOTE: There are lots of parameters to be set. If you are not sure, leave as is, or consult the network administrator.
Accessing settings using the Embedded Web Server (EWS) Network-connected MFPs have an Embedded Web Server available to view and modify printer settings. For more information about the EWS, go to http://support.hp.com. Access the EWS Use the following steps to open the EWS: 1. Print a configuration page to obtain your printer's IP address or host name. 2. Open a Web browser, and in the address line, type the IP address or host name exactly as it displays on the configuration page.
5. Select the Standard Accounting option. There are two options for Job Accounting: 6. ● No Accounting: When this option is selected, the Job Accounting feature is disabled. ● Standard Accounting: When this option is selected, the user can select either the “ID/ Password” mode or “ID only” mode. Click the Add button to add a user Account ID. NOTE: The Standard Accounting feature supports up to 200 users. Set up an email account NOTE: Make sure the network is connected to the printer.
9. Enter the domain name if your server is joined to the certain domain, otherwise just enter your computer name which is registered to the SMB. 10. Enter the path for saving the scanned image. NOTE: The folder to save the scanned image must be on the root. The folder properties need to be setup as a share. Your user name should have the rights to read and write the folder. 11. Click the Apply button.
80 Chapter 8 System and Other Settings ENWW
9 Maintenance This chapter provides information about purchasing supplies, accessories, and maintenance parts available for your machine.
Ordering supplies and accessories NOTE: Available accessories may differ from country/region to country/region. Contact your sales representatives to obtain the list of available supplies and maintenance parts.
Available accessories You can purchase accessories to enhance your machine's performance and capacity. These accessories must be installed by a qualified HP authorized service provider, dealer, or the retailer where you bought the machine. Contact an HP authorized service or support provider to order an accessory. NOTE: a Some features and optional goods may not be available depending on model or country/region.
Storing the consumables Consumables contain components that are sensitive to light, temperature, and humidity. HP suggests users follow these recommendations to ensure optimal performance, highest quality, and longest life from your new HP consumables. Store the consumables in the same environment in which the printer will be used. This should be in controlled temperature and humidity conditions. The consumables should remain in their original and unopened package until installation.
Estimated toner cartridge life Print cartridge life is approximate, based on average A4 /Letter-size page count with ISO coverage. Declared cartridge yield value in accordance with ISO/IEC 19798. Actual yields vary considerably based on images printed and other factors. For more information, go to http://www.hp.com/go/learnaboutsupplies. Redistributing toner When the toner cartridge is near the end of its life: ● White streaks or light printing occurs and/or density varies from side to side.
2. 3. 4.
5.
Toner cartridge installation 1. Remove toner cartridge from shipping bag. TIP: 2. 88 Keep the orange plug in place. It is required for toner cartridge replacement. Hold the toner cartridge as shown and rotate the toner cartridge end to end to redistribute toner in cartridge.
3. ENWW Pull the red or orange pull tab and remove it completely.
90 4. Align toner cartridge with the opening and push until toner cartridge locks into place. An audible click will indicate the cartridge is locked into place. 5. Close front door and right door.
Imaging unit installation CAUTION: ENWW Leave front and right door open until all installation steps are complete. 1. Remove imaging unit from shipping bag and place it on a clean flat surface. 2. Loosen shipping tape from the bottom and both sides.
3. 92 Remove orange shipping locks from imaging unit.
4. Remove remaining shipping tape and pull protective sheet from imaging unit. CAUTION: NOTE: ENWW Do not touch exposed drum roller surface. Do not expose the imaging unit to light for more than a few minutes.
5. Remove orange plug on back of imaging unit CAUTION: Once the plug is removed, the imaging unit must remain level. Contents may spill out if the imaging unit is tipped. 6. With right and front doors fully open, carefully lift imaging unit into position, so the bottom of imaging unit aligns with the raised alignment rails inside printer cabinet as shown. CAUTION: 94 Chapter 9 Maintenance Do not touch exposed drum roller surface.
7. Install imaging unit and ensure it is fully seated. NOTE: If imaging unit binds or does not slide easily into cabinet, verify the right door is fully open, realign imaging unit, and install.
8. Connect the electrical cable as shown and route cable into holder as shown. CAUTION: 96 Chapter 9 Maintenance Make sure the connector is fully seated in the socket.
9. Install two screws as shown. 10. Ensure electrical connector is plugged in and fully seated. Ensure the two screws are securely installed.
Monitoring the supplies life If you experience frequent paper jams or printing problems, check the number of pages the machine has printed or scanned. Replace the corresponding parts, if necessary. NOTE: ● Some menus may not appear in the display depending on options or models. If so, it is not applicable to your machine. ● It may be necessary to press OK to navigate to lower-level menus for some models. 1. Select Menu 2. Select the option you want and press OK. 3.
Cleaning the machine If printing quality problems occur or if you use your machine in a dusty environment, you need to clean your machine regularly to keep it in the best printing condition and use your machine longer. CAUTION: ● Cleaning the cabinet of the machine with cleaning materials containing large amounts of alcohol, solvents, or other strong substances can discolor or distort the cabinet.
Cleaning the roller NOTE: ● Turn the machine off and unplug the power cord. Wait for the machine to cool down. ● Illustrations on this user’s guide may differ from your machine depending on its options or models. Check your machine type. 1. 2.
3. 4. 5. ADF models only 1.
2. 3.
4.
Cleaning the scan unit Keeping the scan unit clean helps ensure the best possible copies. We suggest that you clean the scan unit at the start of each day and during the day as needed. NOTE: ● Turn the machine off and unplug the power cord. Wait for the machine to cool down. ● Illustrations on this user’s guide may differ from your machine depending on its options or models. Check your machine type 1. Slightly dampen a soft, lint-free cloth or paper towel with water. 2. Lift and open the scanner lid.
Update the firmware The following steps explain how to download and update the firmware on the printer. Step one: Download the firmware from HP.com 1. Go to www.hp.com/support, select Software and Drivers, type the printer name in the search field, click Find, and then select the model from the list of search results. 2. If it is not automatically detected, select or change the operating system. 3. Under the Firmware or Firmware-system section, locate the Firmware Update Utility file. 4.
2. Open a Web browser, and in the address line, type the IP address or host name exactly as it displays on the configuration page. Press the Enter key on the computer keyboard. The EWS opens. If the Web browser displays a There is a problem with this website’s security certificate message when attempting to open the EWS, click Continue to this website (not recommended). NOTE: Choosing Continue to this website (not recommended) will not harm the computer while navigating within the EWS for the HP printer.
8. Select the firmware file and click Open. 9. Select Next and then wait for the wizard to verify the firmware. 10. When prompted, check the firmware version, select Next, and then wait for the firmware to upload to the printer. 11. Wait for the firmware programming process to complete and for the printer to restart. NOTE: This process will take several minutes. Do not close the browser window or interrupt communication until the HP Embedded Web Server (EWS) displays the confirmation page. 12.
108 Chapter 9 Maintenance ENWW
10 Useful Settings This chapter explains how to browse the current status of your machine, and the method of setting for advanced machine setup.
Machine’s initial set up After setting up the printer and connecting the printer to a power cable, follow these steps to set up a password: 1. Select your country from the list of countries. NOTE: 2. Depending on the country selected, the system will select the language. Enter an eight-digit numerical pin code as a password, and then type the password again to confirm the password. NOTE: If a password is not valid, “Invalid input” error message will display on the screen. Press the OK button.
Machine’s basic settings To change the machine’s default settings, follow these steps: NOTE: It may be necessary to press OK to navigate to lower-level menus for some models. 1. Select Menu 2. Select the option you want, then press OK. NOTE: > System Setup > Machine Setup on the control panel. When you press the Power/Wake Up button or start printing, the product will wake up from the power saving mode. 3. Select the option you want, then press OK. 4. Press OK to save the selection. 5.
Altitude adjustment Print quality is affected by atmospheric pressure, which is determined by the height of the machine above sea level. The following information will guide you on how to set your machine for the best print quality. Before you set the altitude value, determine the altitude where you are.
11 Troubleshooting This chapter gives helpful information for what to do if you encounter an error.
Paper feeding problems The following table describes common paper feeding problems and suggested solutions for each one. Condition Suggested solutions Paper sticks together. ● Check the maximum paper capacity of the tray. ● Make sure that you are using the correct type of paper. ● Remove paper from the tray and flex the paper. ● Humid conditions may cause some paper to stick together. Multiple sheets of paper do not feed. Different types of paper may be stacked in the tray.
Clearing jams Introduction The following topics describe how to clear paper jams in several locations inside the printer and the scanner. NOTE: To avoid tearing the paper, pull the jammed paper out slowly and gently. Illustrations on this user’s guide may differ from your printer depending on its model or optional goods. ● Tray 2 ● In optional Tray 3 ● In Multi-purpose Tray 1 ● Inside the printer ● In the exit area ● In the duplex unit area ● Clearing original document jams 1.
2. Remove the jammed paper by gently pulling it straight out. 3. Insert the tray back into the printer until it snaps into place.
In optional Tray 3 ENWW 1. Pull out optional tray. 2. Remove the jammed paper by gently pulling it straight out.
3. Insert tray back into the printer until it snaps into place. If you do not see the paper in this area, stop and go to next step: 4. Open the SCF jam cover.
ENWW 5. Remove the jammed paper by gently pulling it straight out. 6. Close the SCF jam cover.
In Multi-purpose Tray 1 ▲ Remove the jammed paper by gently pulling it straight out.
Inside the printer 1. Open the side cover. 2. Open the jam guide and remove the jammed paper. 1 2 3. Open the fuser jam cover and remove the jammed paper.
4. Close the side cover.
In the exit area CAUTION: 1. The fuser area is hot. Take care when removing paper from the printer. Remove the jammed paper by gently pulling it straight out. If you do not see the paper in this area, stop and go to next step: 2. ENWW Open the side cover.
3. Remove the jammed paper from the exit unit or fuser unit. 4. Close the side cover.
In the duplex unit area ENWW 1. Open the side cover. 2. Remove the jammed paper from the transfer roller assembly.
3. Release the transfer roller assembly and remove the jammed paper. 1 2 4. Close the side cover.
Clearing original document jams NOTE: To prevent document jams, use the scanner glass for thick, thin or mixed paper originals. CAUTION: To avoid tearing the document, remove the jammed document slowly and carefully. Original paper jam in front of scanner ENWW 1. Open the document feeder cover. 2. Gently remove the original carefully from the document feeder.
3. Close the document feeder cover.
Original paper jam inside of scanner 1. Open the document feeder cover. 2. Gently remove the original carefully from the document feeder.
3. Open the scanner lid. 4. Grasp the misfeed original, and remove the paper from the feed area by carefully pulling it. 5. Close the scanner lid.
6. ENWW Close the document feeder cover.
Original paper jam in exit area of scanner 1. Open the Cover-Open and lift up the stacker. 1 2 2. Gently remove the original carefully from the document feeder.
3. Close the Cover-Open and pull down the stacker.
Original paper jam in scanner duplex path 1. Open the document feeder cover. 2. Open the duplex jam cover. Pull the original document gently out of the document feeder.
3. ENWW Close the duplex jam cover and document feeder cover.
Understanding the status LED The color of the LED indicates the machine's current status. NOTE: ● Some LEDs may not be available depending on model or country/region. ● To resolve the error, look at the error message and its instructions from the troubleshooting part. ● You also can resolve the error with the guideline from the computer’s Printing Status window. ● If the problem persists, call a service representative. LED Status Description Status Off ● The machine is off-line.
Understanding display messages Messages appear on the control panel display to indicate the machine’s status or errors. Refer to the tables below to understand the messages and their meaning, and correct the problem, if necessary. NOTE: ● You can resolve the error with the guideline from the computer’s Printing Status program window. ● If a message is not in the table, reboot the power and try the printing job again. If the problem persists, call a service representative.
Toner-related messages Message ● Meaning Suggested solutions Error [error number] A toner cartridge is not installed. Reinstall the toner cartridge. Toner Cart Failure [error number] A toner cartridge is not being detected. Reinstall the toner cartridge two or three times to confirm it is seated properly. If the problem persists, contact the service representatives. Protective film is not removed from toner. Remove the protective film from the toner cartridge.
Message Meaning Suggested solutions printing quality cannot be guaranteed. ● The indicated toner cartridge has reached its estimated cartridge life Replace the toner cartridge for the best print quality when this message appears. Using a cartridge beyond this stage can result in printing quality issues. Replace the toner cartridge. The printer indicates when the cartridge level is low. Actual cartridge life remaining may vary.
Misc. messages Message ● Tray 2 door is open. Close it ● Front door is open. Close it ● Right door is open. Close it ● Scanner door open Door of scanner is open. Close the door ● Not Proper room temp Not Proper room temperature. Change room temperature ● Prepare TR Roller/Prepare with new transfer roller ● Error: C9–2220/TR failure: #C92220. Meaning Suggested solutions The Tray 2 door, front door or right door is not securely latched. Close the door until it locks into place.
Power and cable connecting problems Condition Suggested solutions The machine is not receiving power, or the connection cable between the computer and the machine is not connected properly. ● Connect the machine to the electricity supply first. If the machine has a Power / Wake Up button on the control, press it. ● ENWW Disconnect the machine’s cable and reconnect it.
Printing problems The following table describes common printing problems, the possible causes, and suggested solutions. Condition Possible cause Suggested solutions The machine does not print. The machine is not receiving power. Connect the machine to the electricity supply first. If the machine has a Power / Wake Up button on the control, press it. The machine is not selected as the default machine. Select your machine as your default machine in Windows.
Condition Possible cause Suggested solutions The paper size and the paper size settings do not match. Ensure that the paper size in the printer driver settings matches the paper in the tray. Or, ensure that the paper size in the printer driver settings matches the paper selection in the software application settings you use. The machine cable is loose or defective. Disconnect the machine cable and reconnect. Try a print job that you have already printed successfully.
Printing quality problems The following table describes common printing quality problems, shows examples of each one, and lists suggested solutions. Condition Example Light or faded print The top half of the paper is printed lighter than the rest of the paper Toner specks Dropouts Suggested solutions ● If a vertical white streak or faded area appears on the page, the toner supply is low. Install a new toner cartridge.
Condition White Spots Example Suggested solutions If white spots appear on the page: ● The paper is too rough and a lot of dirt from paper falls to the inner components within the machine, so the transfer roller may be dirty. Clean the inside of your machine. ● The paper path may need cleaning. Clean the inside of your machine. If these steps do not correct the problem, contact a service representative.
Condition Example Background scatter A Toner particles are around bold characters or pictures Curl or wave 146 Chapter 11 Troubleshooting Background scatter results from bits of toner randomly distributed on the printed page. ● The paper may be too damp. Try printing with a different batch of paper. Do not open packages of paper until necessary so that the paper does not absorb too much moisture.
Condition Example Wrinkles or creases Suggested solutions ● Ensure that the paper is loaded properly. ● Check the paper type and quality. ● Turn the stack of paper over in the tray. Also try rotating the paper 180° in the tray. Back of printouts are dirty ● Check for leaking toner. Clean the inside of the machine. Solid color or black pages ● The toner cartridge may not be installed properly. Remove the cartridge and reinsert it. ● The toner cartridge may be defective.
Condition Horizontal stripes Example Suggested solutions If horizontally aligned black streaks or smears appear: ● The toner cartridge may be installed improperly. Remove the cartridge and reinsert it. ● The toner cartridge may be defective. Remove the toner cartridge and install a new one. Remove the toner cartridge and install a new one. If the problem persists, the machine may require repairing. Contact a service representative.
Copying problems The following table describes common copying problems and suggested solutions. Condition Suggested solutions Copies are too light or too dark. Adjust the darkness in copy feature to lighten or darken the backgrounds of copies. Smears, lines, marks, or spots appear on copies. ● If the defects are on the original, adjust darkness in copy feature to lighten the background of your copies. ● If there are no defects on the original, clean the scan unit.
Scanning problems The following table describes common scanning problems and suggested solutions. Condition Suggested solutions The scanner does not work. ● Make sure that you place the original to be scanned face down on the scanner glass, or face up in the document feeder. ● There may not be enough available memory to hold the document you want to scan. Try the Prescan function to see if that works. Try lowering the scan resolution rate.
Operating system problems Condition Suggested solutions “File in Use” message appears during installation. Exit all software applications. Remove all software from the startup group, then restart Windows. Reinstall the printer driver. “General Protection Fault”, “Exception OE”, “Spool 32”, or “Illegal Operation” messages appear. Close all other applications, reboot Windows and try printing again. “Fail To Print”, “A printer timeout error occurred” message appear.
152 Chapter 11 Troubleshooting ENWW