
Hardware Reference Guide
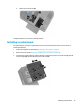
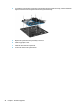


Table Of Contents
- Product features
- Hardware upgrades
- Warnings and cautions
- Preparing for disassembly
- Accessing the tool kit
- Replacing or installing drives
- Removing and replacing the access panel
- Installing system memory
- Installing graphics cards
- Removing the PCI fan
- Installing a system board
- Removing the hard drive fan
- Installing a power supply
- Installing a radiator bracket for liquid cooling
- Cleaning filters
- Electrostatic discharge
- Computer operating guidelines and routine care
- Accessibility
- Index
Installing a radiator bracket for liquid cooling
The radiator bracket can accommodate only 240 mm radiators.
1. Prepare the computer for disassembly (Preparing for disassembly on page 8).
2. Remove the access panel (Removing and replacing the access panel on page 18).
3. Remove any fans mounted to the side of the case.
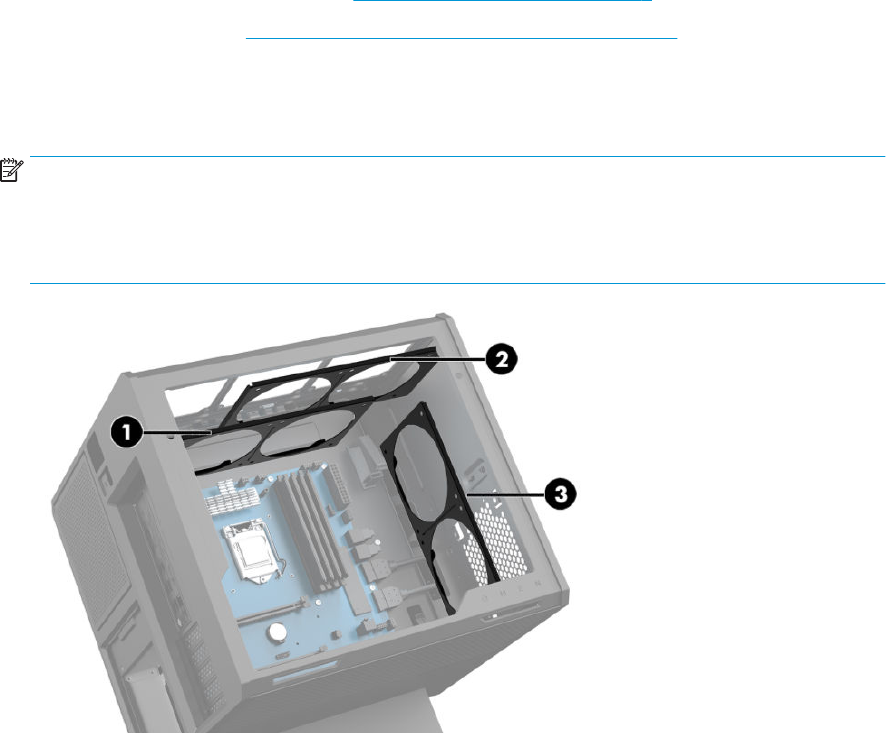
4. If you want to add additional liquid cooling, install the radiator bracket in one of the positions shown in
the following image.
NOTE: On models that support only one bracket, you can install the bracket in either position 1 or 2.
On models that support two brackets, you can install the brackets in either positions 1 and 3 or
positions 2 and 3.
Installation location (3) is present in select models only.
5. Insert the bracket onto the inside rear of the case.
Installing a radiator bracket for liquid cooling 31