
Maintenance and Service Guide


Table Of Contents
- Computer features
- Illustrated parts catalog
- Routine care, SATA drive guidelines, and disassembly preparation
- Removal and replacement procedures
- Computer Setup (F10) Utility
- Troubleshooting without diagnostics
- Safety and comfort
- Before you call for technical support
- Helpful hints
- Solving general problems
- Solving power problems
- Solving hard drive problems
- Solving media card reader problems
- Solving display problems
- Solving audio problems
- Solving printer problems
- Solving keyboard and mouse problems
- Solving hardware installation problems
- Solving network problems
- Solving memory problems
- Solving CD-ROM and DVD problems
- Solving USB flash drive problems
- Solving front panel component problems
- Solving Internet access problems
- Solving software problems
- POST error messages
- Password security and resetting CMOS
- Using HP PC Hardware Diagnostics
- Backing up, restoring, and recovering
- Power cord set requirements
- Statement of memory volatility
- Specifications
- Index
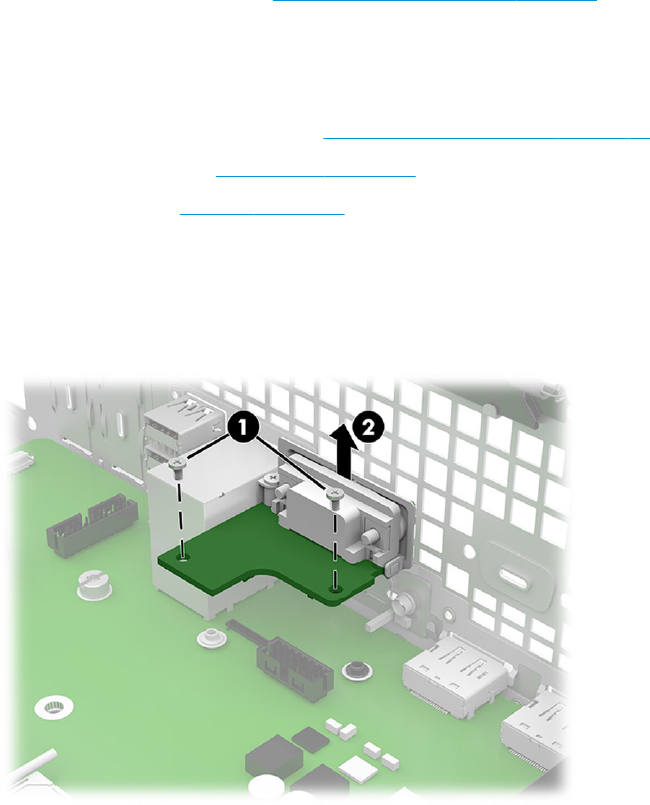
Option card
For a list of available option cards, see Computer major components on page 6.
An option card can be installed under the heat sink near the back of the system board that provides an
additional connector on the rear I/O panel.
Before removing the option card, follow these steps:
1. Prepare the computer for disassembly (Preparation for disassembly on page 20).
2. Remove the access panel (Access panel on page 23).
3. Remove the fan duct (Fan duct on page 45).
Remove the option card:
1. Remove the two Phillips screws (1) that secure the card to the system board.
2. Lift to disengage the card from the system board connector, and then remove the option card from the
computer (2).
To install the option card, reverse the removal procedures.
Option card 51