
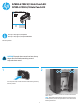
HP Color LaserJet Enterprise M855 and Flow MFP M880 - Hole Punch Kit Installation Guide

2
7
5
8
6
43
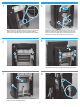
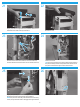
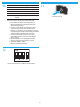
Remove the covers (callout 1) by moving the top of the cover
outward to release the positioning pins (callout 2). TIP: As the
cover is removed, you might need to reach behind the cover to
release the two locator pins on the back side of the cover.
Before proceeding, take note of the two locator pins on the back
side of each cover. These pins must be correctly installed to
assure proper alignment of the covers when they are reinstalled.
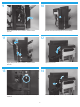
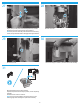
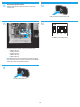
Remove four screws from the latch assembly. Lift the latch assembly straight up to release it, and then rotate
the assembly away from the paper path entrance to remove it.
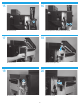
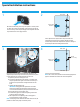
Remove one screw (callout 1) on the right side of the punch
lower front cover assembly (callout 2).
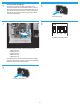
Open the front door, and then release one tab (callout 1).