Getting Started HP Notebook
© Copyright 2011 Hewlett-Packard Development Company, L.P. Bluetooth is a trademark owned by its proprietor and used by Hewlett-Packard Company under license. Microsoft, Windows, and Windows Vista are U.S. registered trademarks of Microsoft Corporation. SD Logo is a trademark of its proprietor. The information contained herein is subject to change without notice. The only warranties for HP products and services are set forth in the express warranty statements accompanying such products and services.
Safety warning notice WARNING! To reduce the possibility of heat-related injuries or of overheating the computer, do not place the computer directly on your lap or obstruct the computer air vents. Use the computer only on a hard, flat surface. Do not allow another hard surface, such as an adjoining optional printer, or a soft surface, such as pillows or rugs or clothing, to block airflow.
iv Safety warning notice
Table of contents 1 Welcome .......................................................................................................................................................... 1 Finding information ............................................................................................................................... 1 2 Getting to know your computer ..................................................................................................................... 4 Top ....................
Using the embedded numeric keypad (select models only) .............................. 27 Turning the embedded numeric keypad on and off .......................... 28 Switching key functions on the embedded numeric keypad ............. 28 Using the integrated numeric keypad (select models only) ............................... 28 Using pointing devices .......................................................................................................................
Performing a recovery ....................................................................................................... 54 Using the Windows recovery tools .................................................................... 54 Using f11 recovery tools .................................................................................... 55 Using a Windows Vista operating system DVD (purchased separately) ........... 55 8 Customer support .................................................................
viii
1 Welcome ● Finding information After you set up and register the computer, it is important to take the following steps: ● Set up HP QuickWeb—Immediately access the Internet, widgets, e-mail, and communication programs without launching your main operating system. For more information, refer to HP QuickWeb on page 22. ● Connect to the Internet—Set up your wired or wireless network so that you can connect to the Internet. For more information, refer to Networking on page 17.
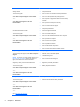
Resources For information about Getting Started ● Computer features To access this guide: ● How to connect to a wireless network specifications Select Start > Help and Support > User Guides. ● How to use the keyboard and pointing devices – or – ● How to replace or upgrade the hard drive and memory modules Select Start > All Programs > HP > HP Documentation.
Resources For information about Worldwide Telephone Numbers booklet HP support telephone numbers This booklet is provided with your computer. HP Web site ● Support information To access this Web site, go to http://www.hp.com/ support. ● Ordering parts and finding additional help ● Accessories available for the device Limited Warranty* Warranty information To access the warranty: Select Start > Help and Support > User Guides > View Warranty Information.
2 4 Getting to know your computer ● Top ● Front ● Right ● Left ● Display ● Bottom Chapter 2 Getting to know your computer
Top TouchPad Component Description (1) TouchPad on/off button Turns the TouchPad on and off. (2) TouchPad Moves the pointer and selects or activates items on the screen. (3) Left TouchPad button Functions like the left button on an external mouse. (4) Right TouchPad button Functions like the right button on an external mouse.
Lights Component (1) (2) (3) (4) Description TouchPad light Caps lock light Power light QuickWeb light ● Amber: The TouchPad is off. ● Off: The TouchPad is on. ● White: Caps lock is on. ● Off: Caps lock is off. ● On: The computer is on. ● Blinking: The computer is in the Sleep state. ● Off: The computer is off or in Hibernation. ● Blinking: QuickWeb is on. ● Off: QuickWeb is off. NOTE: For more information, refer to HP QuickWeb on page 22 and to the HP QuickWeb software Help.
Buttons and fingerprint reader (select models only) Component (1) Description Power button ● When the computer is off, press the button to turn on the computer. ● When the computer is on, press the button briefly to initiate Sleep. ● When the computer is in the Sleep state, press the button briefly to exit Sleep. ● When the computer is in Hibernation, press the button briefly to exit Hibernation.
Component (2) Description QuickWeb button ● When the computer is off or in Hibernation, press the button to open HP QuickWeb. ● When the computer is in Microsoft Windows, press the button to open the default Web browser. ● When the computer is in HP QuickWeb, press the button to open the default Web browser. NOTE: For more information, refer to HP QuickWeb on page 22 and to the HP QuickWeb software Help.
Keys NOTE: Refer to the illustration that most closely matches your computer. Component Description (1) esc key Displays system information when pressed in combination with the fn key. (2) Function keys Execute frequently used system functions when pressed in combination with the fn key. (3) num lk key (select models only) Turns the embedded numeric keypad on and off when pressed in combination with the fn key.
Component Description (1) esc key Displays system information when pressed in combination with the fn key. (2) Function keys Execute frequently used system functions when pressed in combination with the fn key. (3) num lk key (select models only) Alternates between the navigational and numeric functions on the integrated numeric keypad. NOTE: The keypad function that is active when the computer is turned off remains on when the computer is turned back on.
Front Component (1) Description Hard drive light ● Blinking White: The hard drive is being accessed. ● Amber: HP 3D DriveGuard has temporarily parked the hard drive. NOTE: For information on HP 3D DriveGuard, refer to the HP Notebook Reference Guide.
Right Component 12 Description (1) USB 2.0 ports (2) Connect optional USB devices. (2) RJ-11 (modem) jack (select models only) Connects a modem cable. (3) Optical drive (select models only) Reads and writes (select models only) to an optical disc. (4) Optical drive light Lights when the optical drive is active. (5) Optical drive eject button Releases the optical drive disc tray.
Left Component (1) Description Security cable slot Attaches an optional security cable to the computer. NOTE: The security cable is designed to act as a deterrent, but it may not prevent the computer from being mishandled or stolen. (2) Battery light ● Amber: The computer is connected to external power and the battery is 0 to 90% charged. ● White: The computer is connected to external power and the battery is 90 to 99% charged.
Component (9) Description USB 3.0 port Connects an optional USB device. NOTE: (10) 14 USB 2.0 port Chapter 2 Getting to know your computer Some models may show a slightly different icon. Connects an optional USB device.
Display Component Description (1) Speakers (2) Produce sound. (2) Internal display switch Turns off the display or initiates Sleep if the display is closed while the power is on. NOTE: The display switch is not visible from the outside of the computer. (3) WWAN antennas (2)* (select models only) Send and receive wireless signals to communicate with wireless wide area networks (WWAN).
Bottom Component Description (1) Battery and access cover release latches Release the battery from the battery bay and the access cover from the computer. (2) Battery bay Holds the battery. (3) SIM slot Supports a wireless subscriber identity module (SIM) (select models only). The SIM slot is located inside the battery bay. (4) Vents (2) Enable airflow to cool internal components. NOTE: The computer fan starts up automatically to cool internal components and prevent overheating.
3 Networking ● Using an Internet service provider (ISP) ● Connecting to a wireless network NOTE: Internet hardware and software features vary depending on computer model and your location. Your computer may support one or both of the following types of Internet access: ● Wireless—For mobile Internet access, you can use a wireless connection. Refer to Connecting to an existing WLAN on page 19 or Setting up a new WLAN network on page 20.
Using an Internet service provider (ISP) Before you can connect to the Internet, you must establish an ISP account. Contact a local ISP to purchase Internet service and a modem. The ISP will help set up the modem, install a network cable to connect your wireless computer to the modem, and test the Internet service. NOTE: Your ISP will give you a user ID and password to access the Internet. Record this information and store it in a safe place.
Connecting to an existing WLAN Windows 7 1. Turn on the computer. 2. Be sure that the WLAN device is on. 3. Click the network icon in the notification area, at the far right of the taskbar. 4. Select a network to connect to. NOTE: If no WLANs are listed, you may be out of range of a wireless router or access point. NOTE: If you do not see the WLAN you want to connect to, click Open Network and Sharing Center, and then click Set up a new connection or network. A list of options is displayed.
Setting up a new WLAN network Required equipment: ● A broadband modem (either DSL or cable) (1) and high-speed Internet service purchased from an Internet service provider (ISP) ● A wireless router (purchased separately) (2) ● Your new wireless computer (3) NOTE: Some modems have a built-in wireless router. Check with your ISP to determine what type of modem you have. The illustration shows an example of a completed WLAN network installation that is connected to the Internet.
Configuring a wireless router For help in setting up a WLAN, refer to the information provided by your router manufacturer or your ISP. The Windows operating system also provides tools to help you set up a new wireless network. To use the Windows tools to set up your network: ● Windows 7—Select Start > Control Panel > Network and Internet > Network and Sharing Center > Set up a new connection or network > Set up a network. Then follow the on-screen instructions.
4 HP QuickWeb Getting started The HP QuickWeb environment provides a fun and engaging way to perform many of your favorite activities. Your computer is ready to go within seconds of starting QuickWeb, allowing you to rapidly access the Internet, widgets, and communication programs. Simply press the QuickWeb button on your computer, and then start browsing the Internet, communicating with Skype, and exploring other HP QuickWeb programs.
Starting HP QuickWeb ▲ To start HP QuickWeb, press the QuickWeb button when the computer is off or in Hibernation. The following table explains the different behaviors of the QuickWeb button. Button Behavior QuickWeb button ● When the computer is off or in Hibernation, opens HP QuickWeb. ● When the computer is in Microsoft Windows, opens the default Web browser. ● When the computer is in HP QuickWeb, opens the default Web browser.
5 24 Keyboard and pointing devices ● Using the keyboard ● Using pointing devices Chapter 5 Keyboard and pointing devices
Using the keyboard Identifying the hotkeys A hotkey is a combination of the fn key (1) and either the esc key (2) or one of the function keys (3). To use a hotkey: ▲ Briefly press the fn key, and then briefly press the second key of the hotkey combination. Hotkey combination Description fn+esc Displays system information. fn+f1 Initiates Sleep, which saves your information in system memory. The display and other system components turn off and power is conserved.
Hotkey combination fn+f5 Description Initiates the QuickLock security feature. QuickLock protects your information by displaying the operating system Log On window. While the Log On window is displayed, the computer cannot be accessed until a Windows user password or a Windows administrator password is entered. NOTE: Before you can use QuickLock, you must set a Windows user password or a Windows administrator password. For instructions, refer to Help and Support.
Using the embedded numeric keypad (select models only) (1) Component Description fn key Turns the embedded numeric keypad on and off when pressed in combination with the num lk key. NOTE: The embedded numeric keypad will not function while an external keyboard or numeric keypad is connected to the computer. (2) Embedded numeric keypad When the keypad is turned on, it can be used like an external numeric keypad.
Turning the embedded numeric keypad on and off Press fn+num lk to turn on the embedded numeric keypad. Press fn+num lk again to turn off the keypad. NOTE: The embedded numeric keypad is turned off while an external keyboard or numeric keypad is connected to the computer.
Using pointing devices NOTE: In addition to the pointing devices included with your computer, you can use an external USB mouse (purchased separately) by connecting it to one of the USB ports on the computer. Setting pointing device preferences Use Mouse Properties in Windows to customize settings for pointing devices, such as button configuration, click speed, and pointer options. To access Mouse Properties: ● Windows 7—Select Start > Devices and Printers.
Turning the TouchPad off and on To turn the TouchPad off and on, quickly double-tap the TouchPad on/off button. The following table shows and describes the TouchPad display icons. TouchPad light Item Description Amber Indicates that the TouchPad is off. Off Indicates that the TouchPad is on. Navigating To move the pointer, slide one finger across the TouchPad in the direction you want the pointer to go.
Selecting Use the left and right TouchPad buttons like the corresponding buttons on an external mouse. Using TouchPad gestures The TouchPad supports a variety of gestures. To use TouchPad gestures, place two fingers on the TouchPad at the same time. NOTE: TouchPad gestures are not supported in all programs. To view the demonstration of a gesture: 1. Click the Show hidden icons icon in the notification area, at the far right of the taskbar. 2. Click the Synaptics Pointing Device icon 3.
Scrolling Scrolling is useful for moving up, down, or sideways on a page or image. To scroll, place two fingers slightly apart on the TouchPad, and then drag them across the TouchPad in an up, down, left, or right motion. NOTE: Scrolling speed is controlled by finger speed. Pinching/Zooming Pinching allows you to zoom in or out on images or text. ● Zoom in by placing two fingers together on the TouchPad, and then moving them apart.
Flicking Flicking allows you to navigate through screens or quickly scroll through documents. To flick, use three fingers to touch the TouchPad zone in a light, quick flicking motion up, down, left, or right. NOTE: Three-finger flicking is disabled at the factory.
6 Maintenance ● Inserting or removing the battery ● Using the optional security screw ● Replacing or upgrading the hard drive ● Adding or replacing memory modules ● Updating programs and drivers ● Using SoftPaq Download Manager ● Cleaning your computer Inserting or removing the battery NOTE: For additional information on using the battery, refer to the HP Notebook Reference Guide.
▲ Insert the battery (1) into the battery bay until it is seated (2). The battery release latches automatically lock the battery into place. To remove the battery: CAUTION: Removing a battery that is the sole power source for the computer can cause loss of information. To prevent loss of information, save your work and initiate Hibernation or shut down the computer through Windows before removing the battery. 1. Slide the battery release latches (1) to release the battery.
2. 36 Slide the battery up (2), and remove the battery from the battery bay (3).
Using the optional security screw Use the optional security screw to lock the access cover to the bottom of the computer. When not in use the security screw can be stored inside the battery bay. To use the security screw: 1. Remove the battery. CAUTION: Removing a battery that is the sole power source for the computer can cause loss of information. To prevent loss of information, save your work and initiate Hibernation or shut down the computer through Windows before removing the battery. 2.
Replacing or upgrading the hard drive CAUTION: To prevent information loss or an unresponsive system: Shut down the computer before removing the hard drive from the hard drive bay. Do not remove the hard drive while the computer is on, in the Sleep state, or in Hibernation. If you are not sure whether the computer is off or in Hibernation, turn the computer on by pressing the power button. Then shut down the computer through the operating system. Removing the hard drive 38 1.
9. Lift the hard drive (3) out of the hard drive bay. Installing a hard drive 1. Insert the hard drive into the hard drive bay (1). 2. Pull the hard drive tab (2) to the left until the hard drive is fully seated.
3. Replace the four hard drive screws (3). 4. Align the tabs on the access cover with the latches on the computer (1), then slide the cover in to close it (2). The release latches automatically lock the access cover into place (3).
5. Replace the security screw (4), if desired. For additional information about the security screw, refer to Using the optional security screw on page 37. 6. Replace the battery. 7. Connect AC power and external devices to the computer. 8. Turn on the computer. Adding or replacing memory modules The computer has two memory module slots.
CAUTION: To prevent information loss or an unresponsive system: Shut down the computer before adding or replacing memory modules. Do not remove a memory module while the computer is on, in the Sleep state, or in Hibernation. If you are not sure whether the computer is off or in Hibernation, turn the computer on by pressing the power button. Then shut down the computer through the operating system. 1. Save your work and shut down the computer. 2.
b. Grasp the edge of the memory module (2), and then gently pull the memory module out of the memory module slot. CAUTION: To prevent damage to the memory module, hold the memory module by the edges only. Do not touch the components on the memory module. To protect a memory module after removal, place it in an electrostatic-safe container. 8. Insert a new memory module: CAUTION: To prevent damage to the memory module, hold the memory module by the edges only.
c. Gently press the memory module (3) down, applying pressure to both the left and right edges of the memory module, until the retention clips snap into place. CAUTION: To prevent damage to the memory module, be sure that you do not bend the memory module. 9. Align the tabs on the access cover with the latches on the computer (1), then slide the cover in to close it (2). The release latches automatically lock the access cover into place (3).
10. Replace the security screw (4), if desired. For additional information about the security screw, refer to Using the optional security screw on page 37. 11. Replace the battery. 12. Connect AC power and external devices to the computer. 13. Turn on the computer. Updating programs and drivers HP recommends that you update your programs and drivers on a regular basis with the latest versions. Go to http://www.hp.com/support to download the latest versions.
Using SoftPaq Download Manager HP SoftPaq Download Manager (SDM) is a tool that provides quick access to SoftPaq information for HP business computers without requiring the SoftPaq number. Using this tool, you can easily search for SoftPaqs, and then download and unpack them. SoftPaq Download Manager works by reading and downloading, from the HP FTP site, a published database file containing computer model and SoftPaq information.
Cleaning your computer ● Cleaning products ● Cleaning procedures Cleaning products Use the following products to safely clean and disinfect your notebook or tablet PC: ● Dimethyl benzyl ammonium chloride 0.3 percent maximum concentration (For example: germicidal disposable wipes. These wipes come in a variety of brand names.
Cleaning the TouchPad and keyboard WARNING! To reduce the risk of electric shock or damage to internal components, do not use a vacuum cleaner attachment to clean the keyboard. A vacuum cleaner can deposit household debris on the keyboard surface. CAUTION: When cleaning the TouchPad and keyboard, do not let liquids drip between the keys. This can permanently damage internal components.
7 Backup and recovery Windows 7 ● Backing up your information ● Performing a system recovery To protect your information, use Windows Backup and Restore to back up individual files and folders, back up your entire hard drive (select models only), create system repair discs (select models only) by using the installed optical drive (select models only) or an optional external optical drive, or create system restore points.
new software and data files, you should continue to back up your system on a regular basis to maintain a reasonably current backup. The system repair discs (select models only) are used to start up (boot) the computer and repair the operating system in case of system instability or failure. Your initial and subsequent backups allow you to restore your data and settings if a failure occurs. You can back up your information to an optional external hard drive, a network drive, or discs.
Using the Windows recovery tools To recover information you previously backed up: 1. Select Start > All Programs > Maintenance > Backup and Restore. 2. Follow the on-screen instructions to recover your system settings, your computer (select models only), or your files. To recover your information using Startup Repair, follow these steps: CAUTION: Using Startup Repair completely erases hard drive contents and reformats the hard drive.
3. If the HP Recovery partition is listed, restart the computer, and then press esc while the “Press the ESC key for Startup Menu” message is displayed at the bottom of the screen. 4. Press f11 while the “Press for recovery” message is displayed on the screen. 5. Follow the on-screen instructions. Using a Windows 7 operating system DVD (purchased separately) To order a Windows 7 operating system DVD, go to http://www.hp.
Windows Vista To protect your information, use the Backup and Restore Center to back up individual files and folders, back up your entire hard drive (select models only), or create system restore points. In case of system failure, you can use the backup files to restore the contents of your computer.
To create a backup using Backup and Restore Center: NOTE: Be sure that the computer is connected to AC power before you start the backup process. NOTE: The backup process may take over an hour, depending on file size and the speed of the computer. 1. Select Start > All Programs > Maintenance > Backup and Restore Center. 2. Follow the on-screen instructions to back up your entire computer (select models only) or your files.
4. Select Repair your computer. 5. Follow the on-screen instructions. NOTE: For additional information on recovering information using the Windows tools, perform a search for these topics in Help and Support. Using f11 recovery tools CAUTION: Using f11 completely erases hard drive contents and reformats the hard drive. All files you have created and any software installed on the computer are permanently removed.
NOTE: This process takes several minutes. 1. If possible, back up all personal files. 2. Restart the computer, and then insert the Windows Vista operating system DVD into the optical drive before the Windows operating system loads. 3. When prompted, press any keyboard key. 4. Follow the on-screen instructions. 5. Click Next. 6. Select Repair your computer. 7. Follow the on-screen instructions. After the repair is completed: 56 1.
8 Customer support ● Contacting customer support ● Labels Contacting customer support If the information provided in this user guide, in the HP Notebook Reference Guide, or in Help and Support does not address your questions, you can contact HP Customer Support at: http://www.hp.com/go/contactHP NOTE: For worldwide support, click Contact HP worldwide on the left side of the page, or go to http://welcome.hp.com/country/us/en/wwcontact_us.html. Here you can: ● Chat online with an HP technician.
Labels The labels affixed to the computer provide information you may need when you troubleshoot system problems or travel internationally with the computer: ● Serial number label—Provides important information, including the following: Component (1) Product name (2) Serial number (s/n) (3) Part number/Product number (p/n) (4) Warranty period (5) Model description Have this information available when you contact technical support. The serial number label is affixed inside the battery bay.
9 Specifications ● Input power ● Operating environment 59
Input power The power information in this section may be helpful if you plan to travel internationally with the computer. The computer operates on DC power, which can be supplied by an AC or a DC power source. The AC power source must be rated at 100–240 V, 50–60 Hz. Although the computer can be powered from a standalone DC power source, it should be powered only with an AC adapter or a DC power source supplied and approved by HP for use with this computer.
Operating environment Factor Metric U.S.
Index Symbols/Numerics 6–in-1 Media Card Reader 11 A access cover removing 38, 41 replacing 39, 44 security screw 37 access cover release latches 16 audio-in (microphone) jack 11 audio-out (headphone) jack 11 B Backup and Restore 50 Backup and Restore Center 53, 54 battery removing 34 replacing 34 battery bay 16, 58 Battery light 13 battery release latches 16 Bluetooth label 58 buttons left TouchPad 5 optical drive eject 12 power 7 QuickWeb 8 right TouchPad 5 TouchPad on/off 5 wireless 8 C caps lock ligh
num lk 9, 10 Windows Applications 9, 10 Windows logo 9, 10 L labels Bluetooth 58 HP Mobile Broadband Module 58 Microsoft Certificate of Authenticity 58 regulatory 58 serial number 58 SIM 58 wireless certification 58 WLAN 58 lights Battery 13 caps lock 6 hard drive 11 optical drive 12 power 6 QuickWeb 6 TouchPad 6 webcam 15 wireless 6 operating system Microsoft Certificate of Authenticity label 58 Product Key 58 optical drive 12 optical drive eject button 12 optical drive light 12 P pinching TouchPad gestur
wireless network (WLAN), equipment needed 20 wireless network, connecting 18 wireless router, configuring 21 wireless set up 20 WLAN connecting 19 protecting 21 WLAN antennas, identifying 15 WLAN device 58 WLAN label 58 WWAN antennas, identifying 15 Z zooming TouchPad gesture 64 Index 32